Required Supplies:
Formlabs:
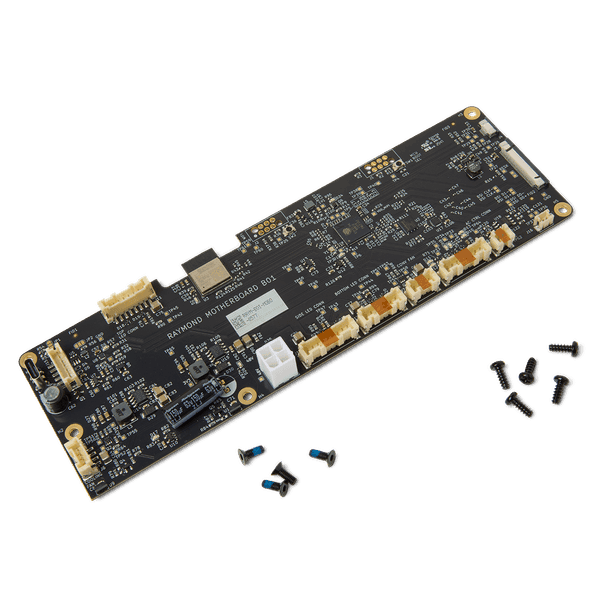
- Replacement motherboard (RP-CU2L-MOBO-01)
- 2 mm hex driver (included in the Form 4L tool cap assembly)
Third-party:
- Phillips driver
- Nitrile gloves
- Anti-static grounding strap

The Form Cure L V2 motherboard is mounted to the back of the machine’s display assembly. If the motherboard is faulty or malfunctioning, the Form Cure L V2 may behave erratically or not function at all.
Use this guide to replace the motherboard on a Form Cure L V2.
Required Supplies:
Formlabs:
Third-party:
预计所需时间: 15–20 分钟
危险:
请阅读并遵守操作手册中的所有安全说明和警告。更换错误的部件可能会引起烧伤、触电、火灾或爆炸。请根据地方法规处置所有部件。
准备工作区
Overview: Prepare the Form Cure L V2 and workspace for replacing the motherboard.
Step 1: Prepare the workspace
Clear a workspace around your machine. Ensure that the workspace is well-ventilated and free of dust.
Step 2: Unplug the machine
Turn off the machine using the power switch on the back of the unit. Disconnect the power cable before continuing with maintenance. Do not perform maintenance on the machine while it is connected to power. Wait five minutes after disconnecting the machine from power before proceeding. If the machine was recently in use, the post-cure chamber will be warm. Wait at least 10 minutes for the chamber to cool.
危险:
在机器通电时进行维护会增加触电风险。在机器通电时,切勿拆卸机器外壳。在尚未安装外壳的情况下,切勿重新接通机器电源。
拆卸主板
Overview: Disconnect and remove the original motherboard.
第 1 步:打开门
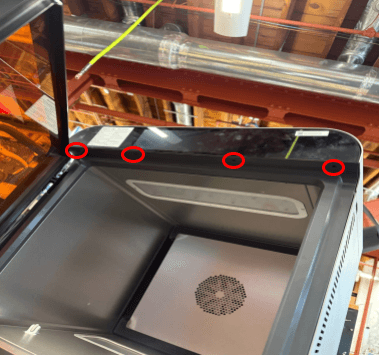
打开固化室门,拧下固定前面板的螺丝。
第 2 步:拧下主板和显示器组件螺丝
使用 2mm 六角扳手,拧松并取下将主板和显示器组件固定在机器框架上的四颗螺丝。将螺丝放在一旁。
第 3 步:拆卸主板和显示屏组件
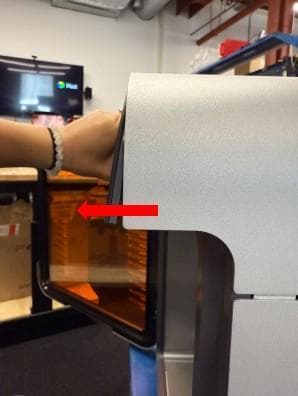
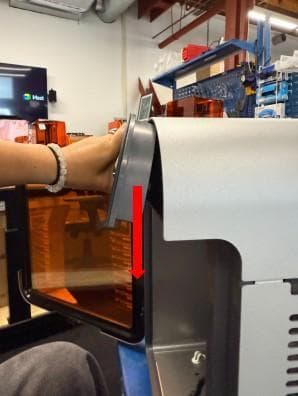
轻轻向上倾斜主板和显示屏组件,然后向下拉。组件应与机器框架分离。请勿用力拉扯主板和显示器组件,因为它们仍通过一组电缆与 Form Cure L V2 相连。
第 4 步:断开主板电缆
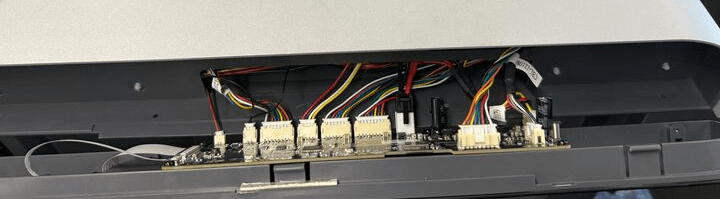
Disconnect all of the cables from the motherboard except for the two ribbon cables. For each, squeeze the tab and slide the cable out of the connector. Take care not to pull on the wires themselves.
Fully separate the motherboard and display assembly from the machine and set it display-side down on your work surface.
Step 5: Uninstall the motherboard
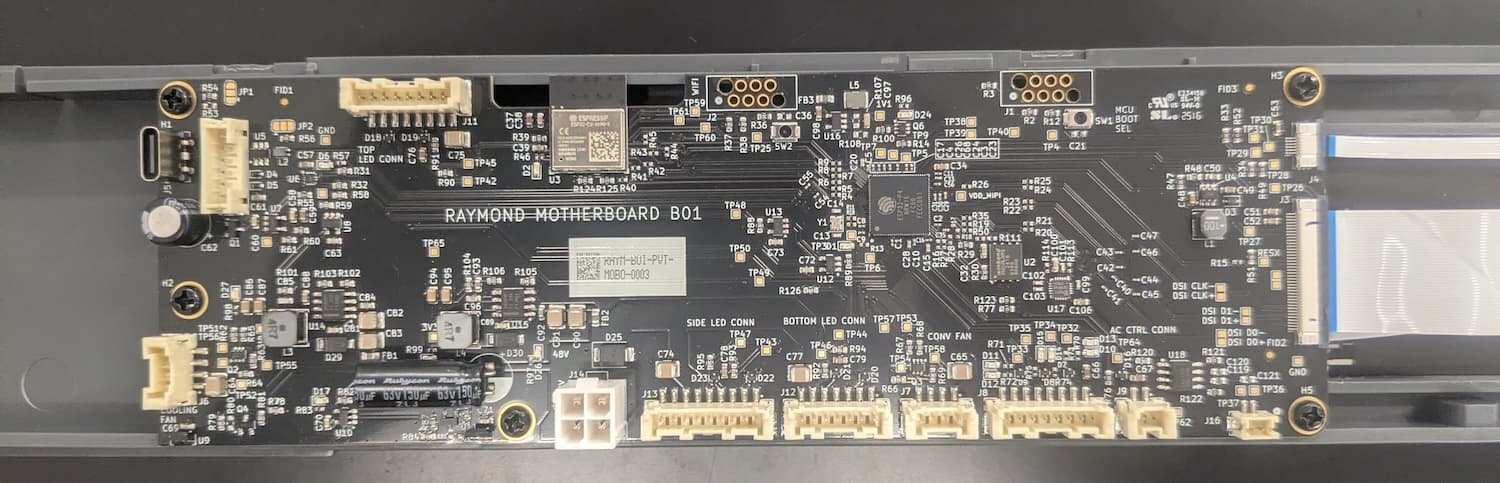
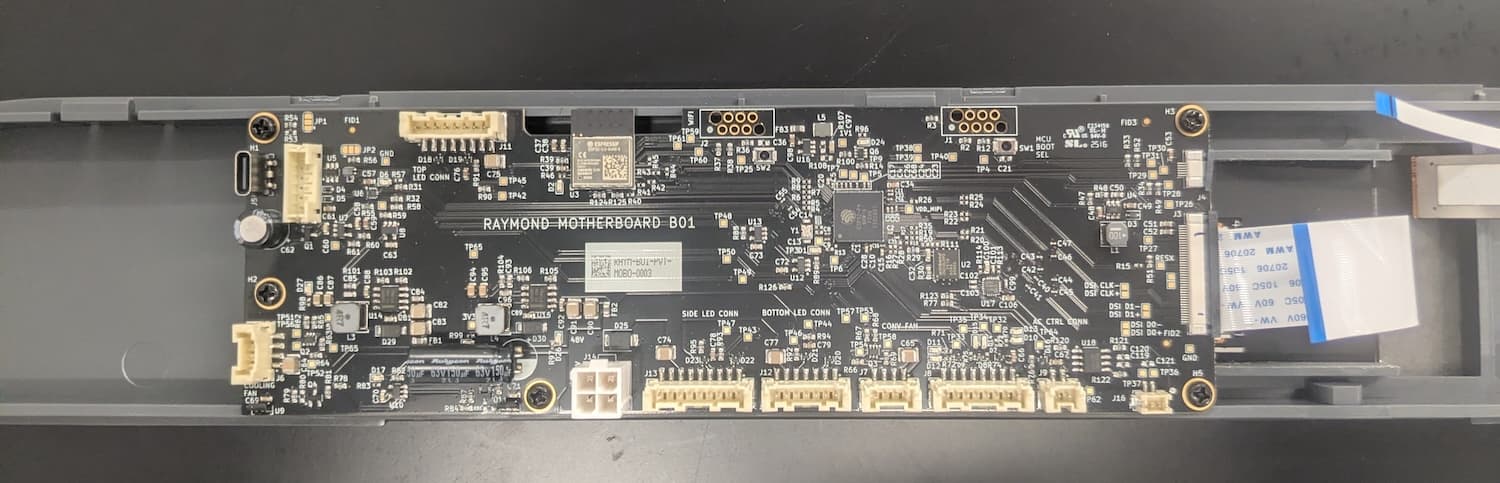
Disconnect the two ribbon cables from the side of the motherboard. For both, slide the black latch on the cable connector away from the white connector body. Once the latch is open, the ribbon cable should separate from the connector with minimal force. Take care not to fold or otherwise damage the ribbon cables.
Using a Phillips driver, loosen and remove the five screws securing the motherboard to the display assembly. Set the screws aside.
Fully separate the motherboard from the display assembly and set it aside for disposal with electronic waste.
安装主板替换件
Overview: Connect, mount, and secure the new motherboard.
Step 1: Mount and secure the motherboard
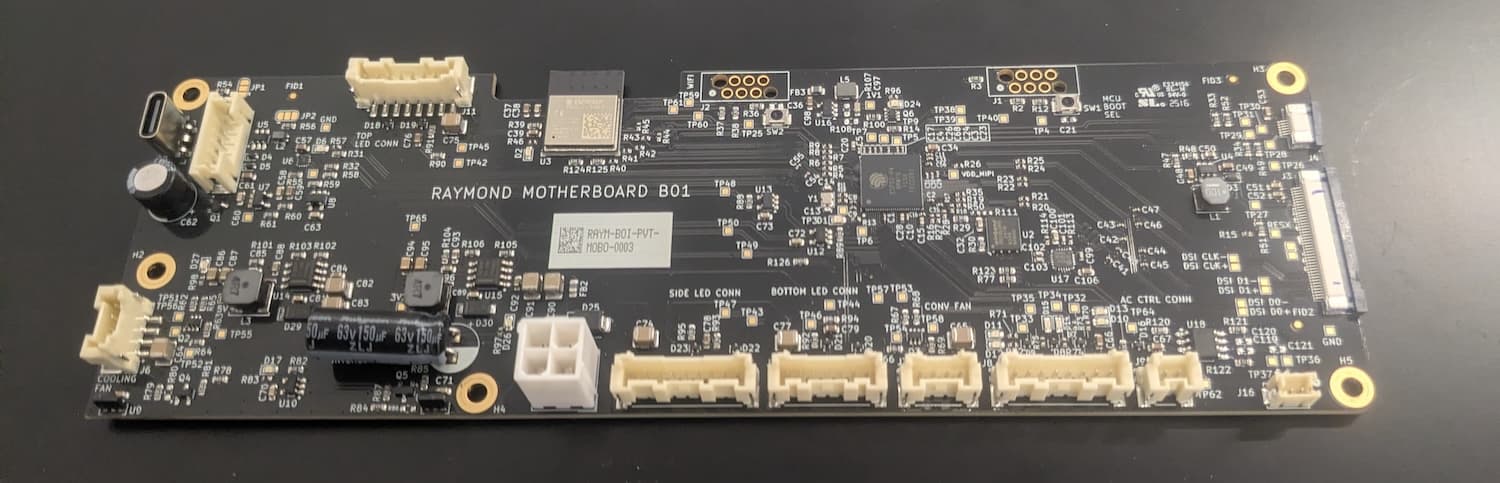
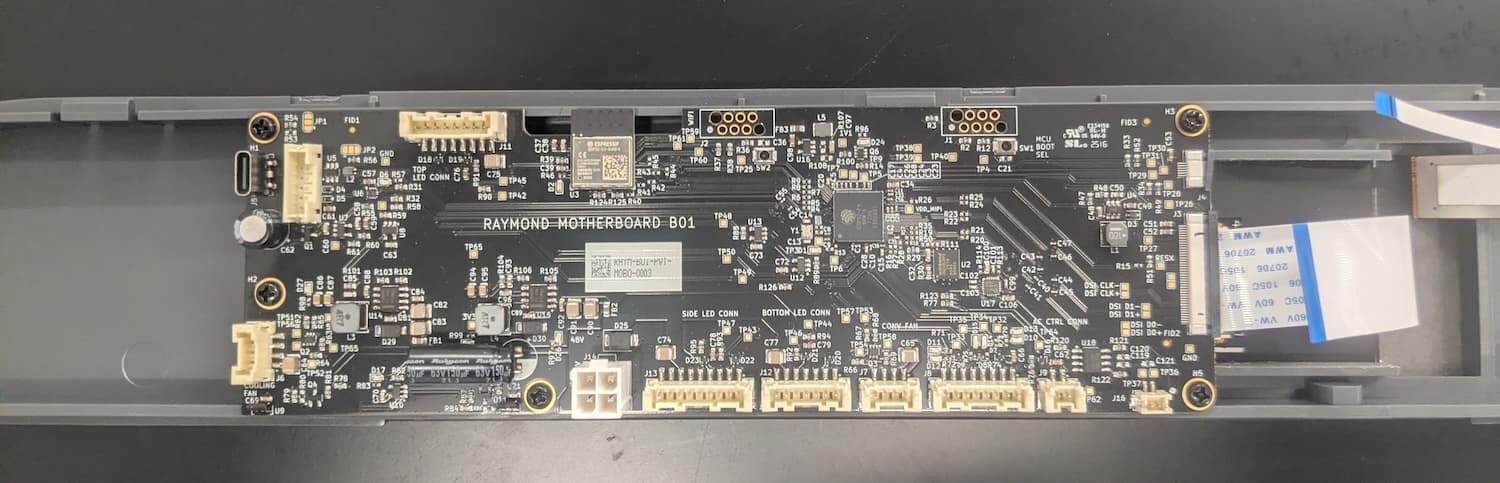
Remove the replacement motherboard from its packaging and place it on the back of the display assembly, aligning the five screw holes in the motherboard with the corresponding screw holes in the display. Thread one motherboard mounting screw into each of the five screw holes, then use a Phillips driver to tighten until snug.
Step 2: Connect the ribbon cables to the motherboard
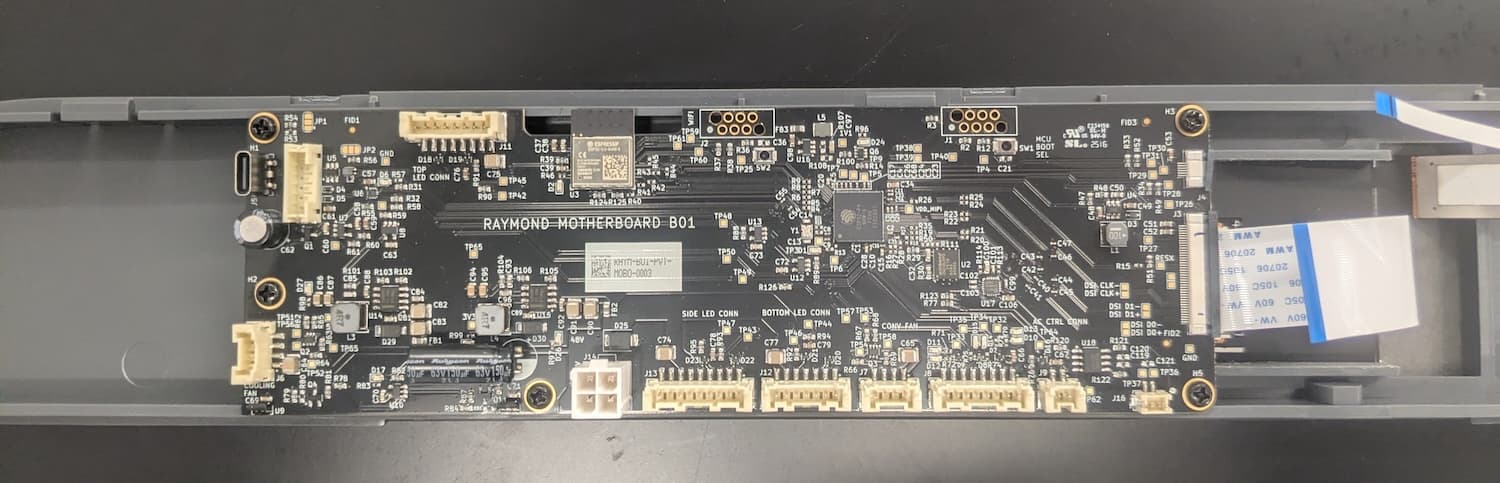
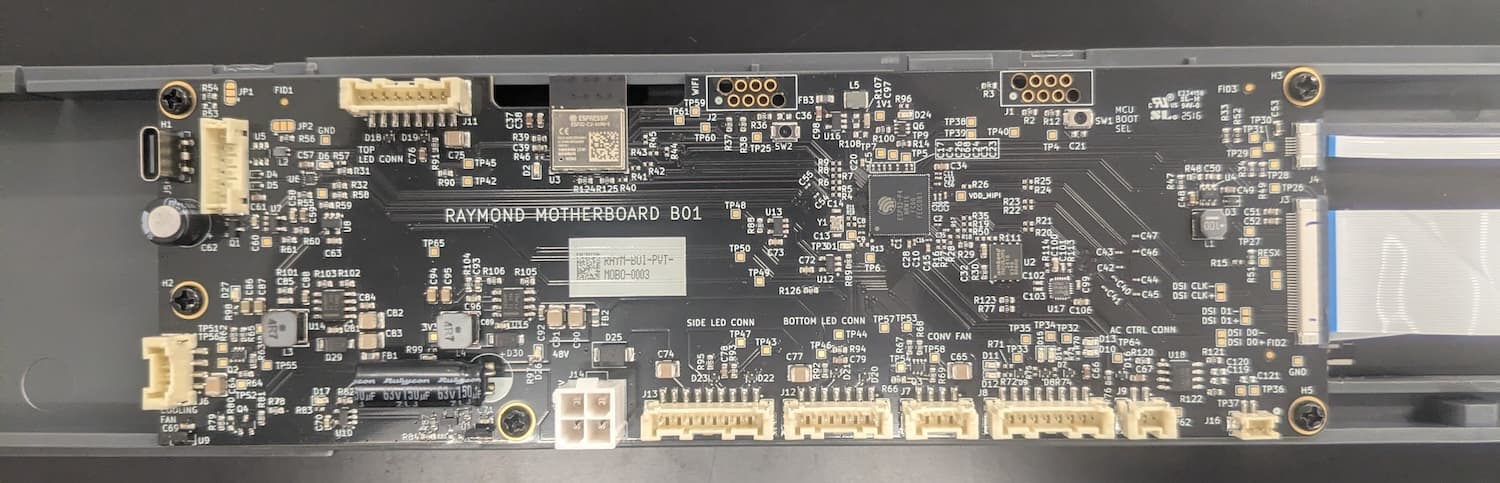
Carefully slide the two ribbon cables into their respective connectors on the motherboard. Push the black latches towards the white connector body. When the latch is flush with the connector body, the ribbon cable is secure.
Step 3: Connect the remaining motherboard cables
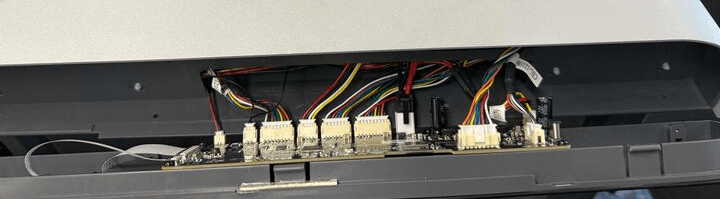
Hold the motherboard and display assembly in front of the machine, near its mounting point. Reconnect all cables to the motherboard, using the image here as a reference. Each cable only fits into its connector in the correct orientation. The locking tab clicks into place when the cable is fully connected.
Step 4: Mount the motherboard and display assembly
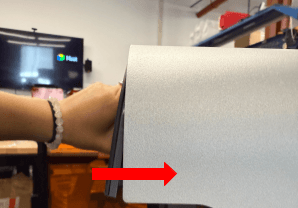
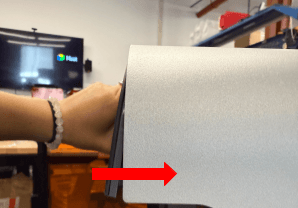
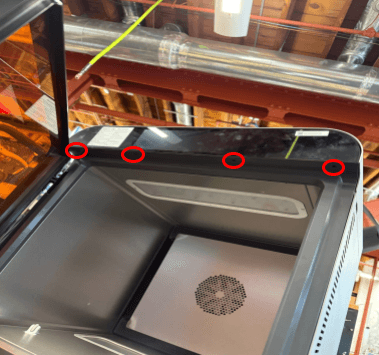
将主板和显示屏组件稍微向上倾斜。将其插入顶部外壳的前缘下方,然后将组件的底部倾斜到位。确保其与机器主体平齐,主板和显示屏组件底部的四个螺孔与 Form Cure L V2 上的相应孔对齐。
Thread one mounting screw into each of the four screw holes in the bottom of the motherboard and display assembly. Using a 2 mm hex driver, tighten the screws until snug.
完成修复
Overview: After installing the new motherboard, perform final checks.
Step 1: Power on the machine
Connect the power cable to the machine and its power supply. Turn on the switch at the back of the machine. Start a post-cure cycle and check that the machine operates normally.