白皮书
Formlabs Logo

Cleaning all powder out of a Fuse 1 generation printer

Cleaning all powder out of a Fuse 1 generation printer

Before transporting your Fuse 1 generation printer or using a different material, thoroughly clean all powder out of the machine. This includes cleaning powder out of the hopper, print enclosure, air filters, and off sensitive components such as the optical cassette and heater tubes. It is critical to fully clean all powder out of the machine before using it with a different material. You may need to perform this cleaning multiple times.

In most cases, when switching between two materials, you will need to thoroughly and comprehensively clean your printer, Fuse Sift, and build chamber. If you are switching between Nylon 12 Powder and Nylon 12 GF Powder or between Nylon 11 Powder and Nylon 11 CF Powder, you can follow a simplified cleaning procedure. Clean the hoppers and dosing assemblies of your printer and Fuse Sift. In most cases, repeated cleaning passes and detailed cleaning of optical surfaces, heaters, and filters are not necessary. You do not need to clean your build chamber when switching between these pairs of materials.

佩戴口罩的人头像(左手侧)

警告:


处理散粉或未烧结的粉末时,请穿戴适当的个人防护装备。请参阅支持文档 Formlabs SLS 产品安全获取更多信息。

注意:

在更换材料前,如果未能清理出所有的粉末,可能会导致打印失败或对机器造成永久性损坏。在进行操作前,请阅读并理解本文的所有说明。

所需物品

预计所需时间:2-3 小时

Supplies:

  • Particulate filtering respiratory protection (N95 or better)
  • Non-reactive nitrile gloves
  • Safety glasses
  • Compressed air
  • Compliant vacuum with static dissipative components, such as a Class II, Division 2 vacuum
    • Thin nozzle attachment (included with the Fuse Sift)
    • Large brush attachment (included with the Fuse Sift)
    • Small brush attachment (third-party, such as in this example attachment set)
    • Thin hose attachment (third-party, such as in this example attachment set)
    • Hopper vacuum attachment, to be printed in advance: STL file
    • Optional: vacuum nozzle set, to be printed in advance
      • Base nozzle: STL
      • Default tip: STL
      • Hook tip: STL
      • Precision tip: STL
  • Scoop (for removing powder from the hopper)
  • Containers suitable for holding SLS powder for storage
  • Non-abrasive microfiber cloth
  • PEC*PADs
  • Ethanol
  • Step stool

注意:

下面列出的每个组件都有其自身专门使用的材料类型。请勿清理组件并换用不同的材料类型。

  • 成型室
  • 粉末盒
  • Fuse Sift 筛网
  • 后处理清理工具

提示:

使用防静电的真空装置附件,以防止触电。对于 3D 打印的附件(如料斗附件),在打印后对其使用防静电喷雾。

清理前

在开始清理前,请准备好机器和无尘的工作环境。

警告:

如果机器在过去 24 小时内进行了打印,请不要执行此程序。否则可能造成严重烧伤或被石英玻璃碎片割伤。在触摸或检查任何打印机组件前,请让打印箱体完全冷却至室温。

Step 1: Print the vacuum cleaning attachment

Download and print the STL file for the cleaning attachment in advance of this procedure. Use your Fuse printer to print this attachment, then wait 24 hours for the quartz heaters to fully cool.

You can also optionally print a set of nozzles to help reach into tight spaces within the printer:

  • Base nozzle: STL
  • Default tip: STL
  • Hook tip: STL
  • Precision tip: STL

Mount the base nozzle on your vacuum hose, then use the bayonet fitting to quickly swap between the default tip (good for general usage), hook tip (for reaching into Fuse 1 generation powder troughs), and precision tip (for reaching into tight spaces, such as between the blades of the use 1+ 30W hopper agitator.

Step 2: Collect tools

Collect the required cleaning tools and put on your personal protective equipment (respiratory protection, gloves, and safety glasses).

Step 3: Insert an optical cassette

Before vacuuming any powder, install an optical cassette in the printer.

注意:

如果在清理打印机的粉末前未能安装光学盒,会导致光学器件和上部激光窗口受到污染。

清理料斗

清理 Fuse 1 代打印机中的粉末时,在擦拭表面或清理更敏感的组件前,应将料斗和打印箱体中的粉末清理干净。

注:

可能需要重复多次才能清理掉打印机中的大部分粉末。根据需要重复进行,交替清理料斗和打印箱体。

第 1 步:插入空成型室

插入空成型室并插上电源插头。关闭打印箱体门。

第 2 步:清空料斗

在打印机的触摸屏上点击 Settings(设置)> Tools(工具)> Empty Hopper(清空料斗)。按照 Empty Hopper(清空料斗)界面中的提示,将粉末从料斗输送到成型室。此过程需花费约一小时的时间。

第 3 步:吸除料斗中剩余的粉末

在吸除剩余粉末之前,应拆下栅罩,以便更好地清理料斗。

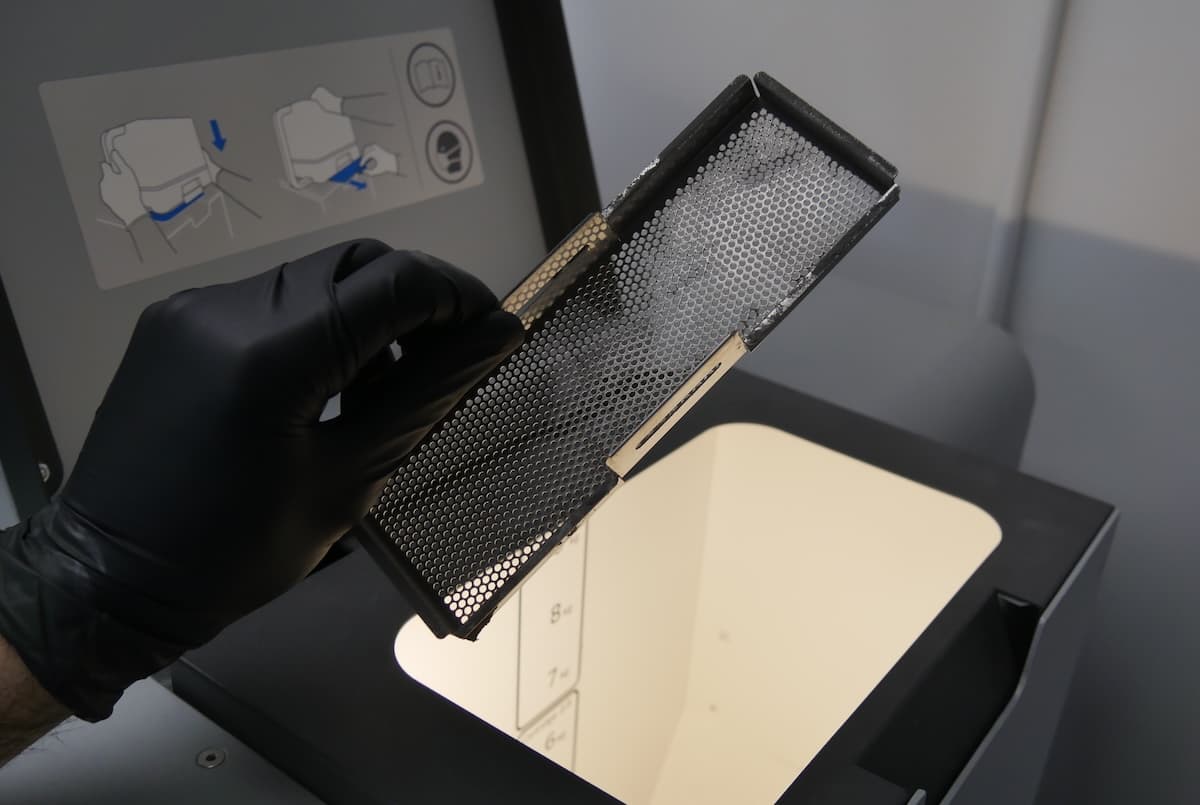
  1. Fuse 1 only: Remove the debris catcher grate from the hopper and vacuum it to remove all powder.
The Fuse 1's debris catcher grate removed from the hopper
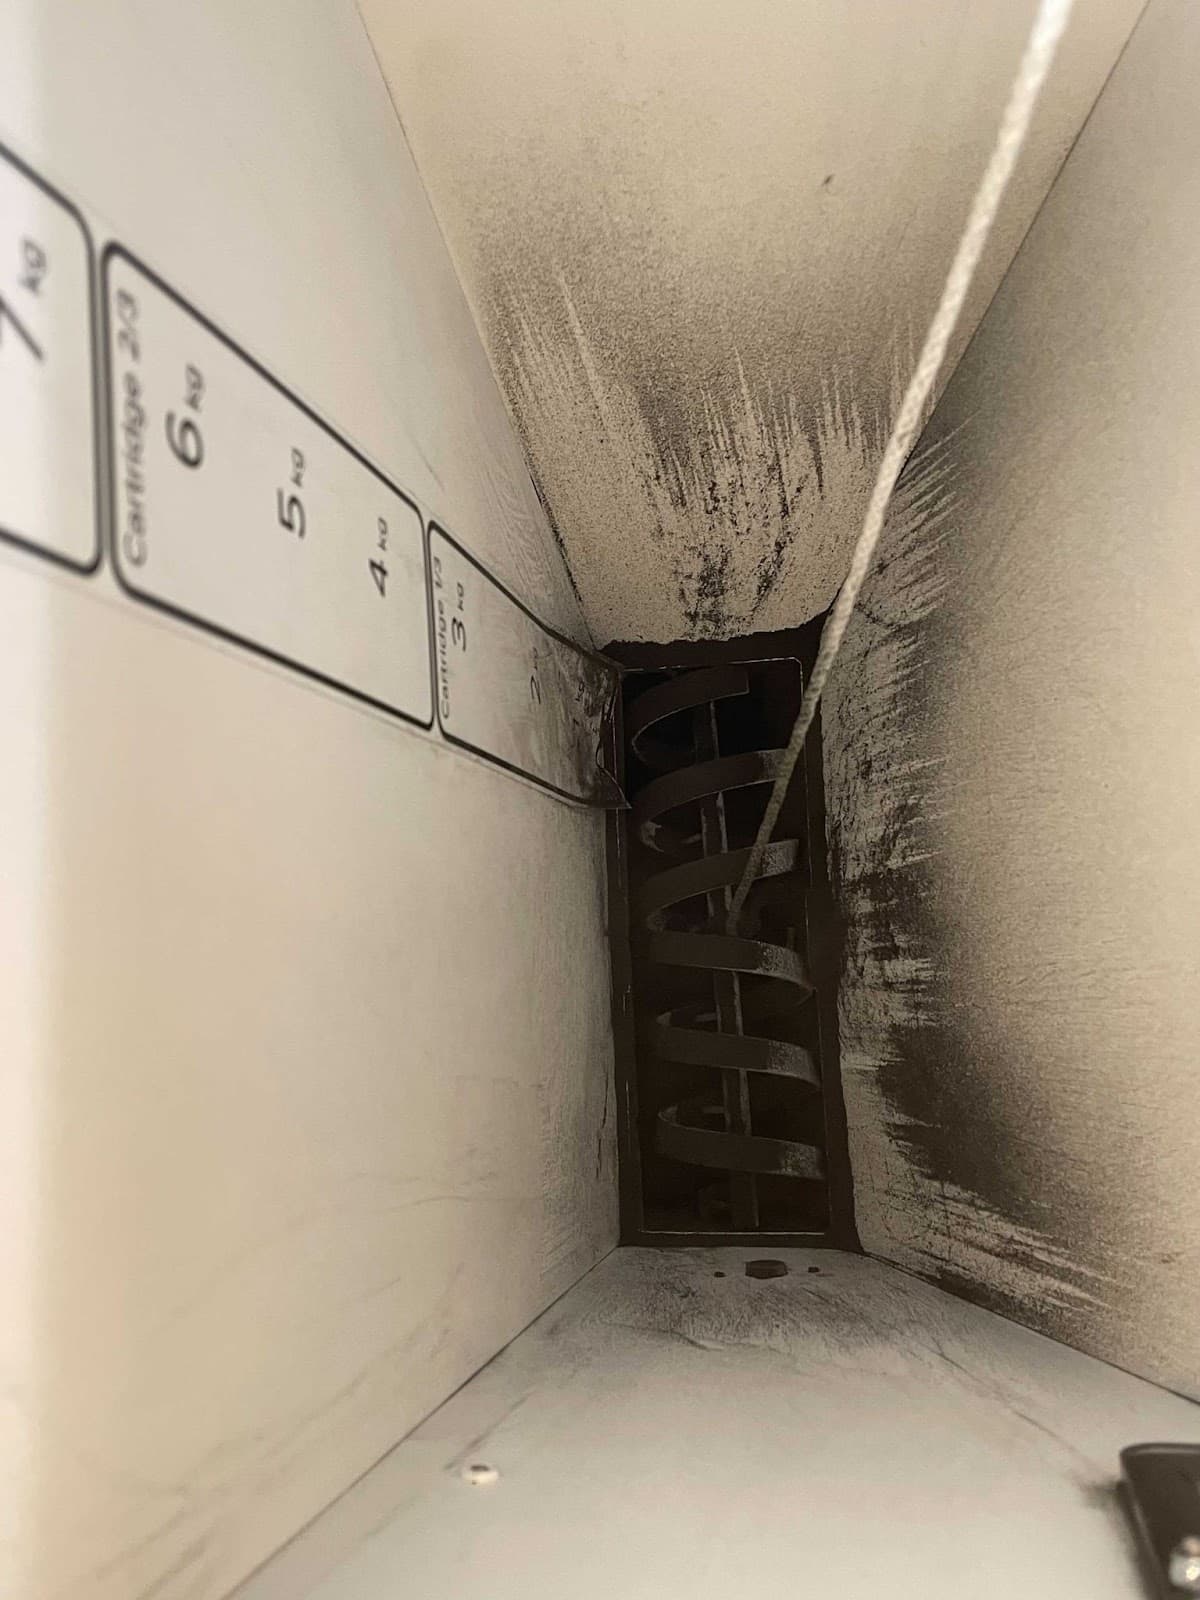
  1. Use the brush attachments to vacuum remaining powder from inside the hopper. If you are cleaning a Fuse 1+ 30W printer, take care not to damage the agitator at the bottom of the hopper. If you previously printed the nozzle set, you can use the precision tip to reach between the agitator blades.
Empty Fuse 1's hopper
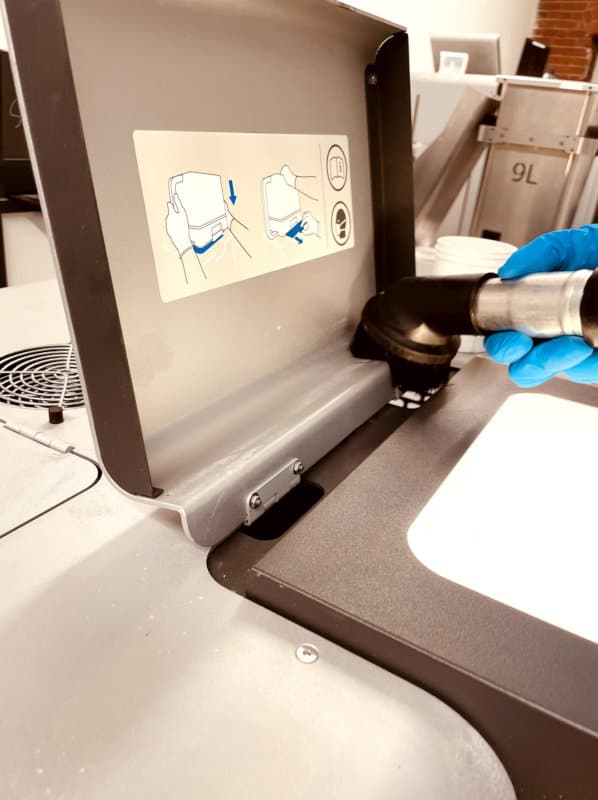
  1. Vacuum the hopper lid hinge.
Cleaning the hopper lid hinge with a vacuum with a brush attachment
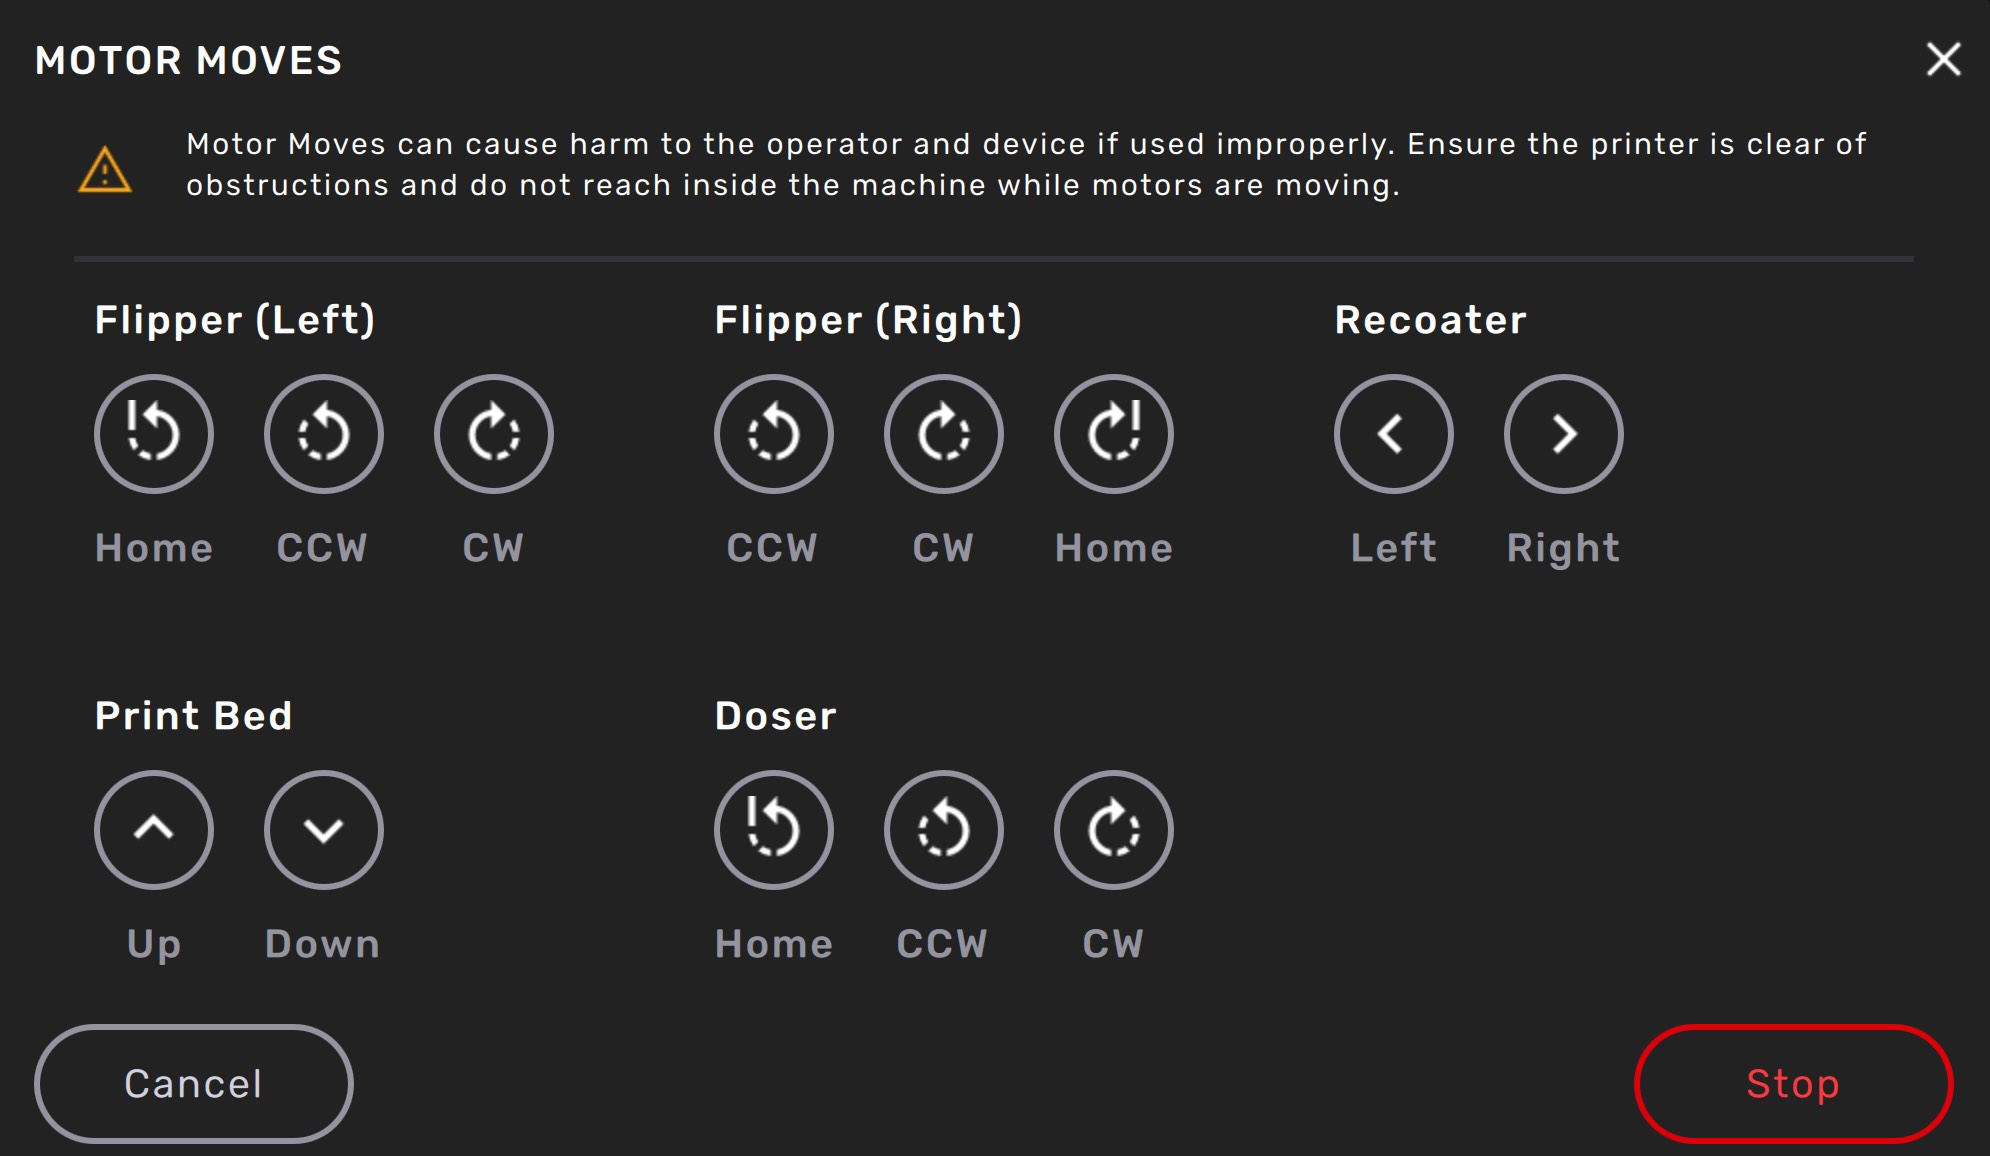
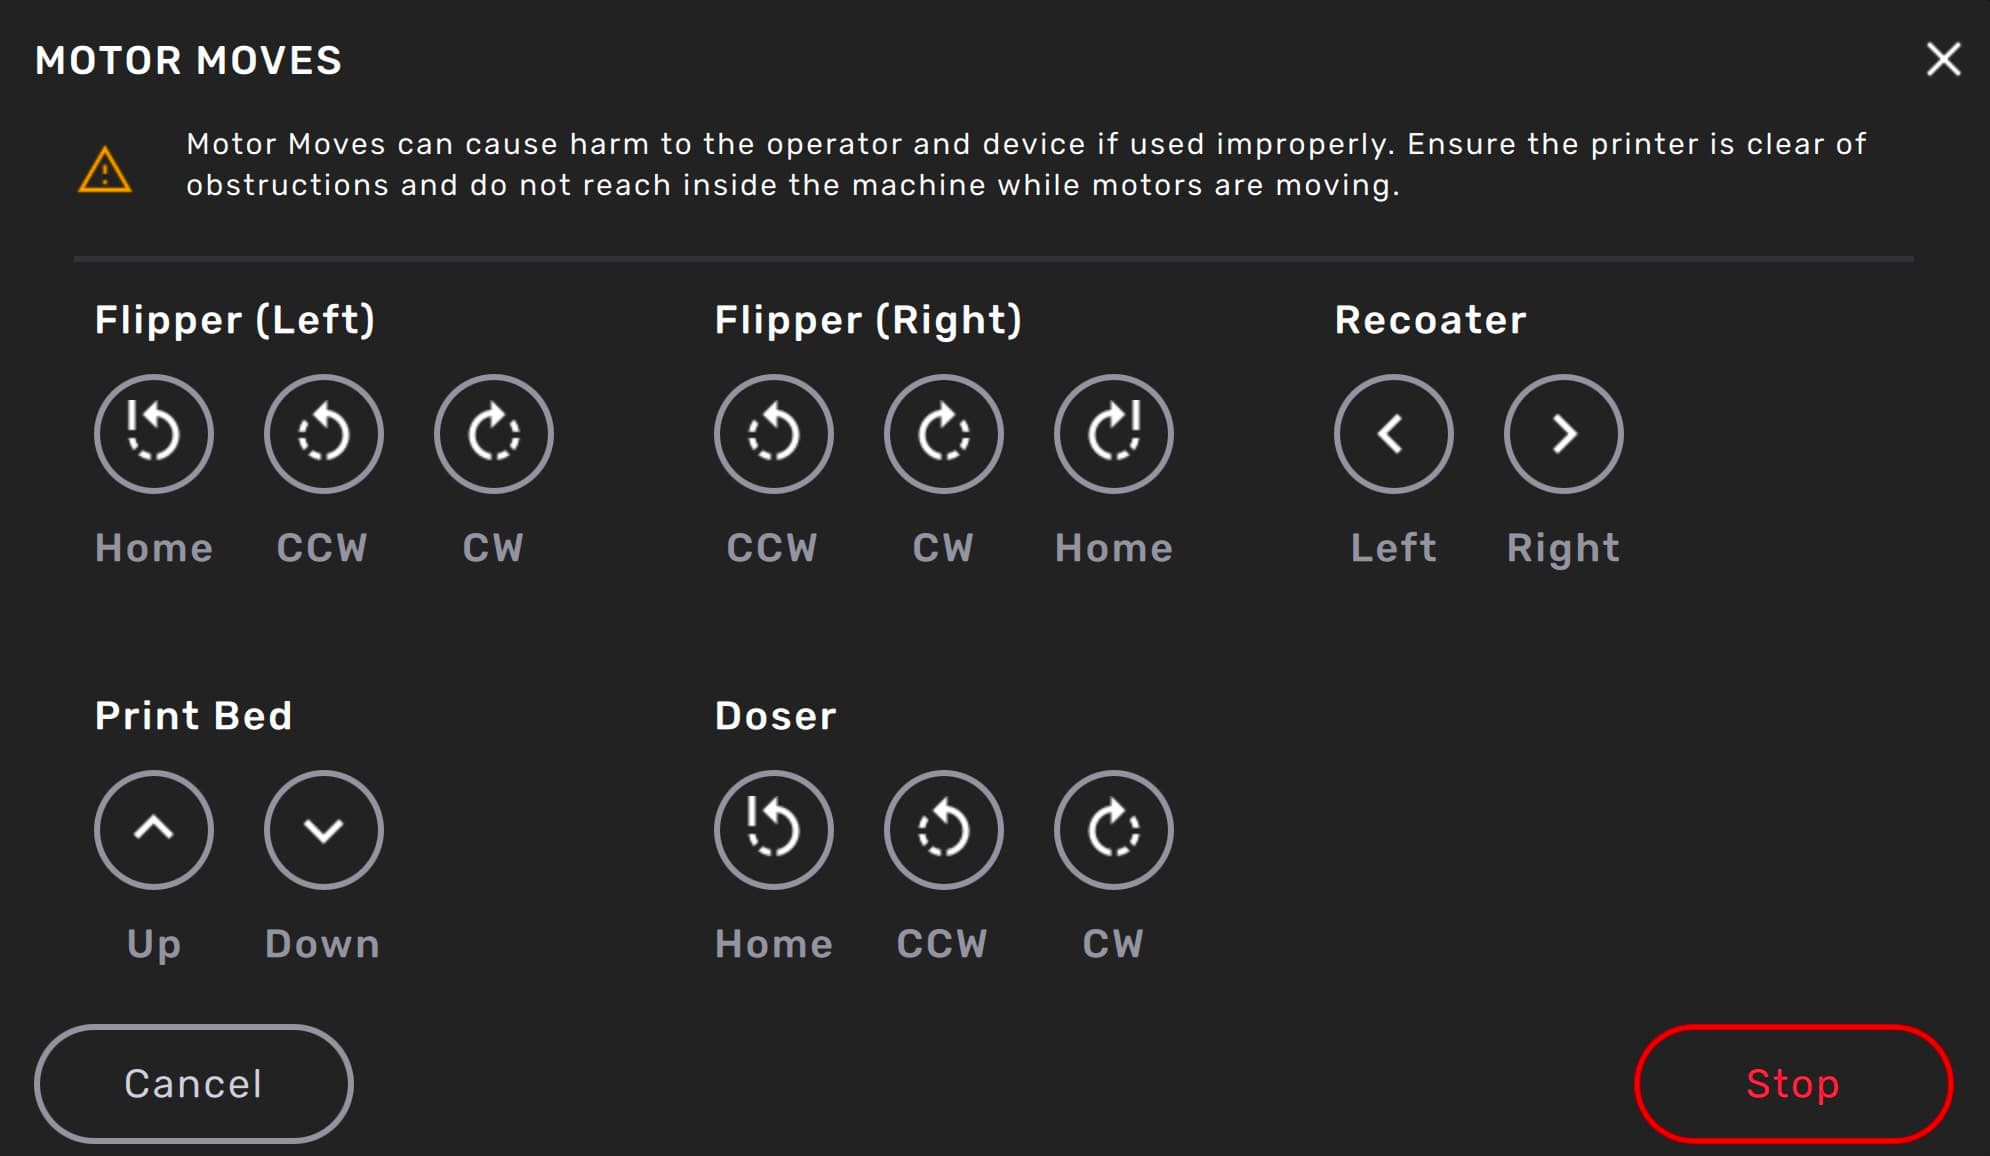
  1. Tap Maintenance > Motor Moves on the printer’s touchscreen. The Motor Moves screen appears, which allows you to manually activate various motors in the print enclosure.
  2. Tap and hold Left on the Recoater motor until the recoater reaches the left side of the print enclosure and stops moving.
  3. Tap Home on the Doser motor. Wait until the doser stops moving before continuing.
  4. Open the print enclosure door and locate the right-hand trough. Tap and hold CW on the Flipper (Right) motor until the flipper is completely vertical.
alttext
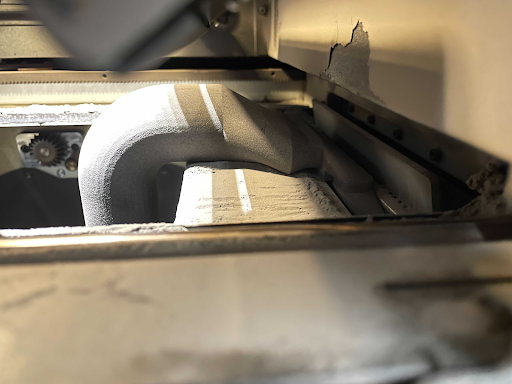
  1. From within the print enclosure, insert the vacuum attachment where the build chamber would usually be placed. Face the attachment upward toward the troughs and recoater.
  2. Bring the attachment up through the hole where the print bed would usually be to insert the wide end into the right-hand trough. The attachment hooks into place underneath the flipper.
  3. Pull the tube that attaches to the vacuum downward to test that it is in position. The attachment should not come out.
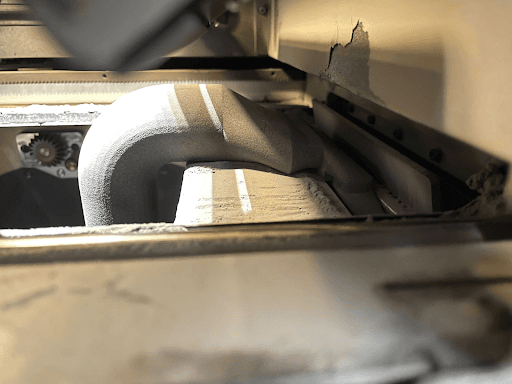
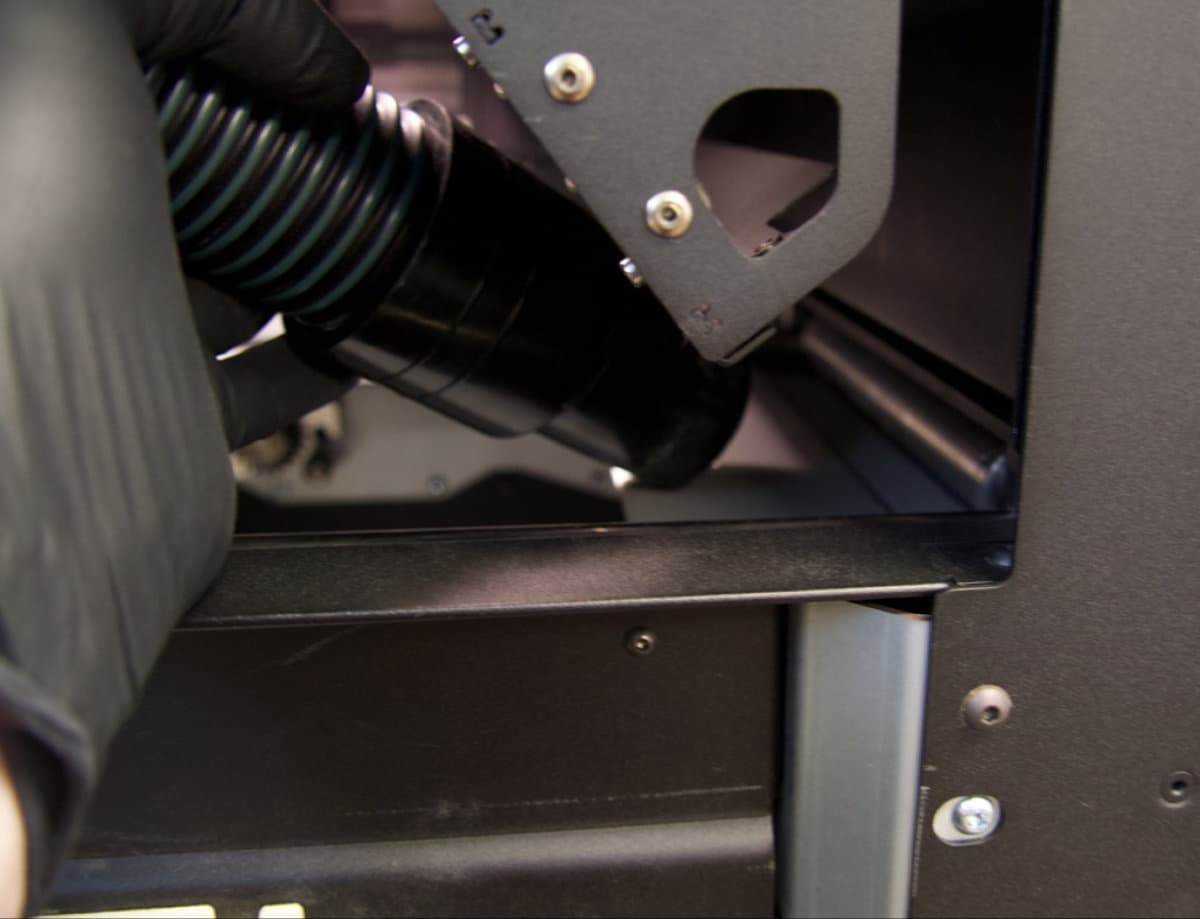
The vacuum attachment enters up through the print enclosre to hook into place and hold up the doser.
  1. Attach the vacuum hose to the attachment.
 
  1. Fuse 1 only: Remove the debris catcher grate from the hopper and vacuum it to remove all powder.
从料斗中取出的 Fuse 1 的碎屑收集栅罩
  1. Use the brush attachments to vacuum remaining powder from inside the hopper. If you are cleaning a Fuse 1+ 30W printer, take care not to damage the agitator at the bottom of the hopper. If you previously printed the nozzle set, you can use the precision tip to reach between the agitator blades.
清空 Fuse 1 的料斗
  1. Vacuum the hopper lid hinge.
用带刷子附件的真空装置清理料斗盖铰链
  1. Tap Maintenance > Motor Moves on the printer’s touchscreen. The Motor Moves screen appears, which allows you to manually activate various motors in the print enclosure.
  2. Tap and hold Left on the Recoater motor until the recoater reaches the left side of the print enclosure and stops moving.
  3. Tap Home on the Doser motor. Wait until the doser stops moving before continuing.
  4. Open the print enclosure door and locate the right-hand trough. Tap and hold CW on the Flipper (Right) motor until the flipper is completely vertical.
Motor Moves touchscreen settings on the Fuse 1
  1. From within the print enclosure, insert the vacuum attachment where the build chamber would usually be placed. Face the attachment upward toward the troughs and recoater.
  2. Bring the attachment up through the hole where the print bed would usually be to insert the wide end into the right-hand trough. The attachment hooks into place underneath the flipper.
  3. Pull the tube that attaches to the vacuum downward to test that it is in position. The attachment should not come out.
The vacuum attachment enters up through the print enclosure to hook into place and hold up the doser.
  1. 将真空软管连接到附件上。

第 4 步:清理给料组件

在料斗内移动给料器以清除粉末时,保持真空装置和附件插在槽内。

注意:

  • 当使用压缩空气或气体除尘器清理机器时,应始终保持真空装置运行,以收集任何流散的粉末。
  • 请勿使用头附件清洁给料器,尤其是在给料器运行时。给料器可能会将刷毛从附件上拉掉,从而污染粉末并导致后续打印失败。
  1. 打开真空装置,同时保持真空装置与附件插在槽内。
  2. 吸除粉末时,先长按 Doser(给料器)界面中的 CW(顺时针翻转)10 秒,然后长按 Doser(给料器)界面中的 CCW(逆时针翻转)10 秒。重复此循环四次。
  3. 每次长按 Doser(给料器)界面中的 CW(顺时针翻转)两秒,直到给料器完整旋转一周。
  4. 每次长按 Doser(给料器)界面中的 CCW(逆时针翻转)两秒,直到给料器反向完整旋转一周。
  5. 将压缩空气从料斗顶部送入料斗。
  6. 长按 Doser(给料器)界面中的 CCW(逆时针翻转)30 秒,同时使用压缩空气清理料斗内部。重复此步骤,直至无多余粉末被吹出。如果要清理 Fuse 1+ 30W 打印机,请确保搅拌器的所有表面均明显洁净。

清理打印箱体

清理完料斗后,清理打印箱体。清理主开放区,然后清理打印箱体顶部的粉末处理装置。

第 1 步:对打印箱体进行真空清理

打开打印箱体门。吸除打印箱体中的任何散粉。必要时使用压缩空气或气体除尘器来清除难以触及的区域的粉末。
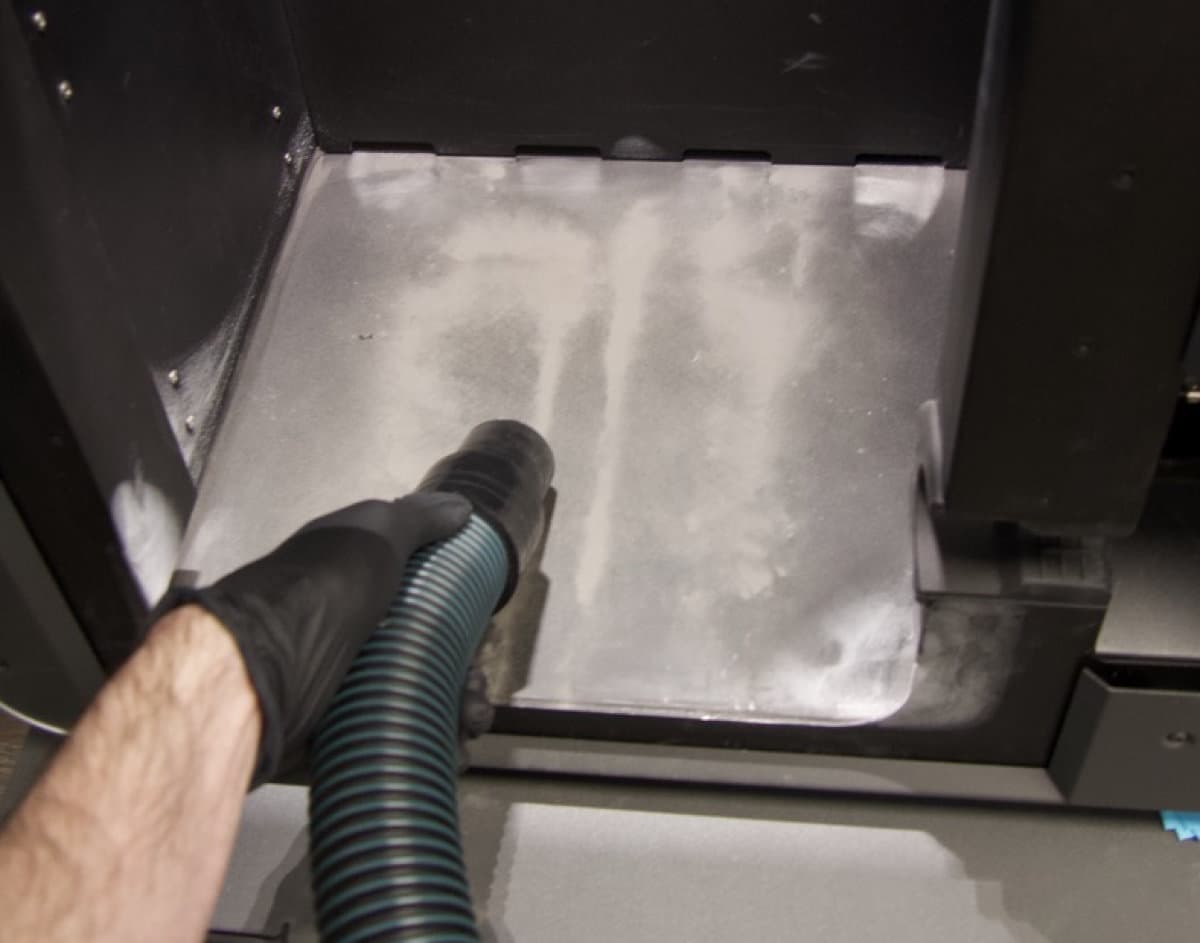
对 Fuse 1 的打印箱体进行真空清理

Step 2: Clean the powder troughs

Two troughs run from the front to the back of the printer at the top of the print enclosure. The troughs store powder to be dispensed into the build chamber. Use the vacuum, fitted with a small brush attachment or the flexible hose attachment, to clean all powder out of the troughs. Use compressed air or a gas duster as necessary to remove powder from hard-to-reach areas. Check in particular for powder buildup along the inner walls and corners of the troughs.

If you previously printed the nozzle set, you can use the hook tip to reach into the troughs.
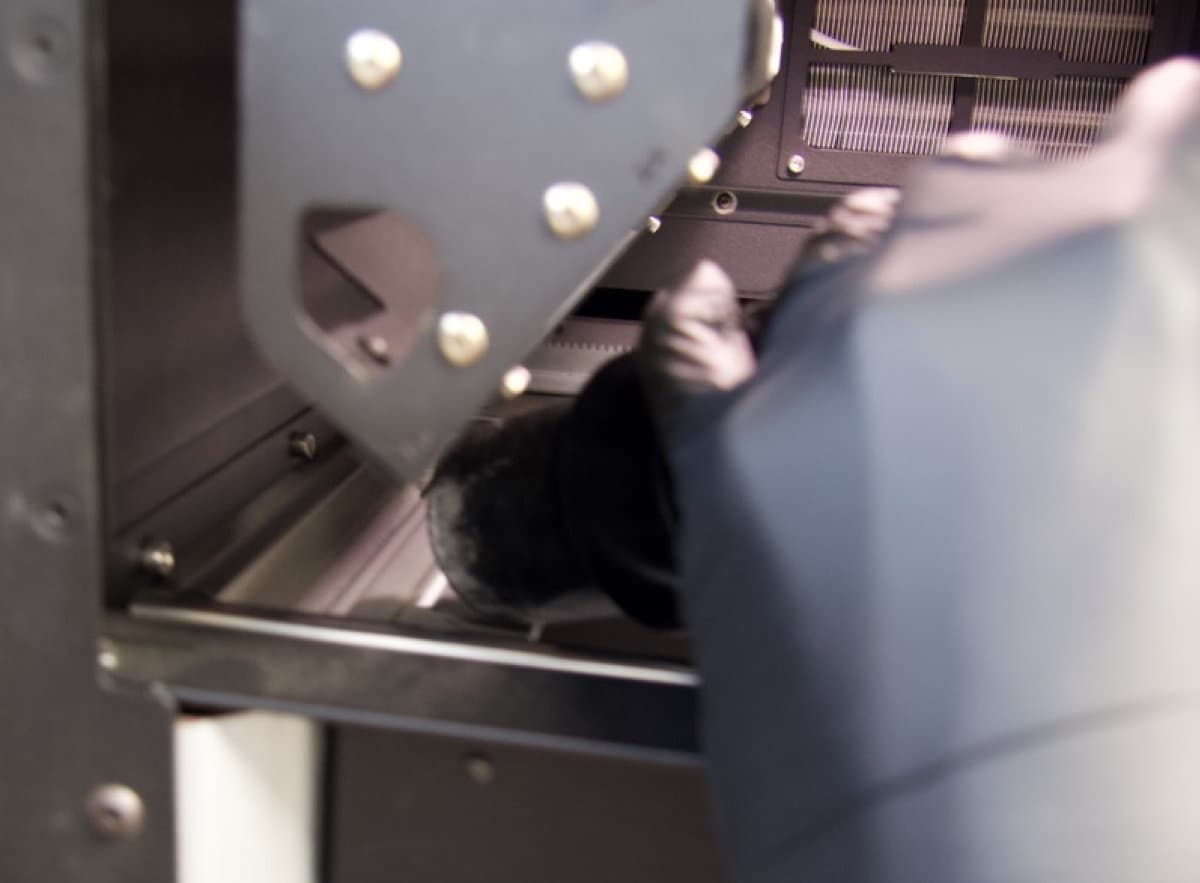
对左侧粉末槽进行真空清理
对右侧粉末槽进行真空清理
对右侧粉末槽进行真空清理

第 3 步:移动粉末槽马达

关闭打印箱体门,移动翻转马达,使粉末脱落,以便清理。

移动翻转板马达:
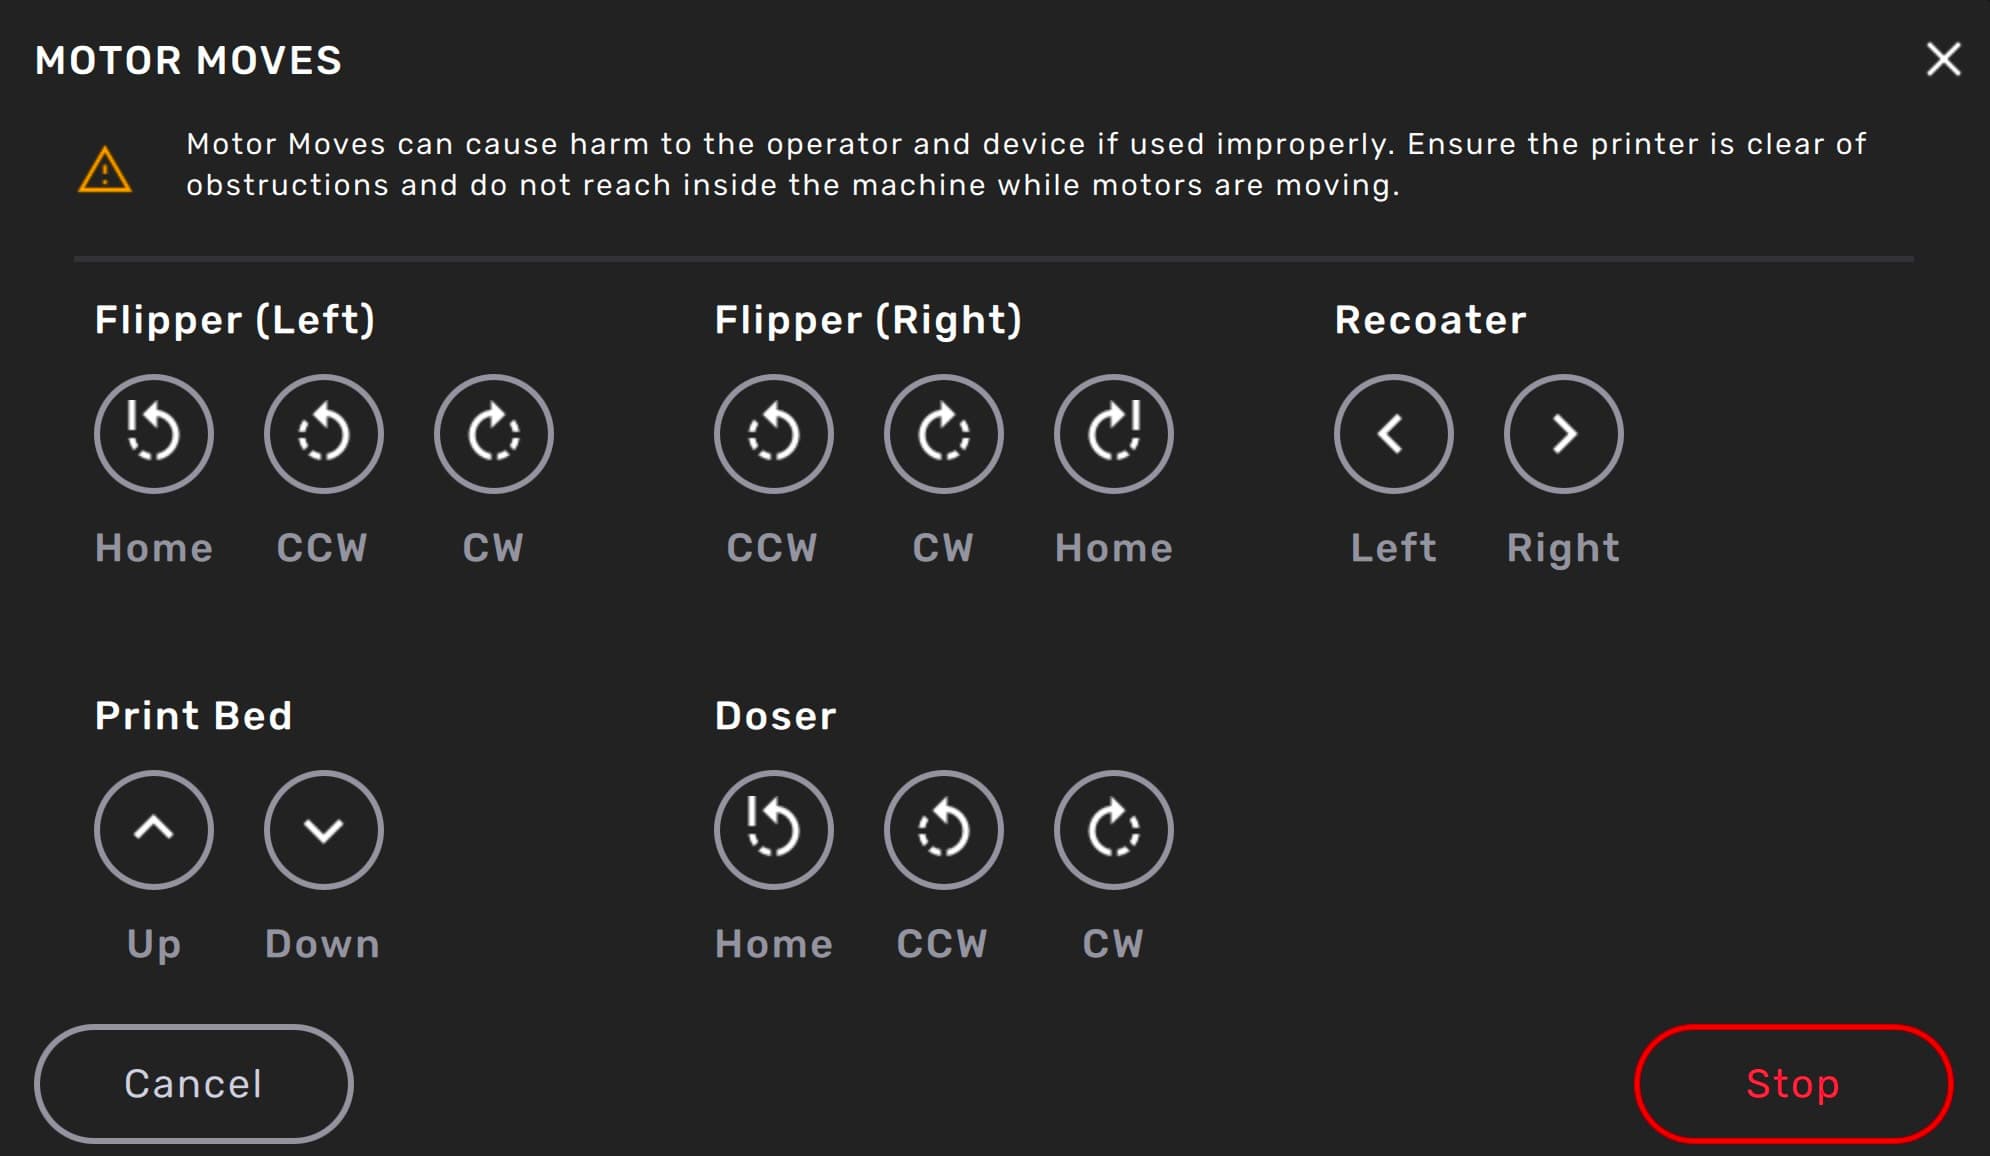
  1. 关闭打印箱体门。
  2. 在触摸屏上,点击扳手图标。将显示 Maintenance(维护)菜单。
  3. 点击 Motor Moves(马达动作)。将显示 Motor Moves(马达动作)界面,可以手动激活打印箱体中的各种马达。
替换文字

小心:

除非特别通知,在打印箱体门打开时,或在打印箱体顶部粉末处理装置的路径上存在任何物体时,请勿选择 Motor Moves(马达动作)菜单中的任何选项。活动部件存在挤压或缠结的危险。如有必要,可点击触摸屏上的 Stop(停止)按钮来停止马达动作。
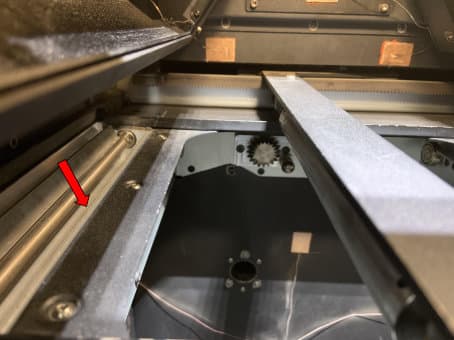
  1. 点击 Flipper (Left)(翻转马达(左))Flipper (Right)(翻转马达(右))标题下的 CW(顺时针翻转)CCW(逆时针翻转)Home(回复原位)箭头,可以顺时针、逆时针旋转左右翻转马达,或使其回复原位。反复移动翻转马达,并对粉末槽进行真空清理,直到干净为止。特别是要确保两个粉末槽的内边缘以及所有相邻组件处无任何粉末。
左侧粉末槽,箭头指向粉末槽的内边缘

第 4 步:检查料斗垫圈

清理完粉末槽后,检查打印机右侧粉末槽。检查粉末槽外边缘上垫圈的位置。将压缩空气吹入料斗可以使垫圈离开原位,进入重涂机路径。用一个薄的工具或穿戴手套的手指将垫圈推回槽边后面的位置。
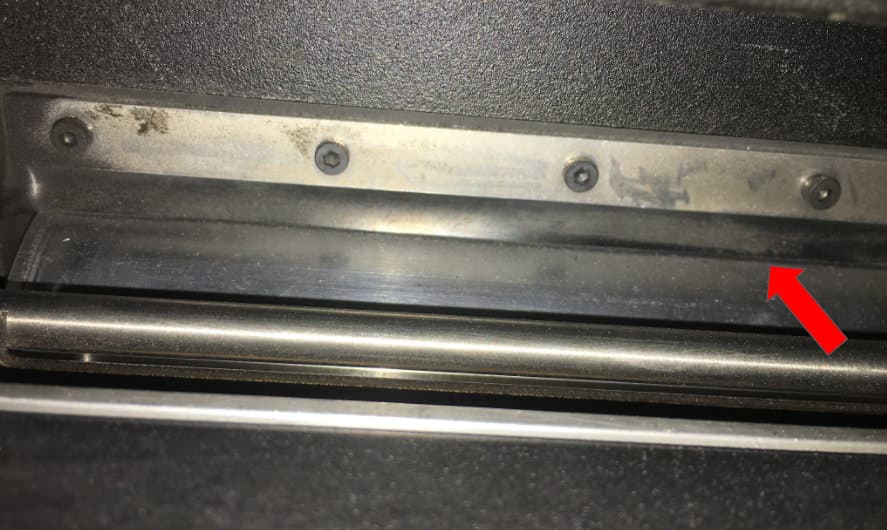
右侧粉末槽,箭头指向料斗垫圈
正确放置的料斗垫圈
未正确放置的料斗垫圈,其与右侧粉末槽重叠
The left image shows a hopper gasket that is properly placed behind the edge of the right-hand powder trough.
The right image shows a hopper gasket that is not properly placed behind the edge of the right-hand powder trough. The gasket overlaps with the powder trough.

第 5 步:擦拭打印箱体

用干净的超细纤维布擦拭打印箱体,以去除任何残留的粉末。

第 6 步:擦拭重涂机

重涂机是一个在打印箱体顶部左右移动的杆,会将粉末分布在打印表面以形成新的打印层。

将重涂机移至清理位置:

  1. 关闭打印箱体门。
  2. 在触摸屏上,点击扳手图标。将显示 Maintenance(维护)菜单。
  3. 点击 Motor Moves(马达动作)。将显示 Motor Moves(马达动作)界面,可以手动激活打印箱体中的各种马达。

小心:

除非特别通知,在打印箱体门打开时,或在打印箱体顶部粉末处理装置的路径上存在任何物体时,请勿选择 Motor Moves(马达动作)菜单中的任何选项。活动部件存在挤压或缠结的危险。如有必要,可点击触摸屏上的 Stop(停止)按钮来停止马达动作。
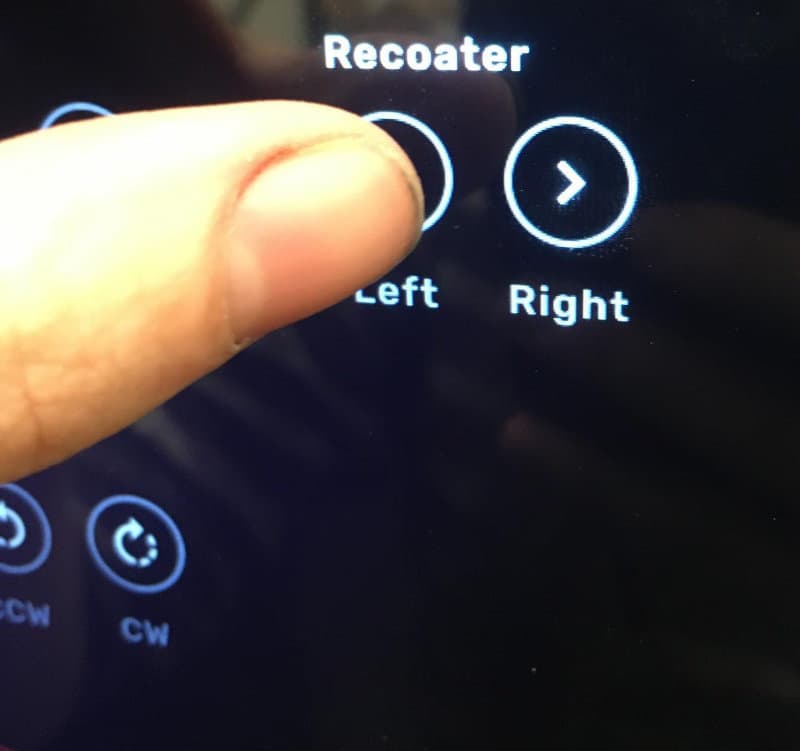
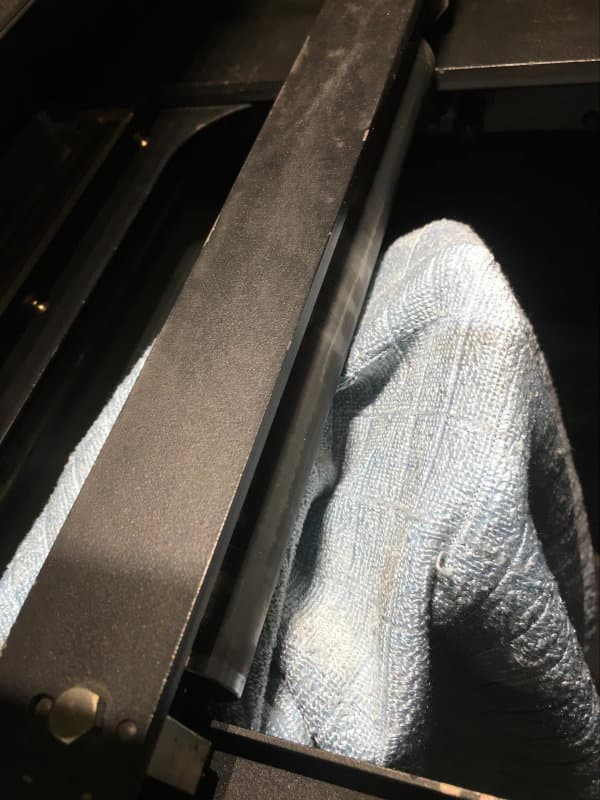
  1. 点击 Recoater(重涂机)标题下的 Left(向左移动)Right(向右移动)箭头来移动重涂机。重涂机一边移动一边旋转,以改变暴露的区域。反复移动重涂机,用超细纤维布擦拭,直到干净为止。
通过 Motor Moves(马达动作)界面移动 Fuse 1 的重涂机
用超细纤维布擦拭 Fuse 1 的重涂机

注意:

如果在 Nylon 12 Powder 和 Nylon 12 GF Powder 或 Nylon 11 Powder 和 Nylon 11 CF Powder 之间切换,请在此处停止。如果要在其他两种材料之间切换,请继续按照以下清理步骤进行操作。

第 7 步:根据需要重复操作

重复清理料斗和打印箱体的步骤,直到凹陷处没有粉末并且所有表面都干净为止。交替清理料斗和打印箱体。

注:

可能需要多次重复上述步骤,才能清理干净所有表面。

清理表面和敏感组件

在清除了打印机中的所有粉末后,继续擦拭表面并清理敏感组件。

注:

可能需要多次操作以清除打印机表面和敏感组件上的所有粉末。根据需要重复以下步骤,直到所有表面完全干净。

清理打印箱体门

清理可能沉积在打印箱体门内侧的任何粉末,特别是垫圈后侧和四周。

第 1 步:对打印箱体门进行真空清理

将刷子附件连接到真空软管。对打印箱体门的内表面进行真空清理。

第 2 步:清理打印箱体门垫圈后侧

打印机箱体门的内表面有一个大的矩形垫圈。使用压缩空气或气体除尘器清除垫圈周围和后侧的粉末。

佩戴口罩的人头像(左手侧)

Notice:

When using compressed air or a gas duster to clean the machine, always keep the vacuum running to catch any mobilized powder.
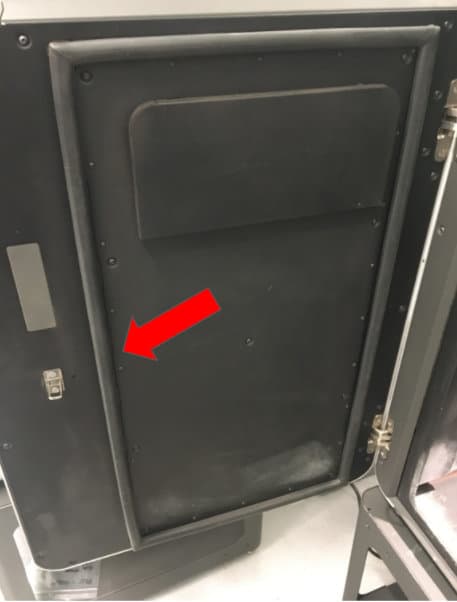
Fuse 1 的打印箱体门,箭头指向门内侧的垫圈

清理石英加热器

戴上一副干净的新丁腈手套。用洁净干燥的 PEC*PAD 小心地擦拭石英加热管。

警告:

加热管较脆,且皮肤油脂极易损坏和污染加热管。损坏或被污染的加热管在加热时可能会发生爆炸。如果加热管损坏或被污染,请勿开启机器。

第 1 步:擦拭加热管

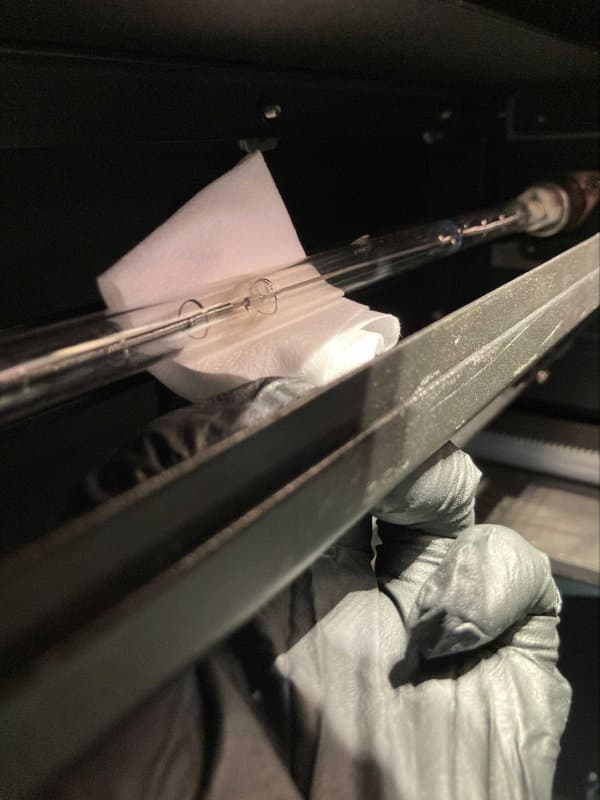
在打印箱体的顶部有两根从打印机的正面延伸到背面的石英加热管。用洁净干燥的 PEC*PAD 轻轻地清理其中一根加热管,以清除所有粉末堆积物。用一个新的 PEC*PAD 重复此操作清理另一根加热管。

佩戴口罩的人头像(左手侧)

Notice:

Human head (left-hand profile) wearing a mask

Never handle the heater tubes with your bare hands. If at any point bare skin contacts the quartz glass, thoroughly clean the tube with a clean PEC*PAD wetted with ethanol.
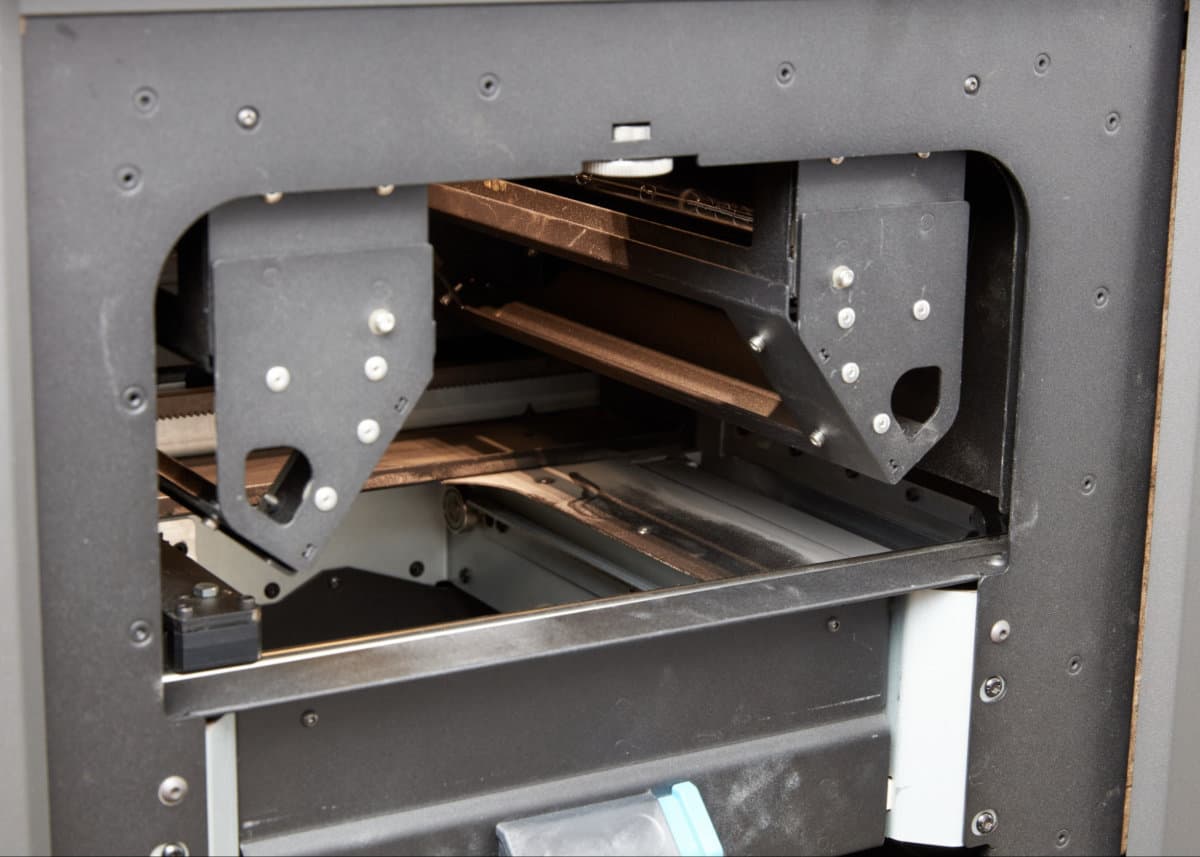
位于打印箱体顶部的 Fuse 1 加热管
用 PEC*PAD 擦拭 Fuse 1 的加热管

清理光学器件和传感器表面

清理光学器件和传感器表面:光学盒、红外传感器和上部激光窗口。与日常维护相同,请遵循这些组件的常规清理程序。

第 1 步:清理光学盒

取出已安装好的光学盒,并进行理,以清除清理过程中可能沉积在上面的任何粉末。

第 2 步:清洁上部激光窗口

检查和清洁上部激光窗口。重新安装光学盒。
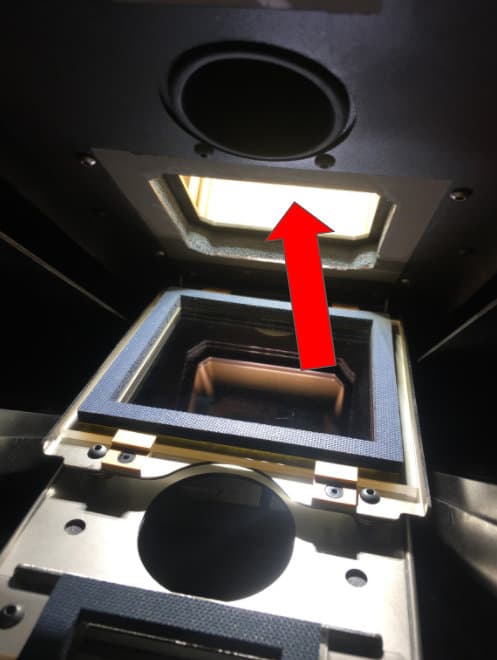
Fuse 1 的打印箱体,箭头指向上部激光窗口
Fuse 1 的上部激光窗口

第 3 步:清洁红外传感器

打开打印机顶部的红外传感器盖板。清理红外传感器。重新安装传感器并合上红外传感器盖板。

清理空气过滤器

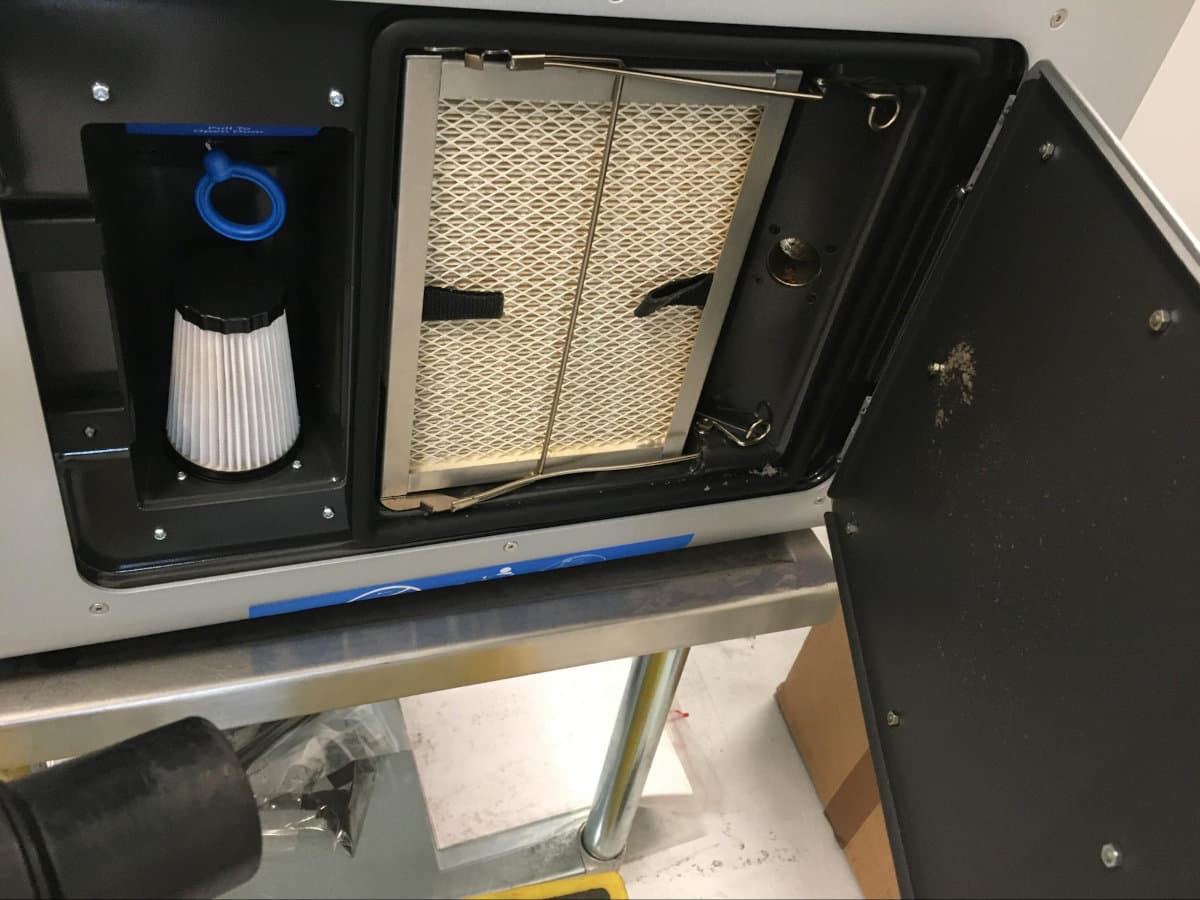
进行真空清理或更换空气过滤器,并清理相关的空气处理硬件。在清理过滤器的过程中,注意清除任何流散的粉末。

第 1 步:真空清理或更换空气过滤器

打开打印机右侧的过滤柜门。清理空气过滤器、排气管道和排气扇。也可同时更换进气过滤器排气过滤器

提示:

轻轻地用压缩空气、气体除尘器或软刷子将过滤器上的粉末敲至松动。

Fuse 1 的过滤柜

第 2 步:重新安装空气过滤器

重新安装过滤器,并关闭过滤柜门。

擦拭粉末料斗

最后用一块干净的超细纤维布擦拭料斗内部。如果用压缩空气来清理打印箱体内部,粉末可能会被吹回料斗中。

第 1 步:擦拭料斗

用干净的超细纤维布擦拭料斗内部,以清除任何残留的粉末。
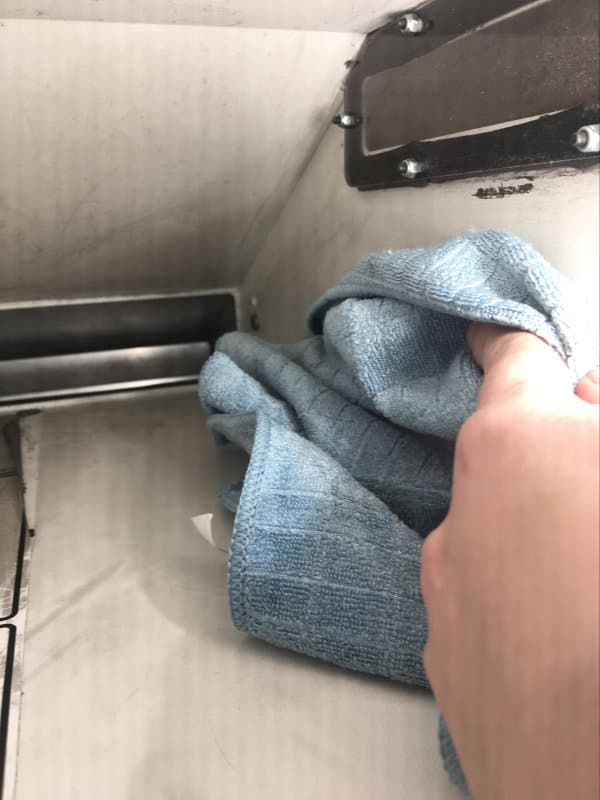
用超细纤维布擦拭 Fuse 1 的料斗内部

后续步骤

在重新检查所有表面并确认所有粉末都已从机器上清除后,则清理程序完成。

如果为了运输机器而清理机器,那么现在就可以进行包装

注意:

一些材料有特定的机器设置要求,在用户界面中没有记录。请确保遵循所选材料的所有必要设置要求和部件设计准则:

密切注意打印初期是否有污染的迹象,如混用不同粉末类型造成的条痕或变色。如果出现污染,请停止打印,处理被污染的粉末,并重复本文所述的所有清理步骤。