白皮书
Formlabs Logo

Form Auto 错误信息

Form Auto 错误信息

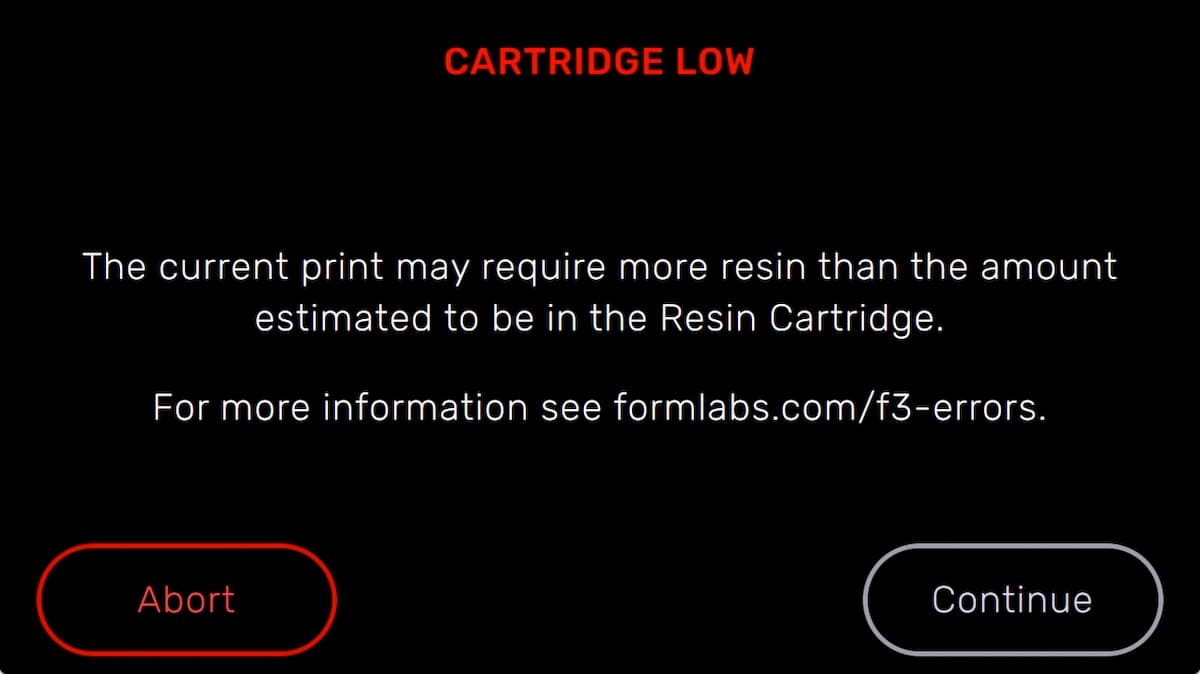
打印机或 Form Auto(自动化系统)遇到异常情况时,打印机触摸屏会显示错误信息以及错误详情。有关打印机错误信息的更多信息,请参阅 Form 3/Form 3B 错误信息

提示:

如需确定错误原因出自 Form Auto 还是打印机,请拔掉 Form Auto 的电源插头,并查看错误是否再次出现。

配置 Dashboard 设置,以便接收本文所述错误及其他打印事件的短信或电子邮件通知。

收集诊断日志

Formlabs 打印机可保存诊断日志,以提供有关打印机的详细信息。联系 Formlabs Support 或您的授权经销商以加快解决故障时,请附上诊断日志以及其他相关观察结果和详细信息。

如需访问安装在 Form Auto 上的打印机的诊断日志,请旋转打印机至触摸屏位置。

对于通过有效 Wi-Fi 或以太网连接到互联网的打印机:

  1. 点击打印机 Home(主页)界面左下角的扳手图标。随即显示 Settings(设置)界面。
  2. 点击 System(系统)System(系统)界面随即显示。
  3. 点击 Upload Diagnostic Info(上传诊断信息日志)。将显示上传诊断信息的确认消息。
  4. 点击 Next(下一步)以开始上传。上传完成后会显示确认信息。
  5. 若打印机显示“无法上传日志”的错误信息,则打印机可能存储空间不足,无法上传。请在 Queue(队列)中删除打印任务,清理出足够的存储空间以上传诊断日志。
  6. 重启打印机并重试。

对于未连接到互联网的打印机:

  1. 打开 PreForm。
  2. 单击 Edit Job Setup(编辑任务设置)。随即打开 Job Setup(任务设置)窗口。
  3. 选择打印机的序列名称。
  4. 单击 Download Logs(下载日志)。随即显示确认窗口。
  5. 单击 Browse(浏览)将诊断日志下载到计算机上的首选位置。
  6. 单击 OK(确定)。诊断日志以加密的 FORMLOGS 格式保存并显示。
  7. 在联系 Formlabs Support 或您的授权经销商时,请附上此文件。
  8. 若 PreForm 显示 ERROR_BAD_STATE 信息,则打印机可能因存储空间不足,无法上传。请在 Queue(队列)中删除打印任务,清理出足够的存储空间以上传日志。
  9. 重启打印机并重试。

进一步了解网络和非网络连接选项

打印机未对准

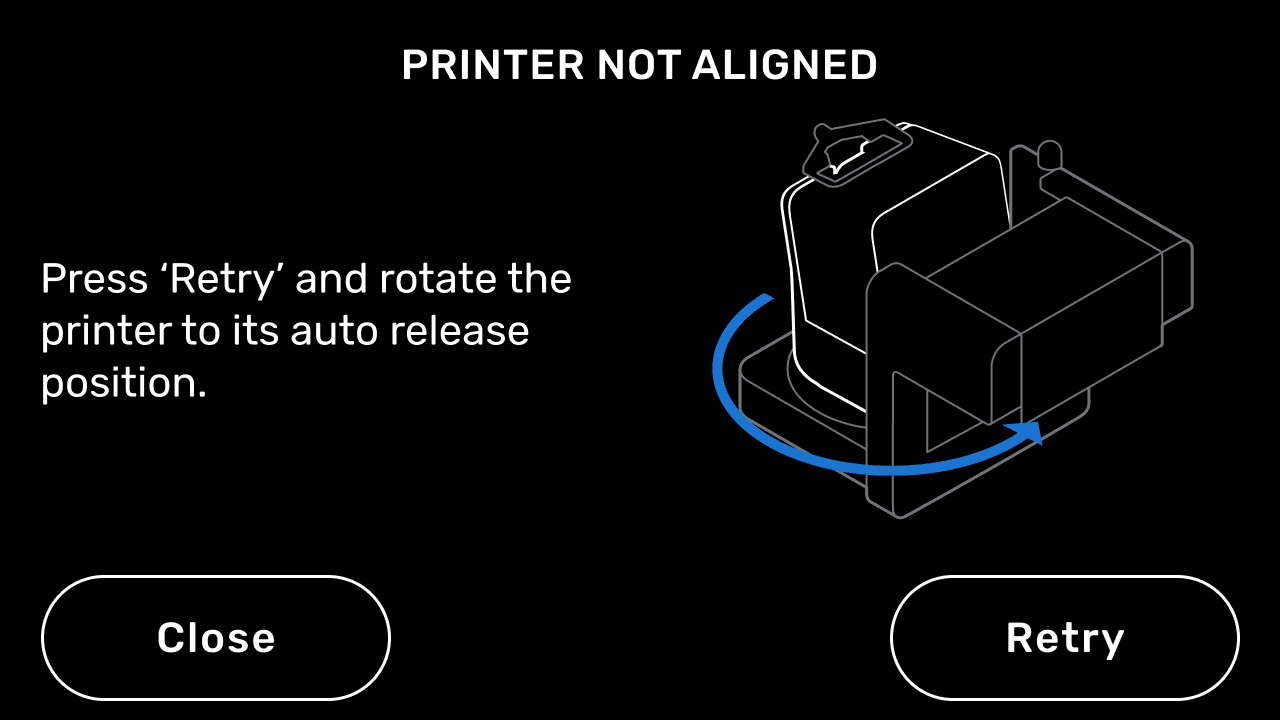
Form Auto 错误信息:打印机未对准

打印机必须正对部件移除块,以便自动取回打印部件。如果打印机在打印结束时未对准部件移除模块,则会显示错误信息 Printer not aligned(打印机未对齐)。将打印机旋转到打印位置(面向部件移除块),然后点击 Retry(重试)

部件移除失败

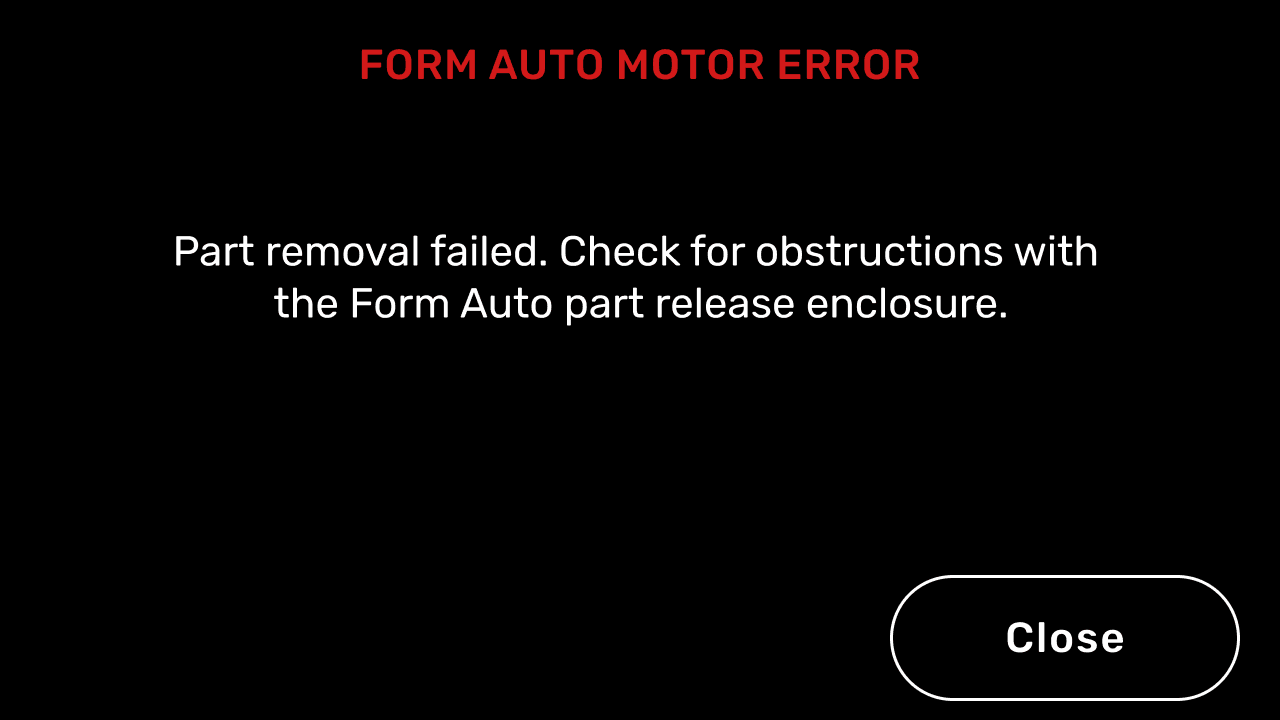
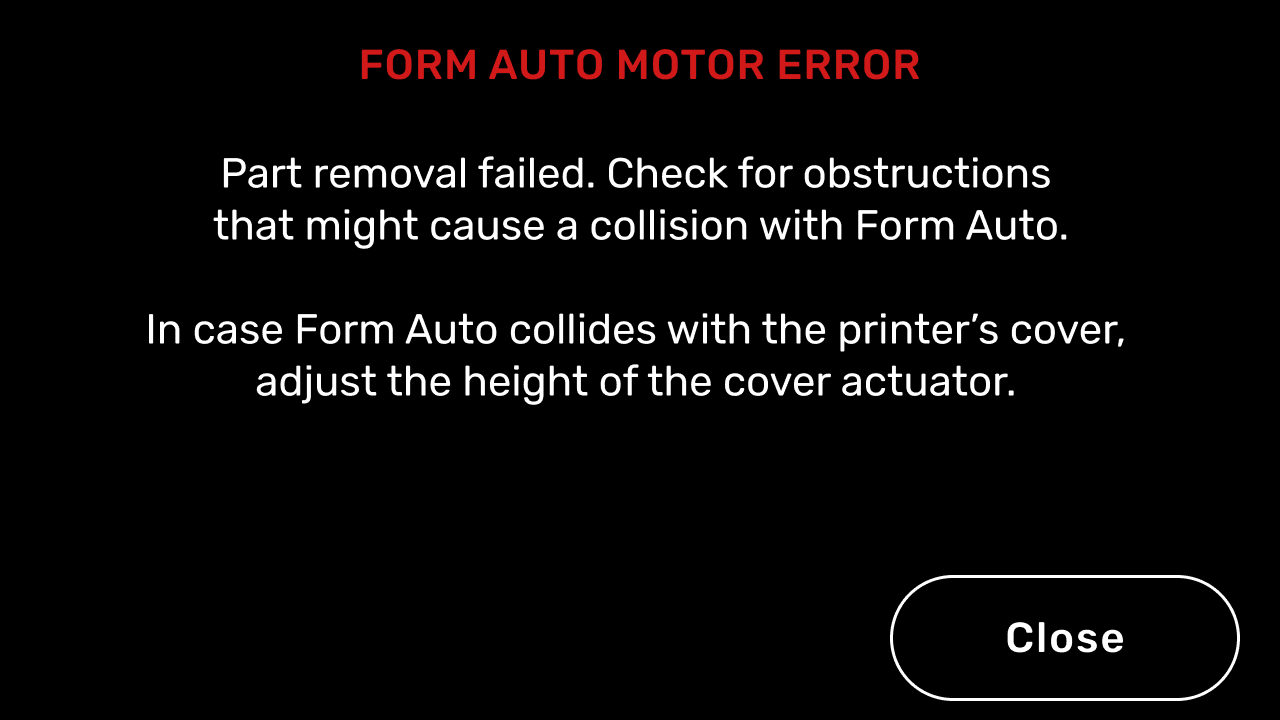
Form Auto 错误信息:马达错误
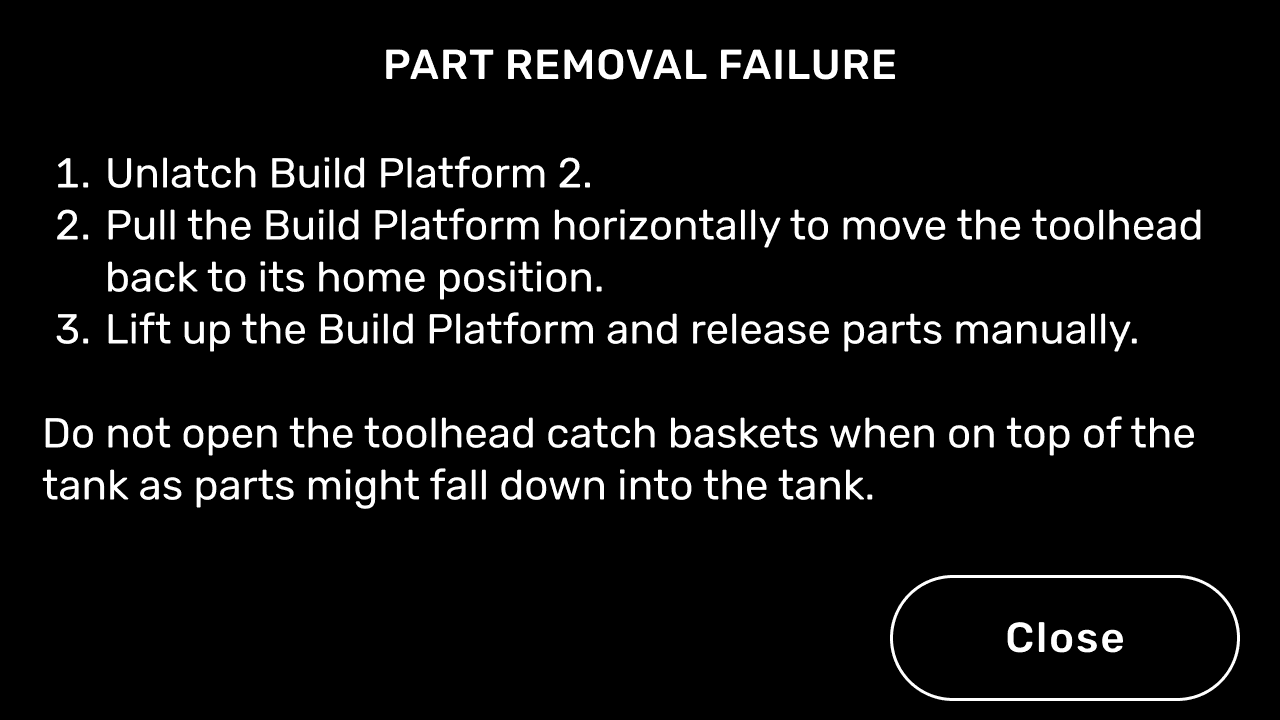
Form Auto 错误信息:部件移除失败

如果 Form Auto 在多次尝试后仍无法自动移除打印部件,打印机会显示 Part removal failure(部件移除失败)错误信息或 Motor error(马达错误)信息。

手动取出打印部件,然后重新插入构建平台并继续打印。取回打印部件:

通信错误
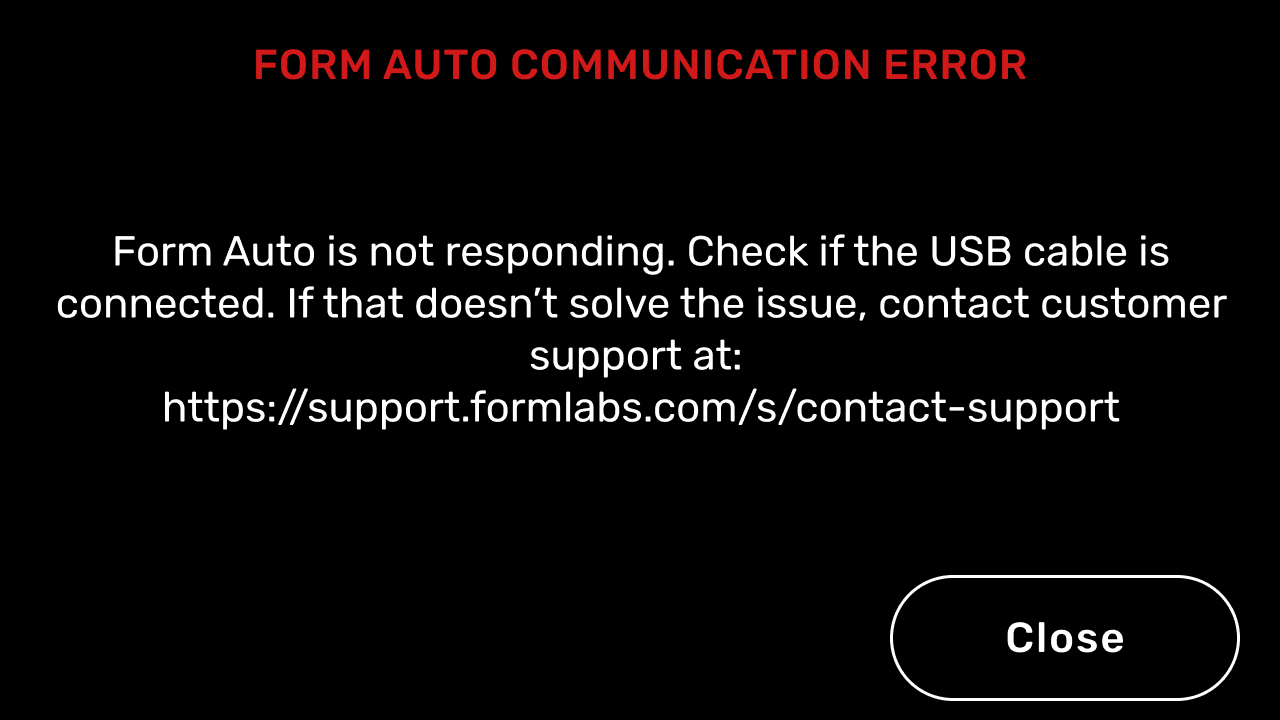
Form Auto 错误信息:通信错误
如果打印机无法与 Form Auto 通信,则会显示错误信息

Communication error(通信错误)。检查 Form Auto USB 连接线是否完全连接到打印机背面的 USB 端口。解决此问题的方法:

  1. 检查打印机上的 USB 端口和 Form Auto 的 USB 插头是否存在液态树脂等污染物。在 Form Auto 和打印机断电的情况下,根据需要使用少量 IPA 清洁 USB 端口或插头。待端口或插头完全干燥后再进行测试。
  2. 尝试将另一台打印机连接到 Form Auto(如果有)。
    • 如果只有一台打印机无法与 Form Auto 通信,则可能需要更换其 USB 端口。Contact Formlabs Support or your authorized reseller.
    • 如果没有打印机可以与 Form Auto 通信,请继续。
  3. 拆卸 Form Auto 的后部门架外壳,以便操作主板。请按照指南 更换 Form Auto 主板 [EN] [DE] [ES] [FR] [IT] [JA] [ZH]中的说明进行操作。
  4. 从主板左侧拔下 USB 连接线。
  5. 将另一根 USB-A 转 USB-B 连接线(例如 Form 3 代打印机随附的连接线)直接插入打印机和 Form Auto 主板。
    • 如果打印机现在可以与 Form Auto 通信,请将电缆穿过 Form Auto 底座,以替换原有 USB 电缆。
    • 如果打印机仍无法与 Form Auto 通信,则可能是 Form Auto 主板损坏或出现故障。请联系 Formlabs Support 或您的 授权经销商

马达错误

Form Auto 错误信息:马达错误

The printer displays a generic Motor error message if the Form Auto motors cannot move as expected. Check for obstructions around the printer and Form Auto that interfere with the movement of the cover or part removal mechanism. If the part removal mechanism interferes with the printer cover, adjust the cover actuator.

The printer may also display a more specific motor-related error, such as Error 357 (which indicates a general motor movement failure) or Error 358 (which indicates that a specific motor failed to reach its home position). These errors also have subcodes: Error 357/1 and 358/1 are related to the part removal mechanism, while Error 357/2 and 358/2 are related to the part release gantry. To resolve these errors:

Error 357

A generic Error 357 is not usually indicative of a more pervasive issue and can often be fixed by resetting and recalibrating the machine. This error and its subcodes occur when the printer sends a command to a motor and the encoder on the motor doesn't detect the expected movement after a few seconds.

  1. Power cycle the Form Auto using the power switch on the unit.
  2. Recalibrate the Form Auto. On the printer’s touchscreen, tap Settings > Form Auto > Calibrate Form Auto and follow the on-screen instructions.
  3. When the calibration is complete, run a test harvest. On the printer’s touchscreen, tap Settings > Form Auto > Run Print Removal Cycle.
  4. If the issue recurs, record a video of the print removal cycle showing the error and contact Formlabs Support or your authorized reseller. Include the video you recorded.

Error 357/1

Error 357/1 indicates an issue with the motor that closes and opens the part removal mechanism or its encoder.
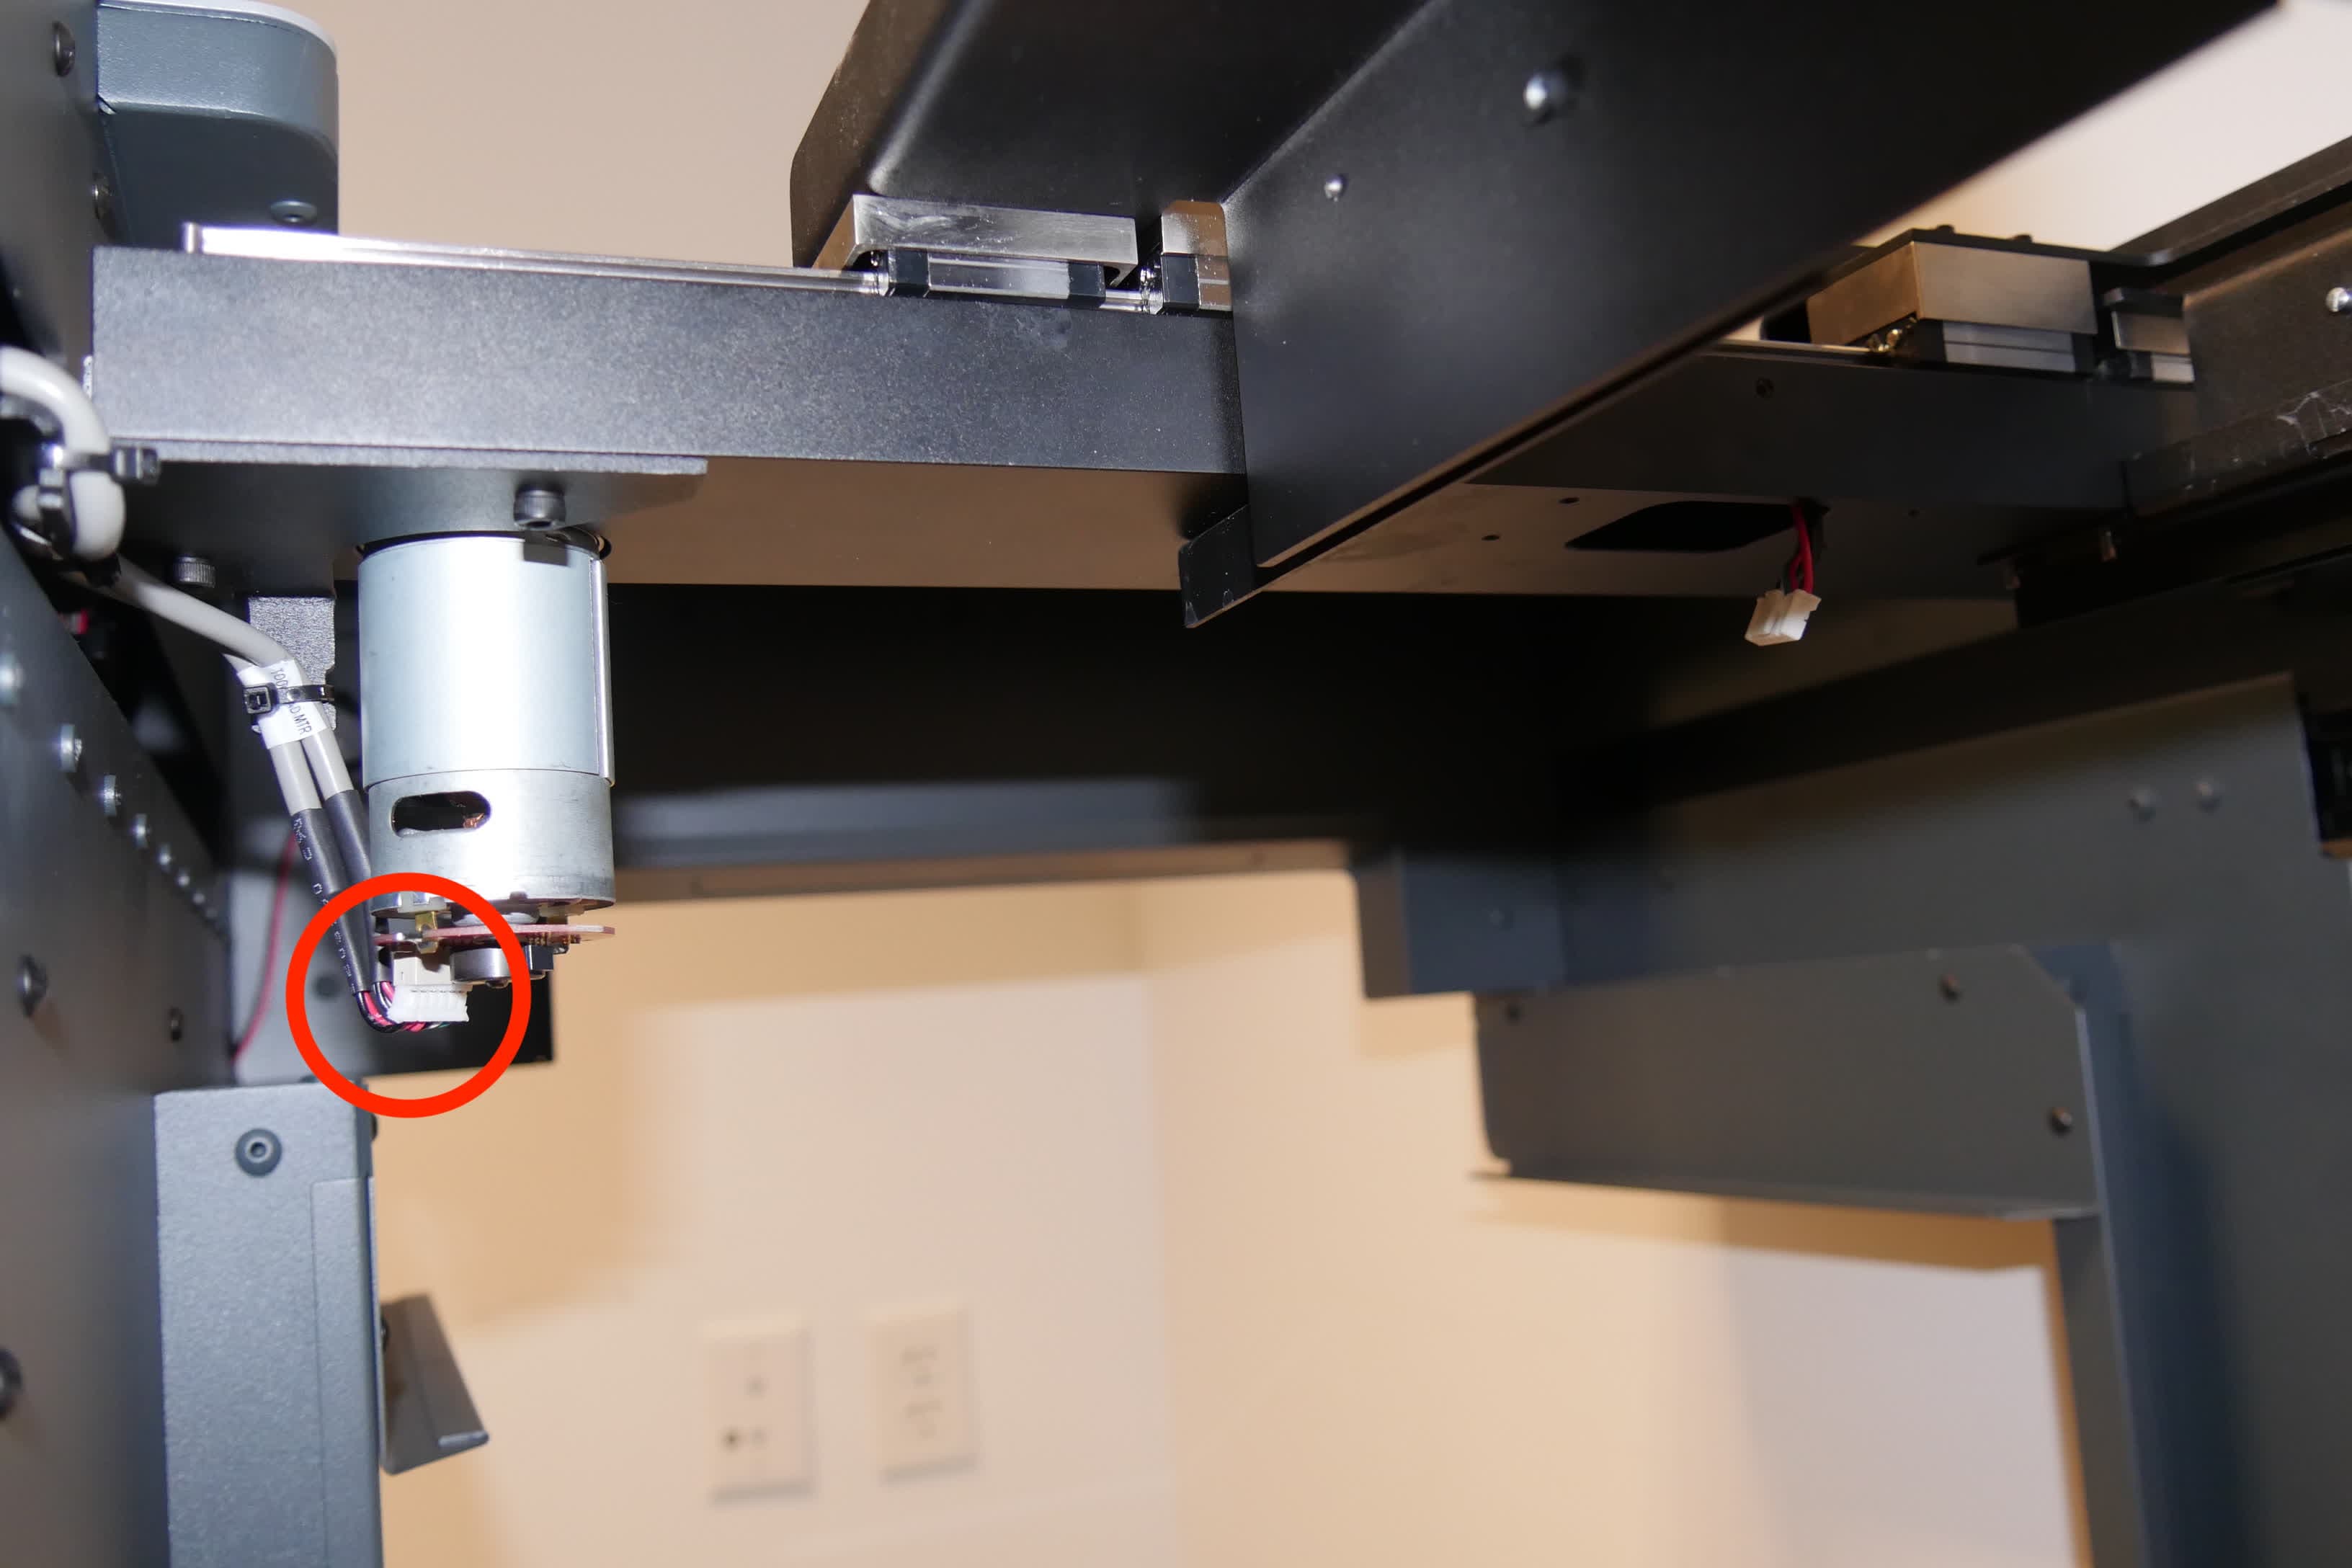
  1. Run a test harvest. On the printer’s touchscreen, tap Settings > Form Auto > Run Print Removal Cycle. Check if the part removal mechanism attempts to close or open at all.
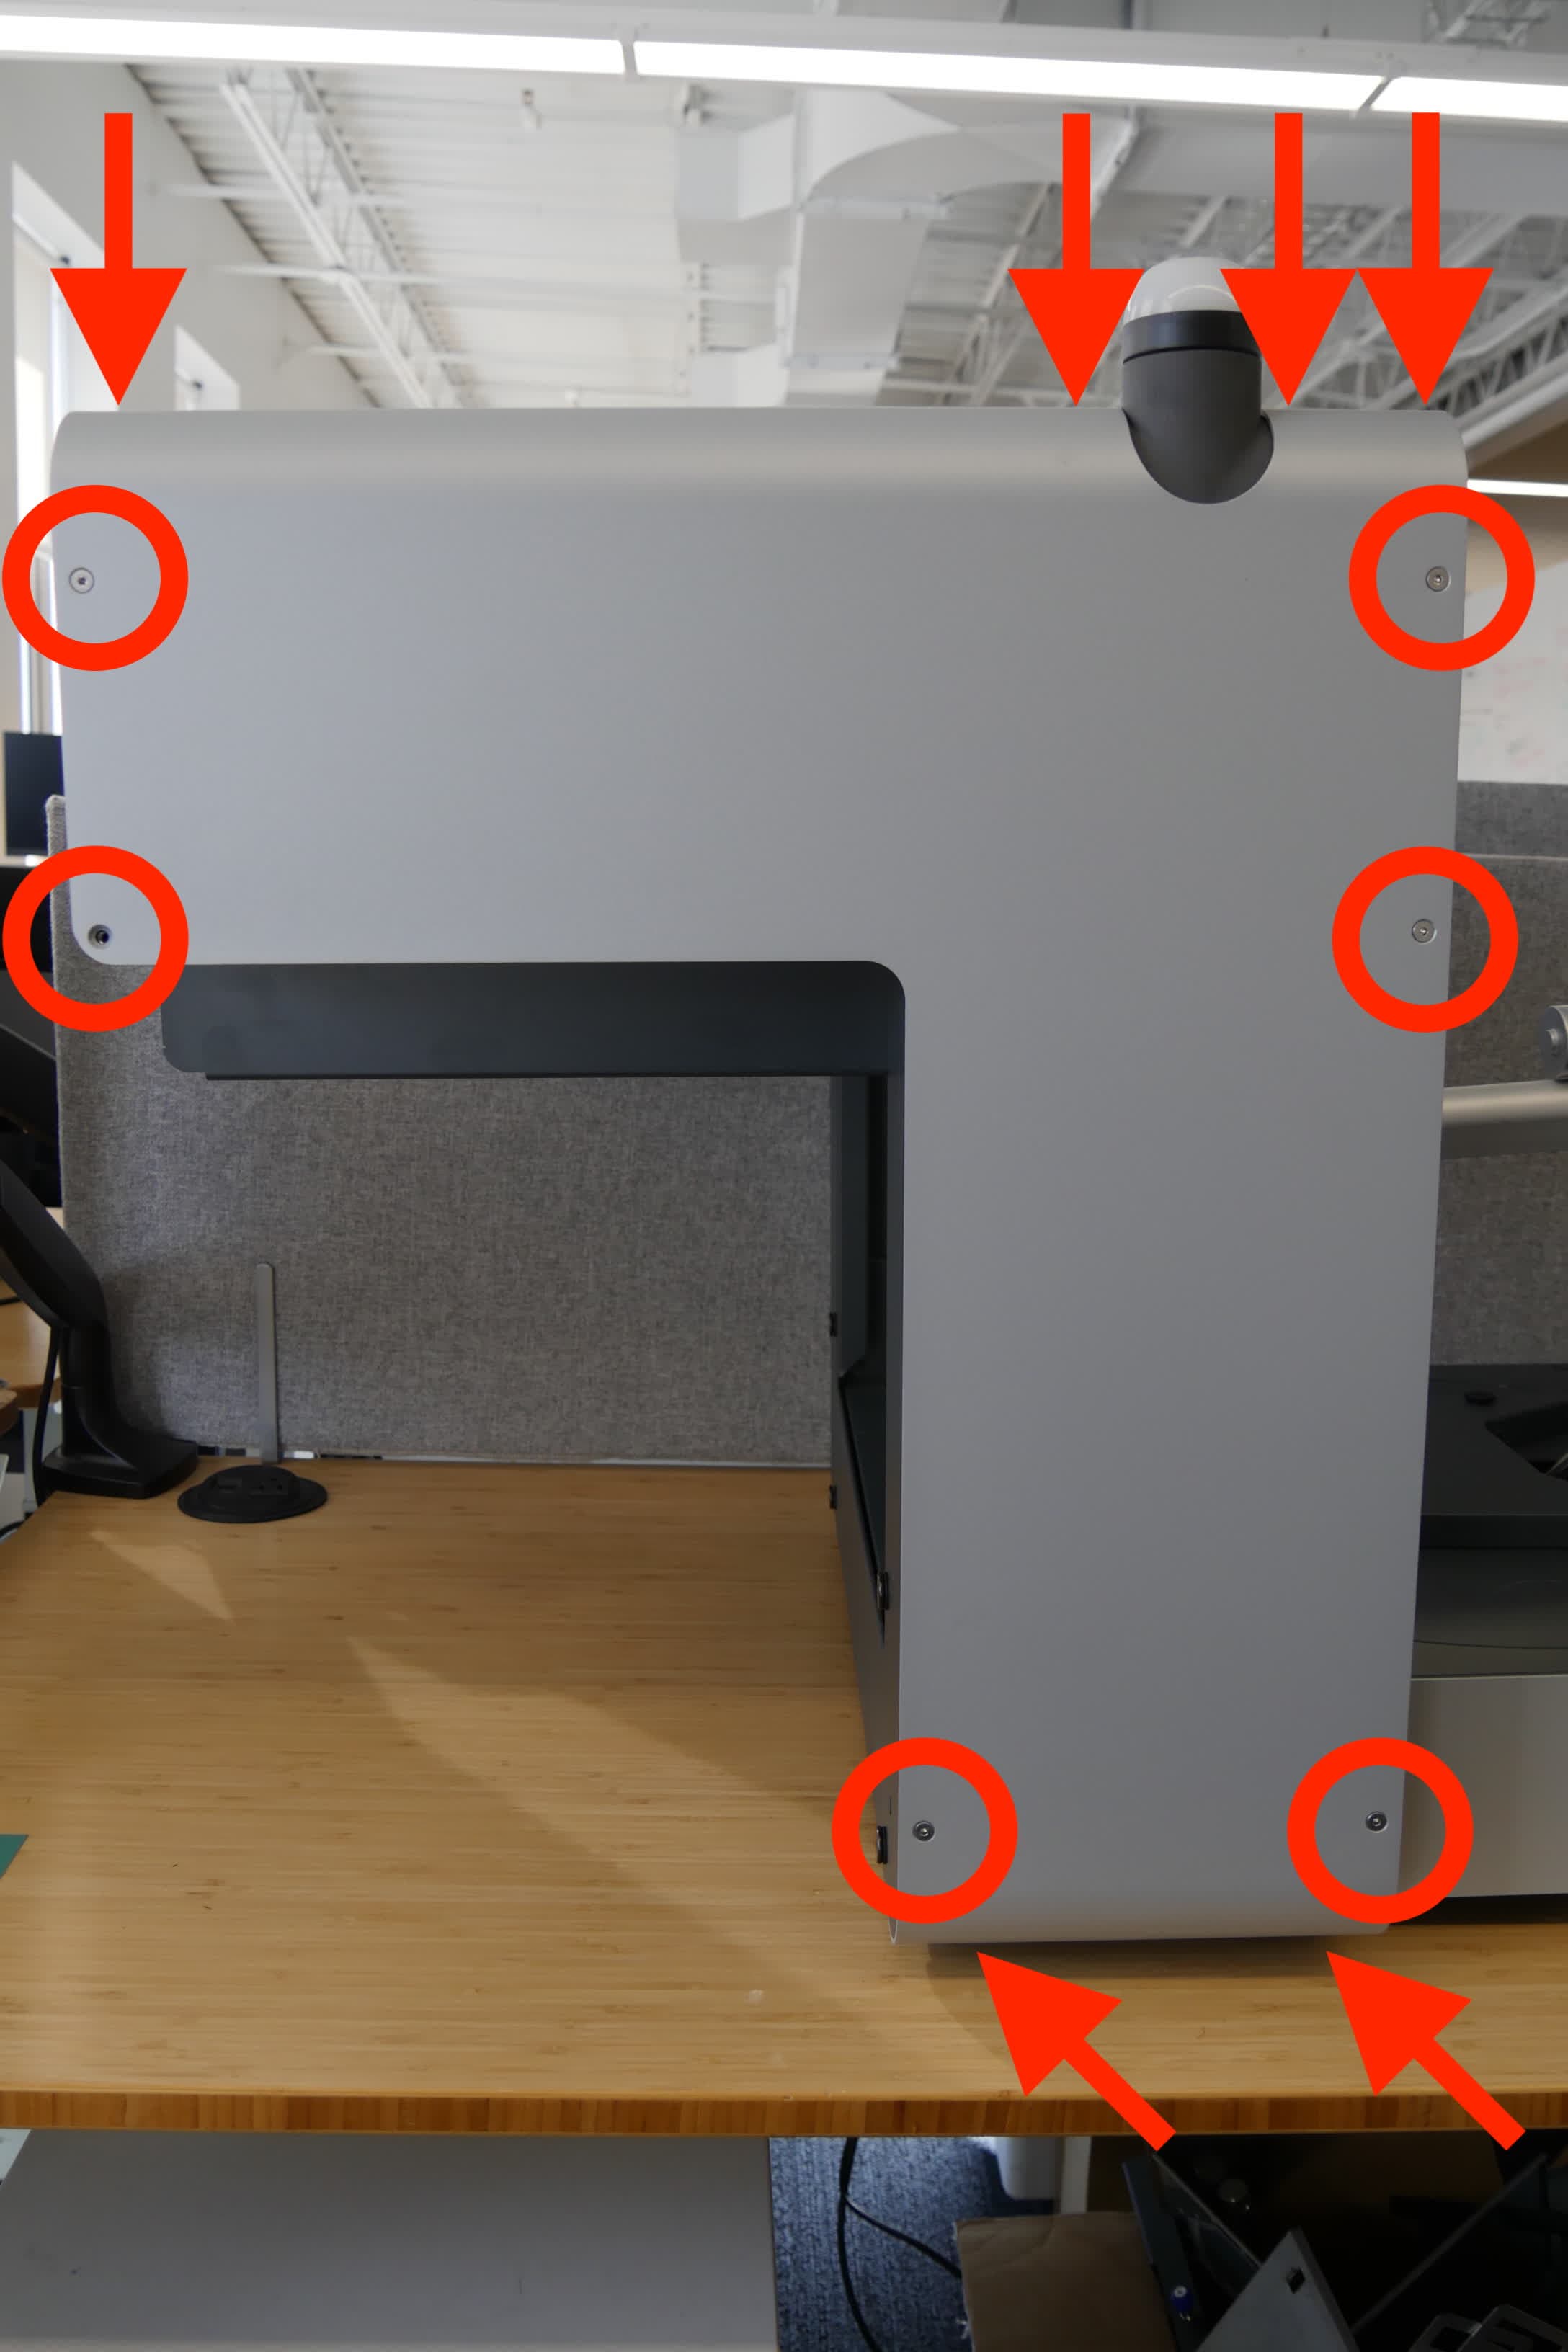
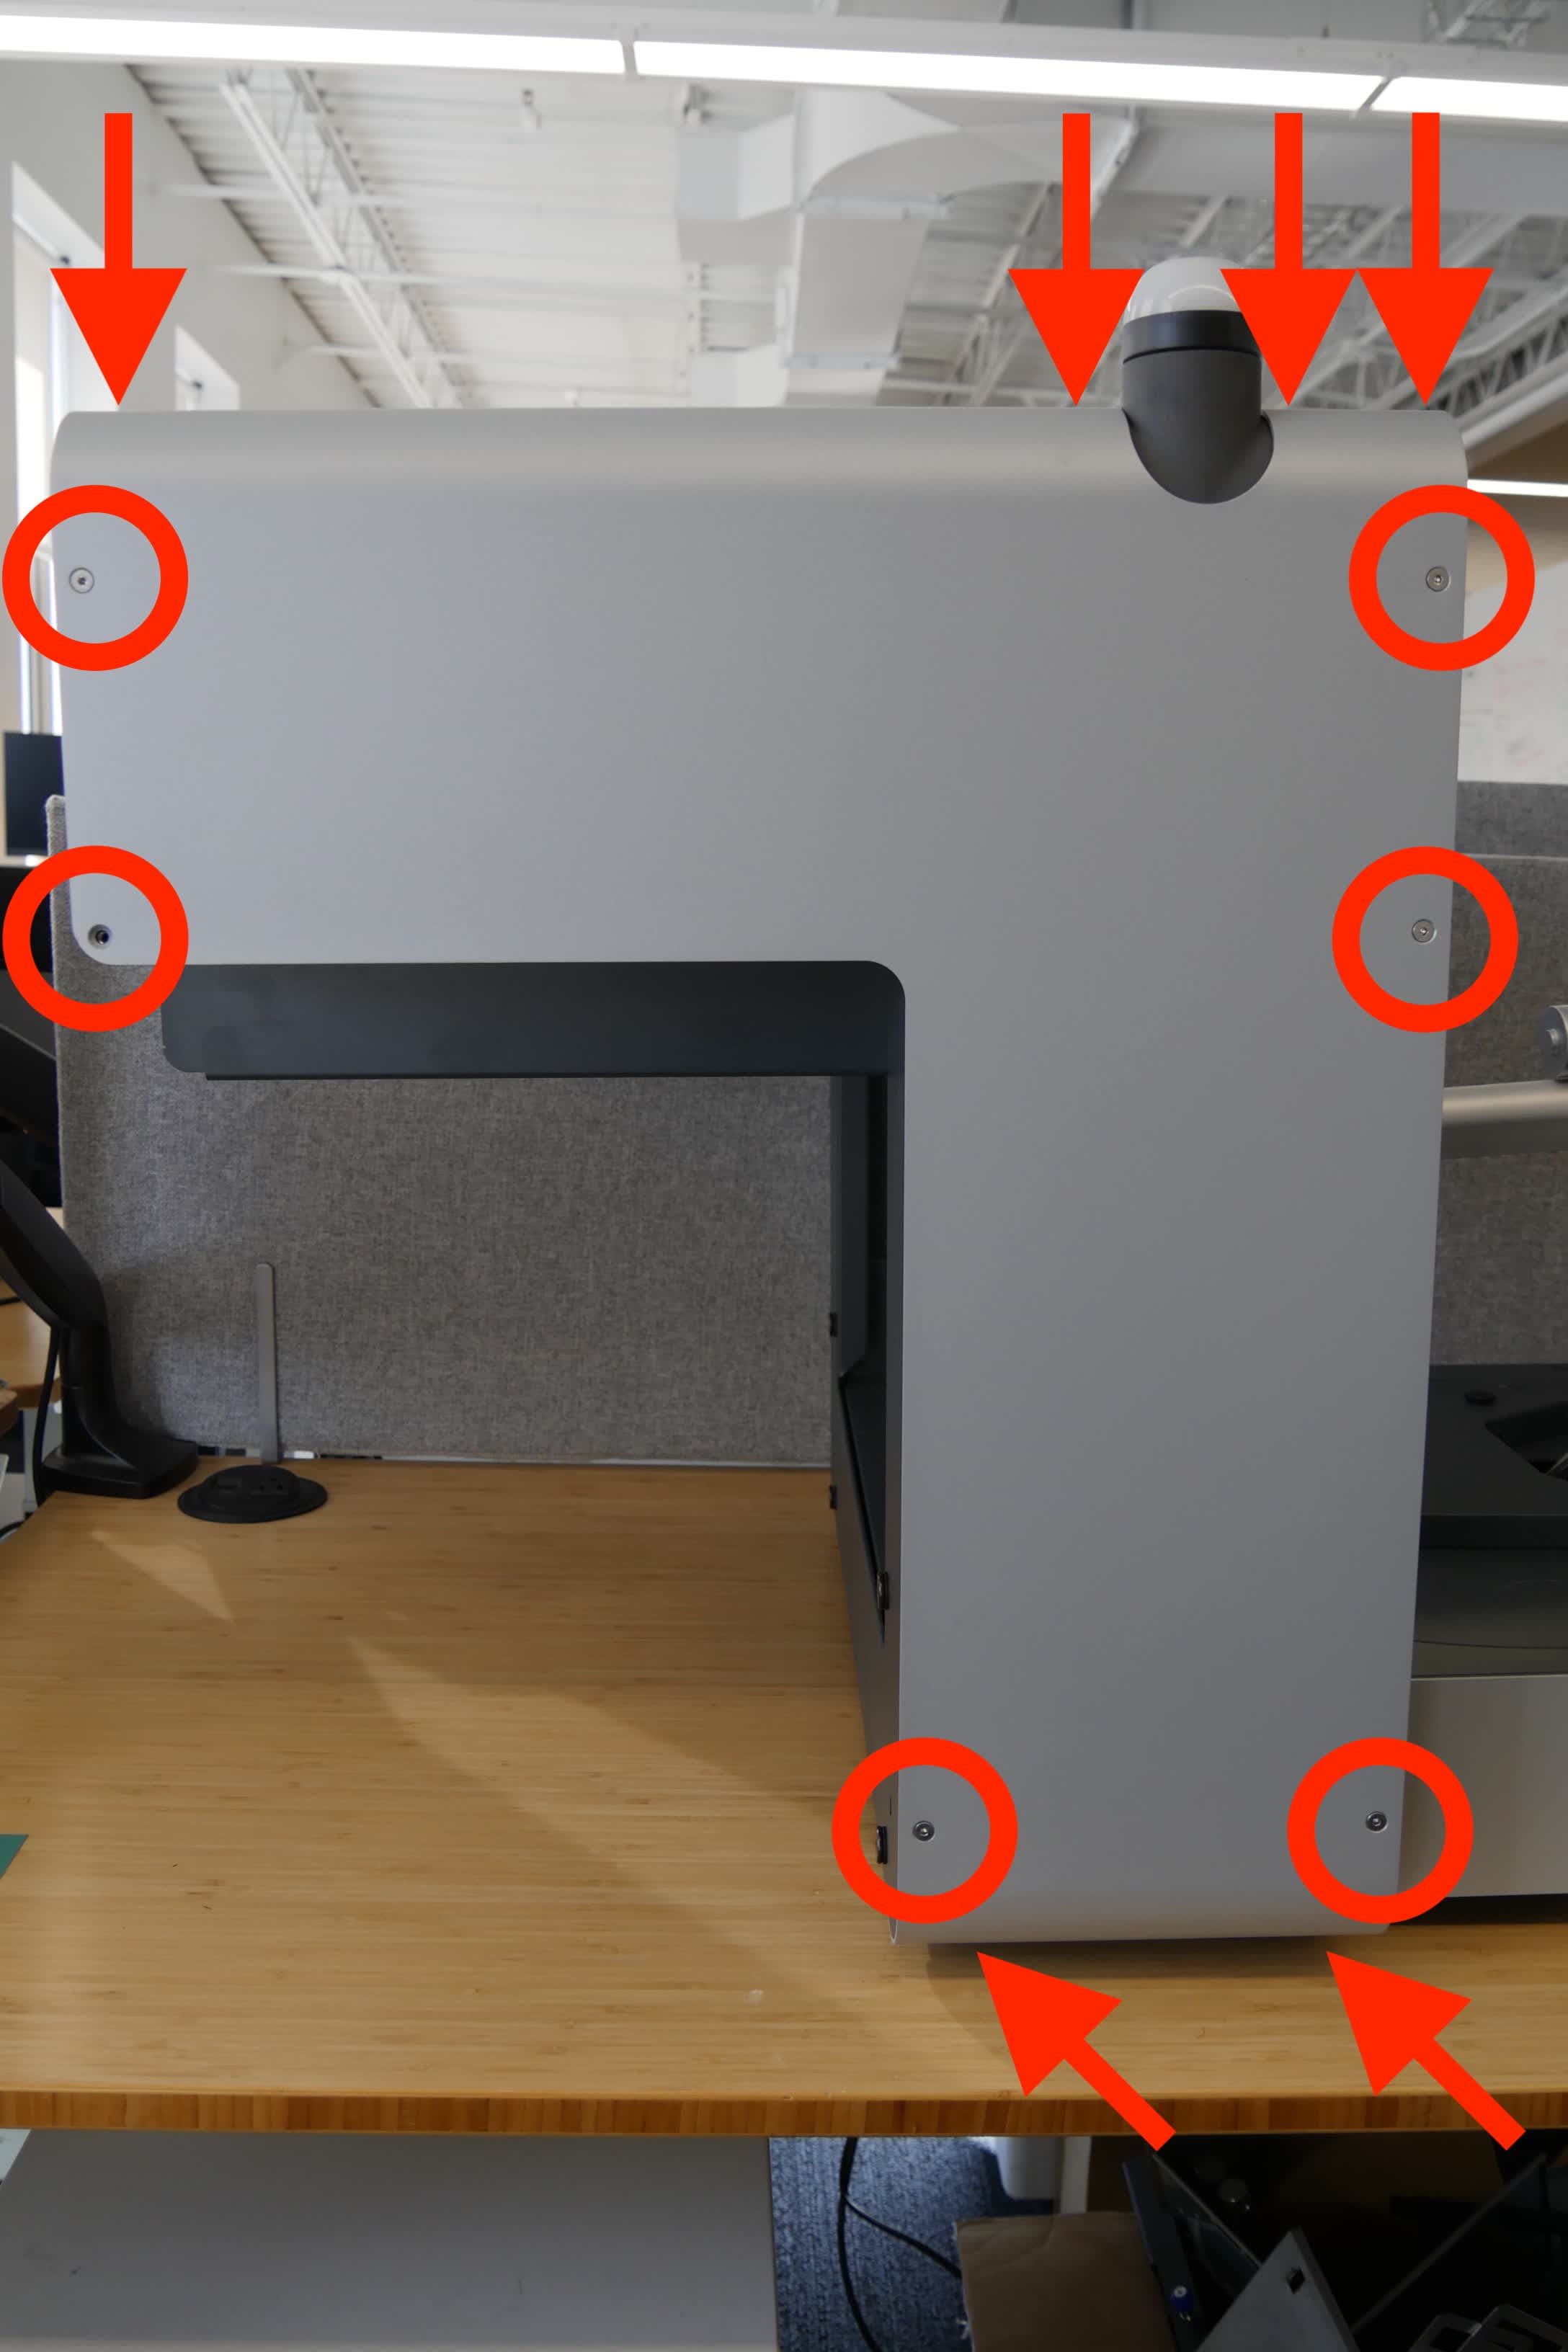
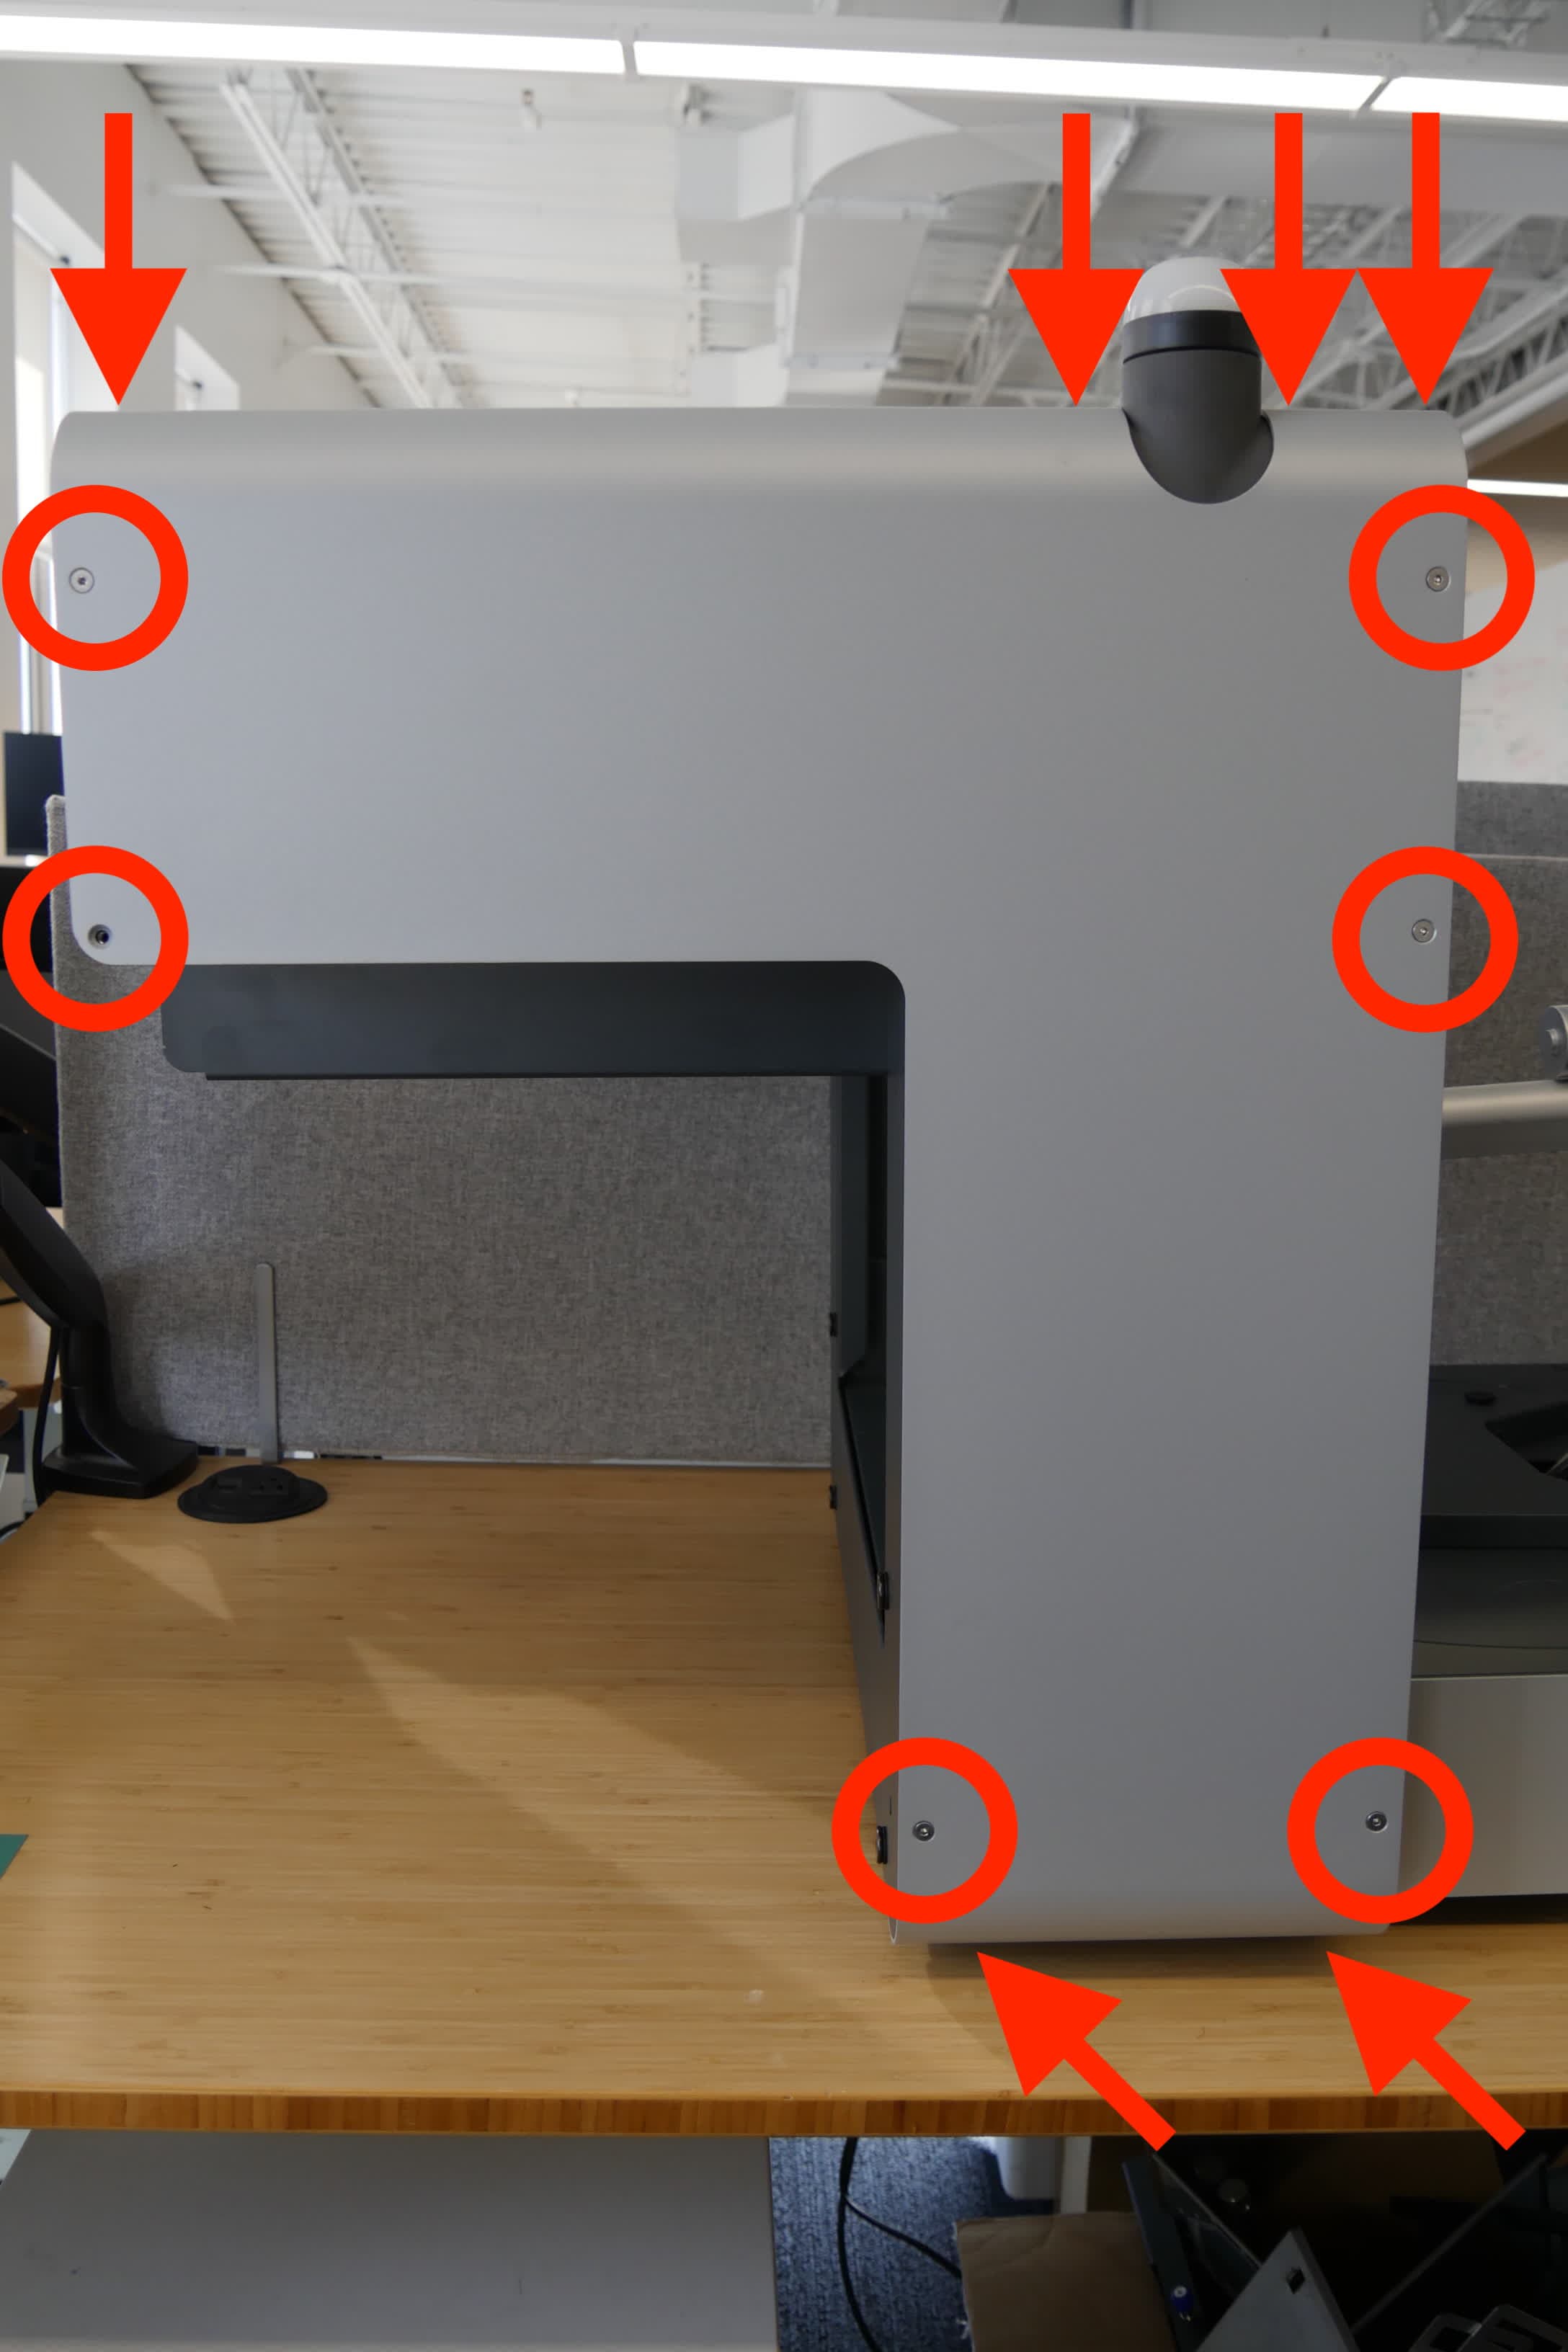
    1. If the part removal mechanism does move and the error appears while or after it squeezes the build platform part release paddles, there may be an issue with the motor encoder or limit switch. Power off and unplug the machine, remove the rear shell (on the same side as the power switch), and reseat both ends of the encoder and limit switch cables.
Form Auto rear shell screws
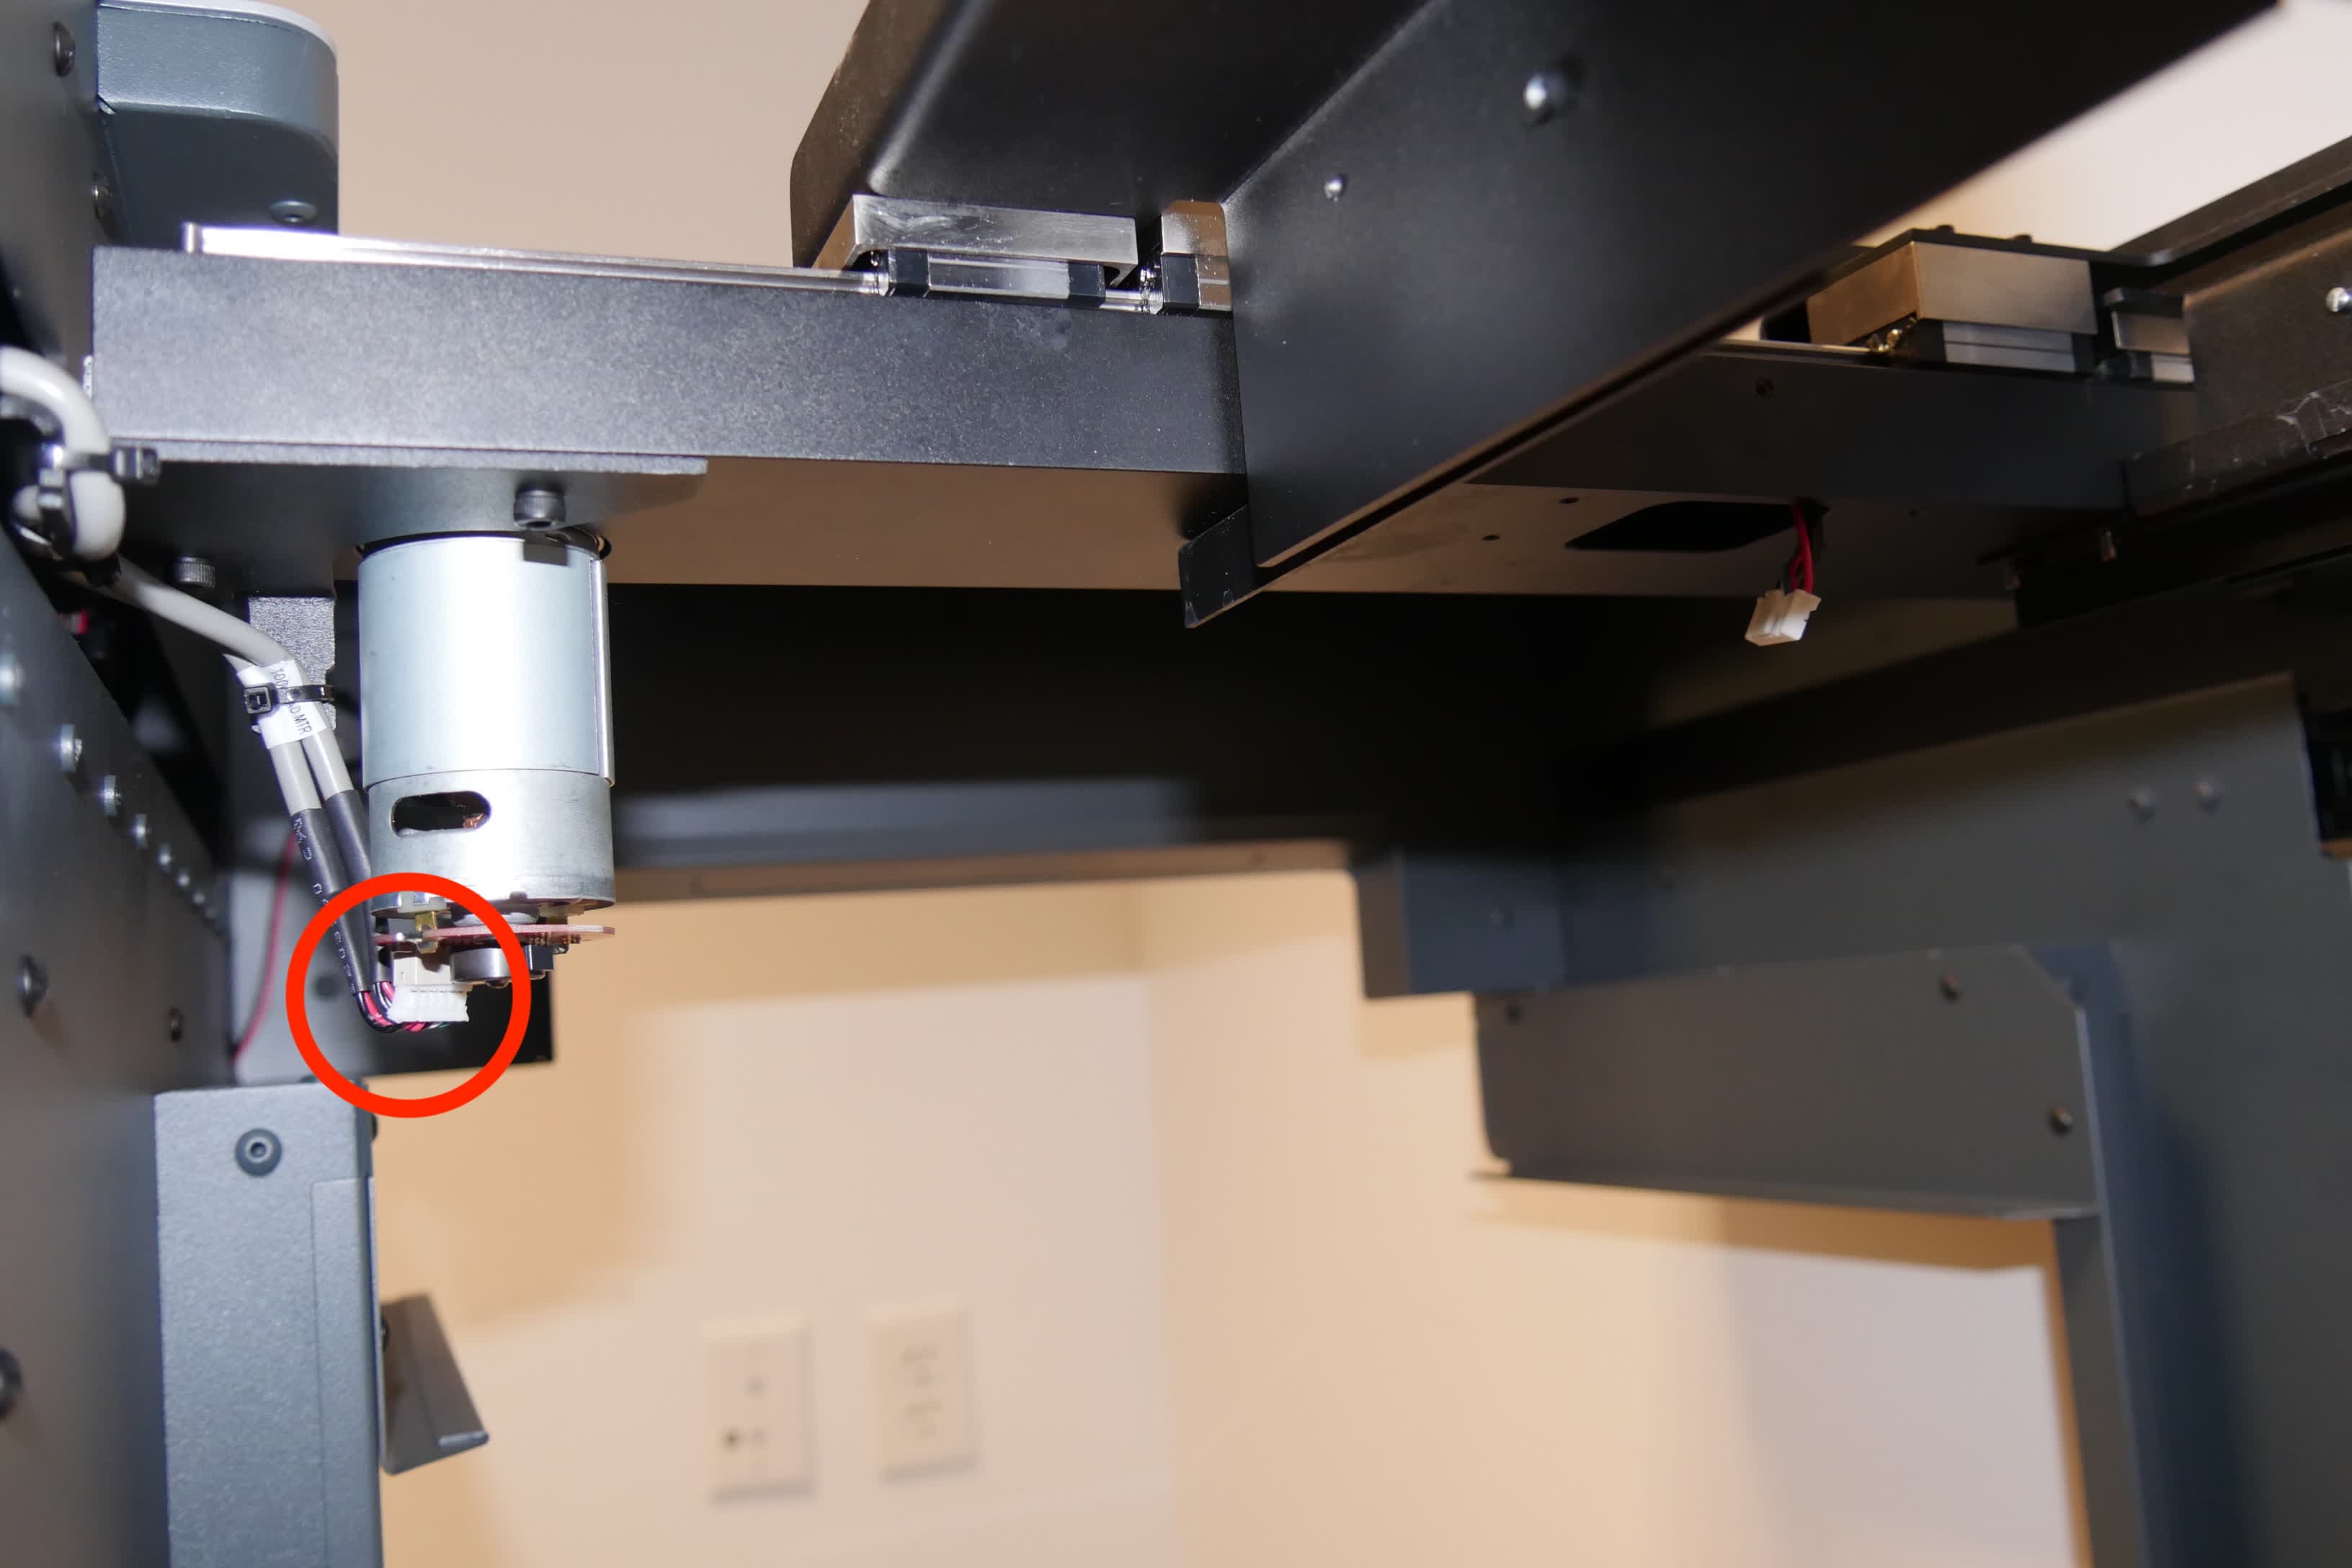
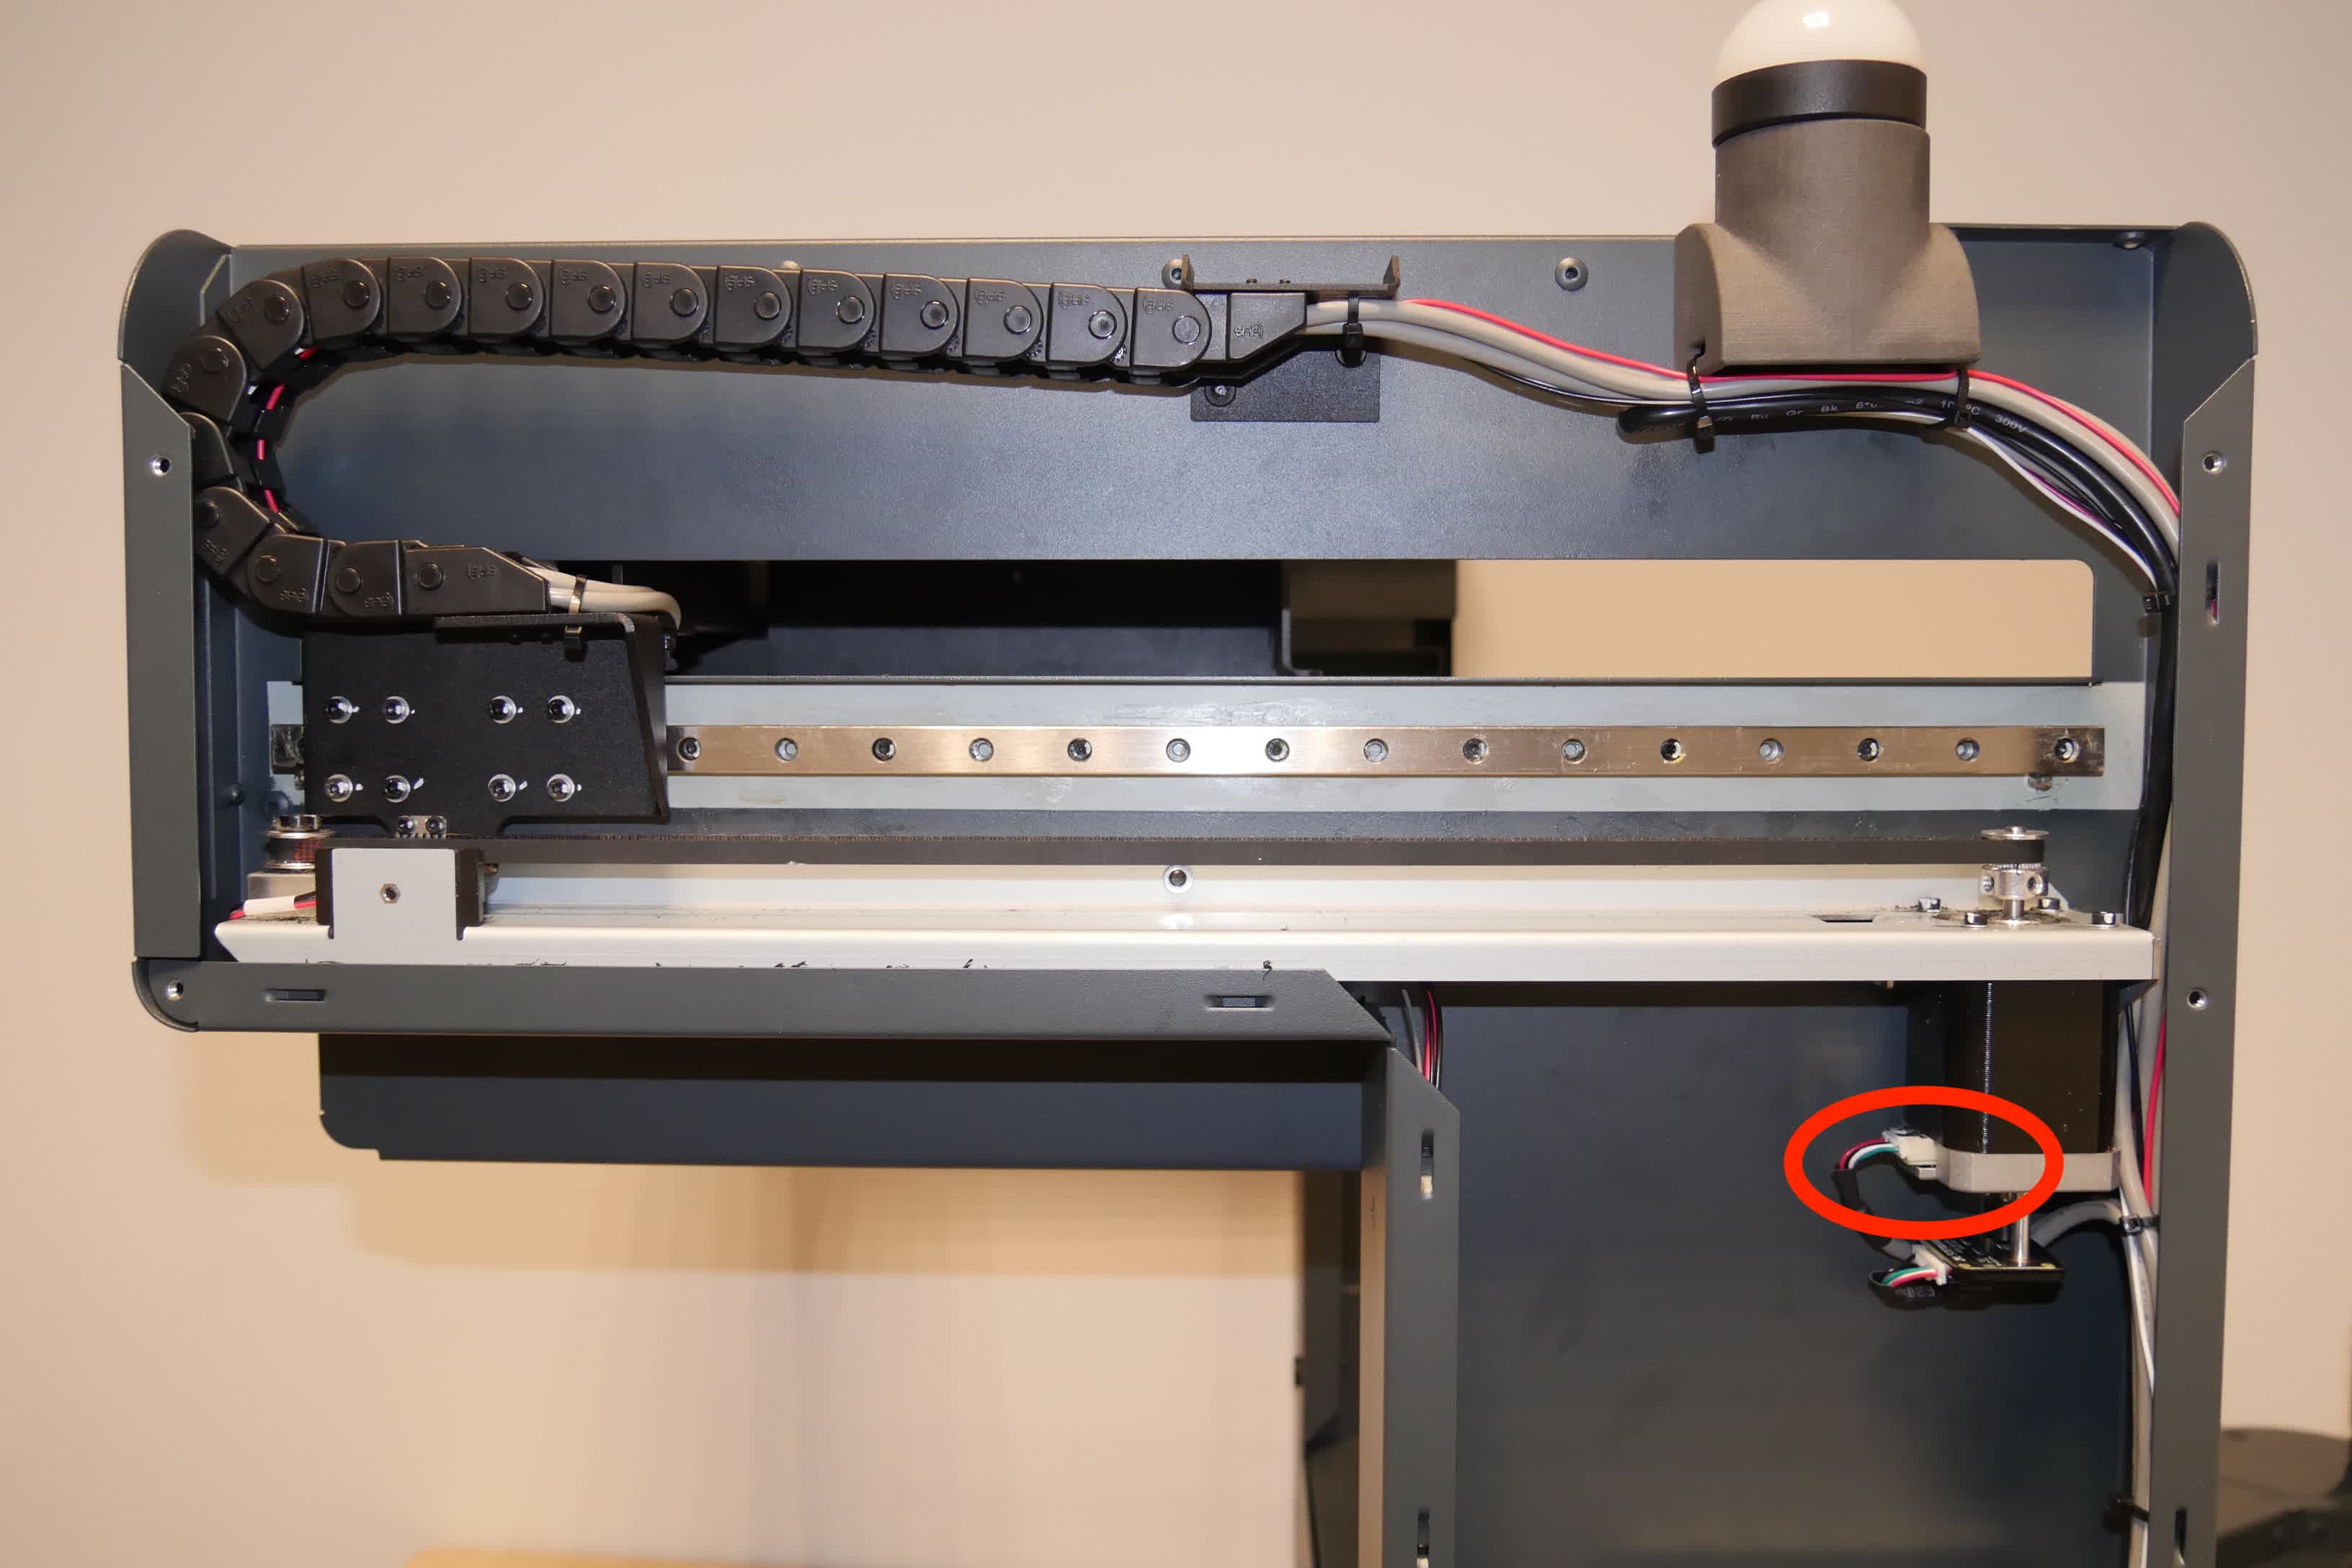
Form Auto print removal mechanism motor
    1. If the part removal mechanism stalls in an unusual place, power off and unplug the Form Auto and move the mechanism by hand to search for a physical obstruction. Replace the part removal mechanism if necessary.
    2. If the mechanism does not move, then the motor is likely the cause of the error. Power off and unplug the machine, remove the rear shell (on the same side as the power switch), and reseat both ends of the motor cable.
Form Auto rear shell screws
Form Auto print removal mechanism motor
  1. If the issue recurs, record a video of the print removal cycle showing the error and contact Formlabs Support or your authorized reseller. Include the video you recorded.

Error 357/2

Error 357/2 indicates an issue with the motor that moves the part removal mechanism towards and away from the printer (also known as the gantry motor) or its encoder.
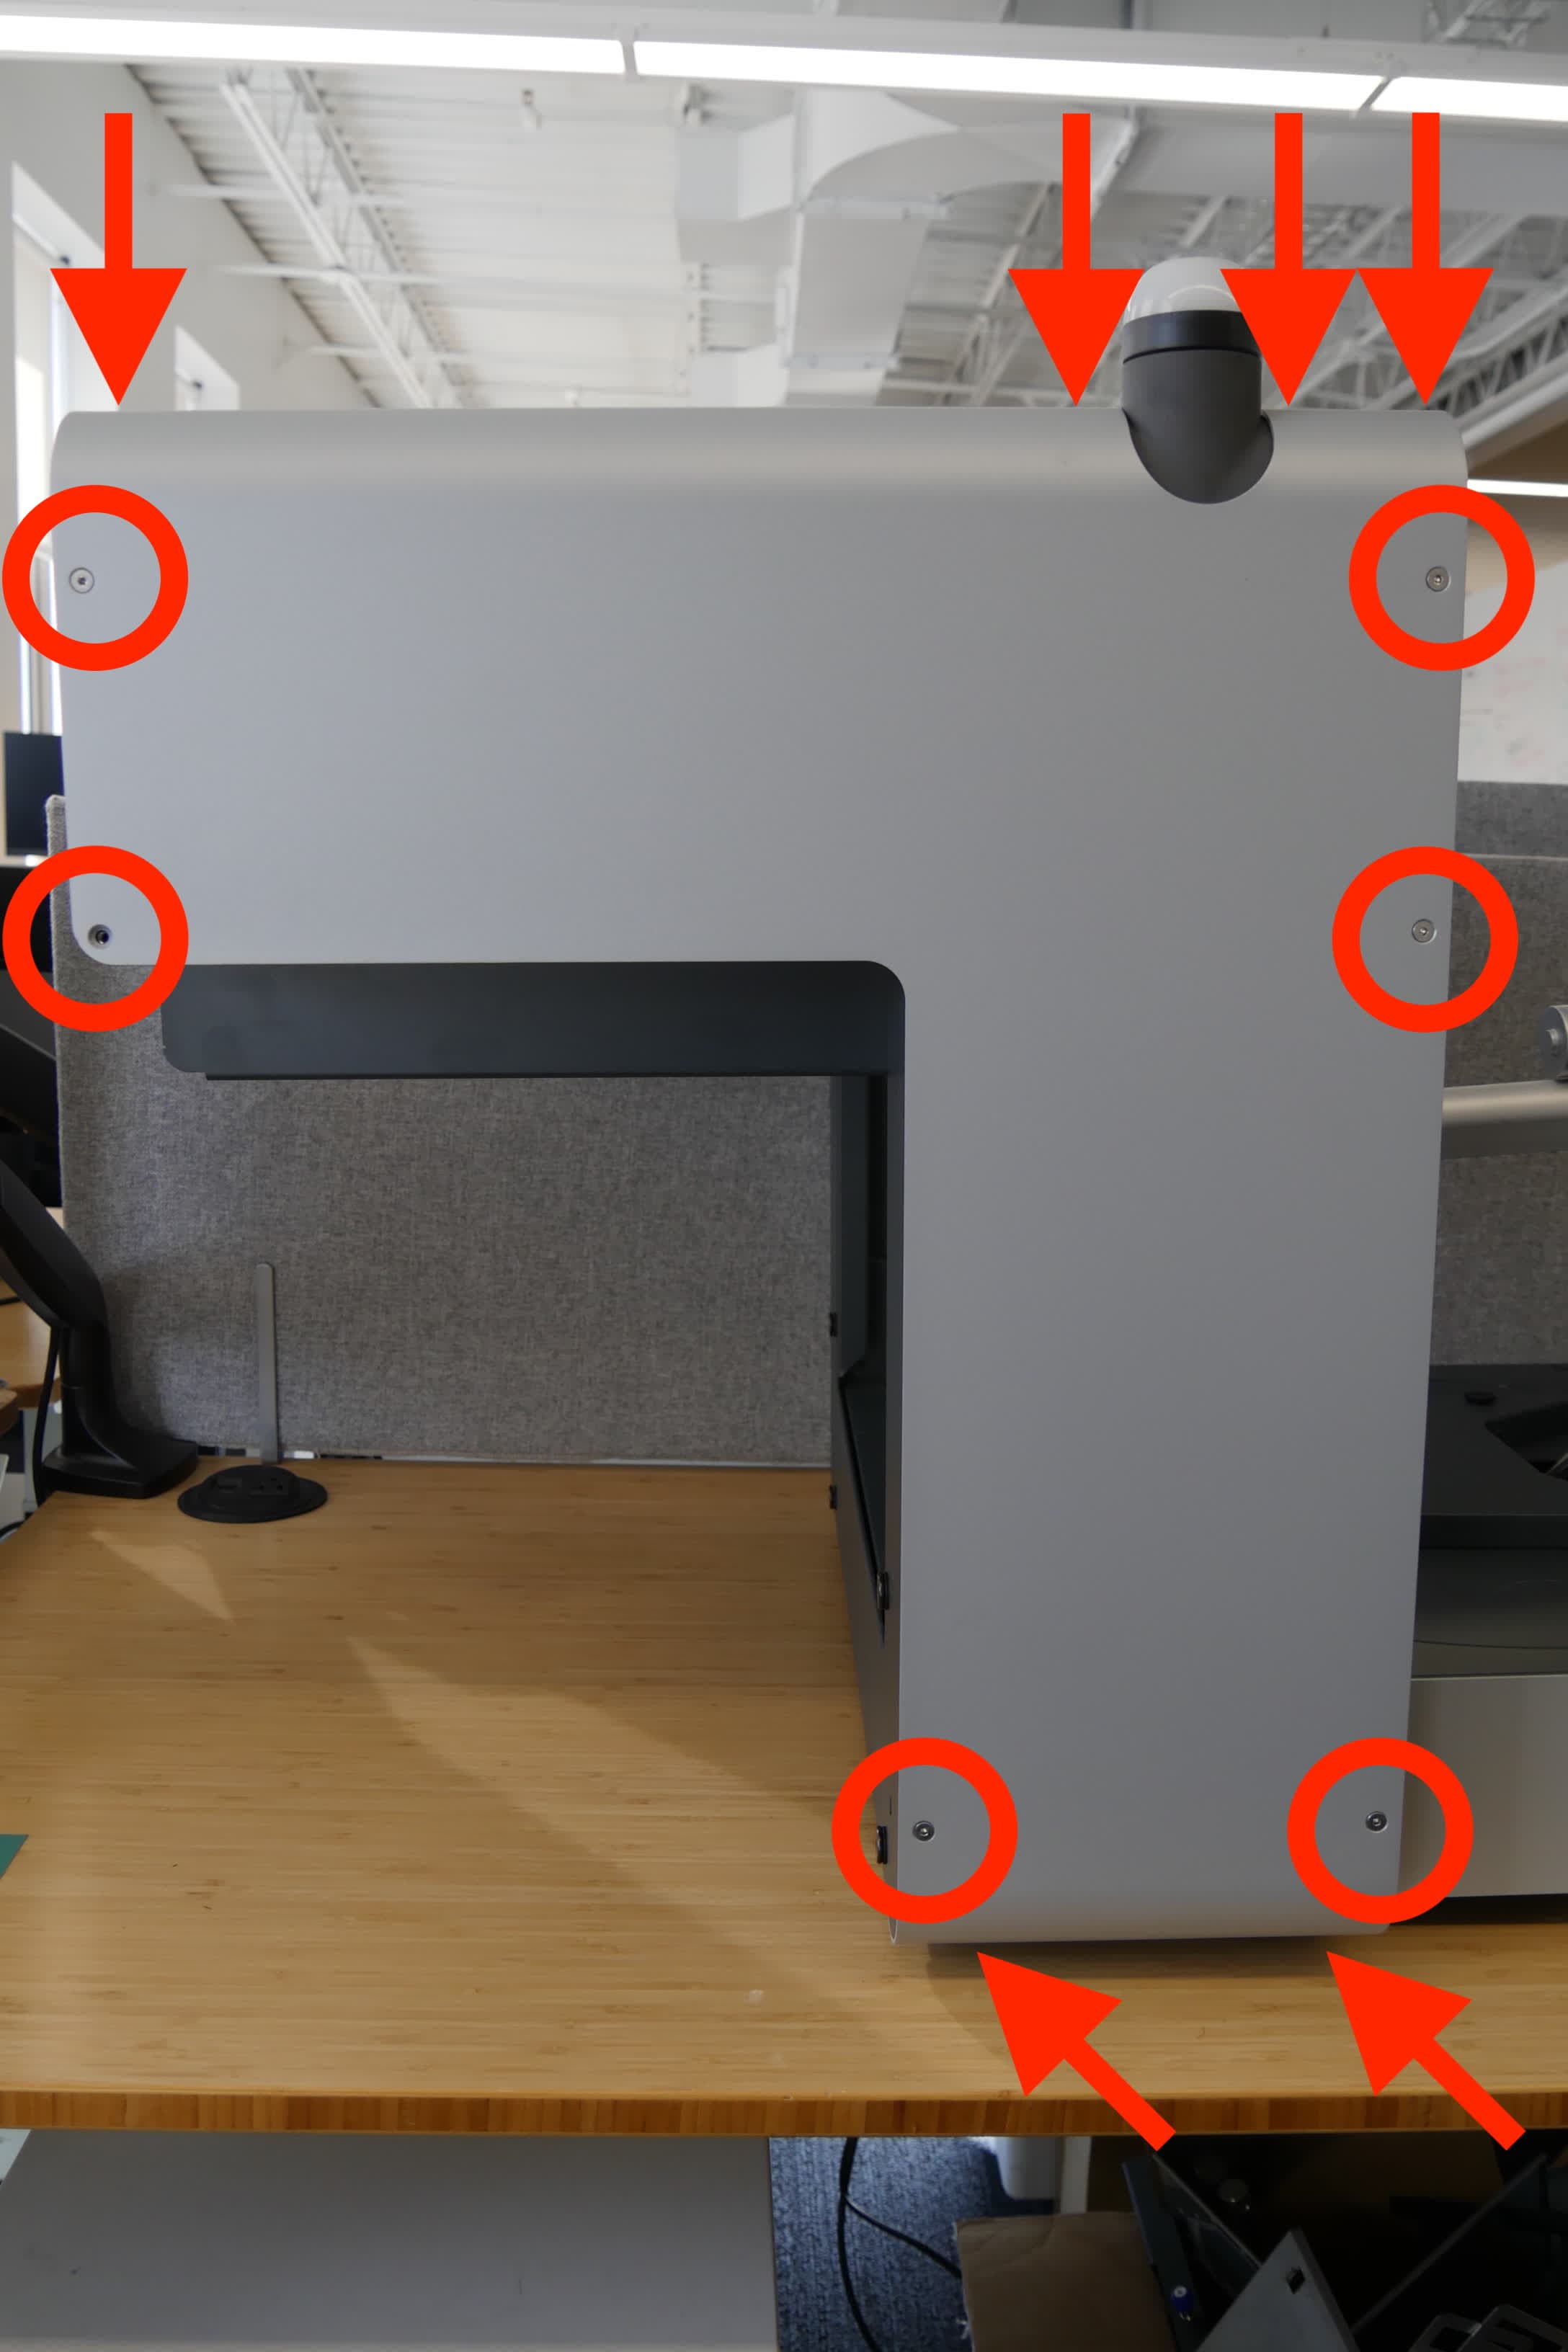
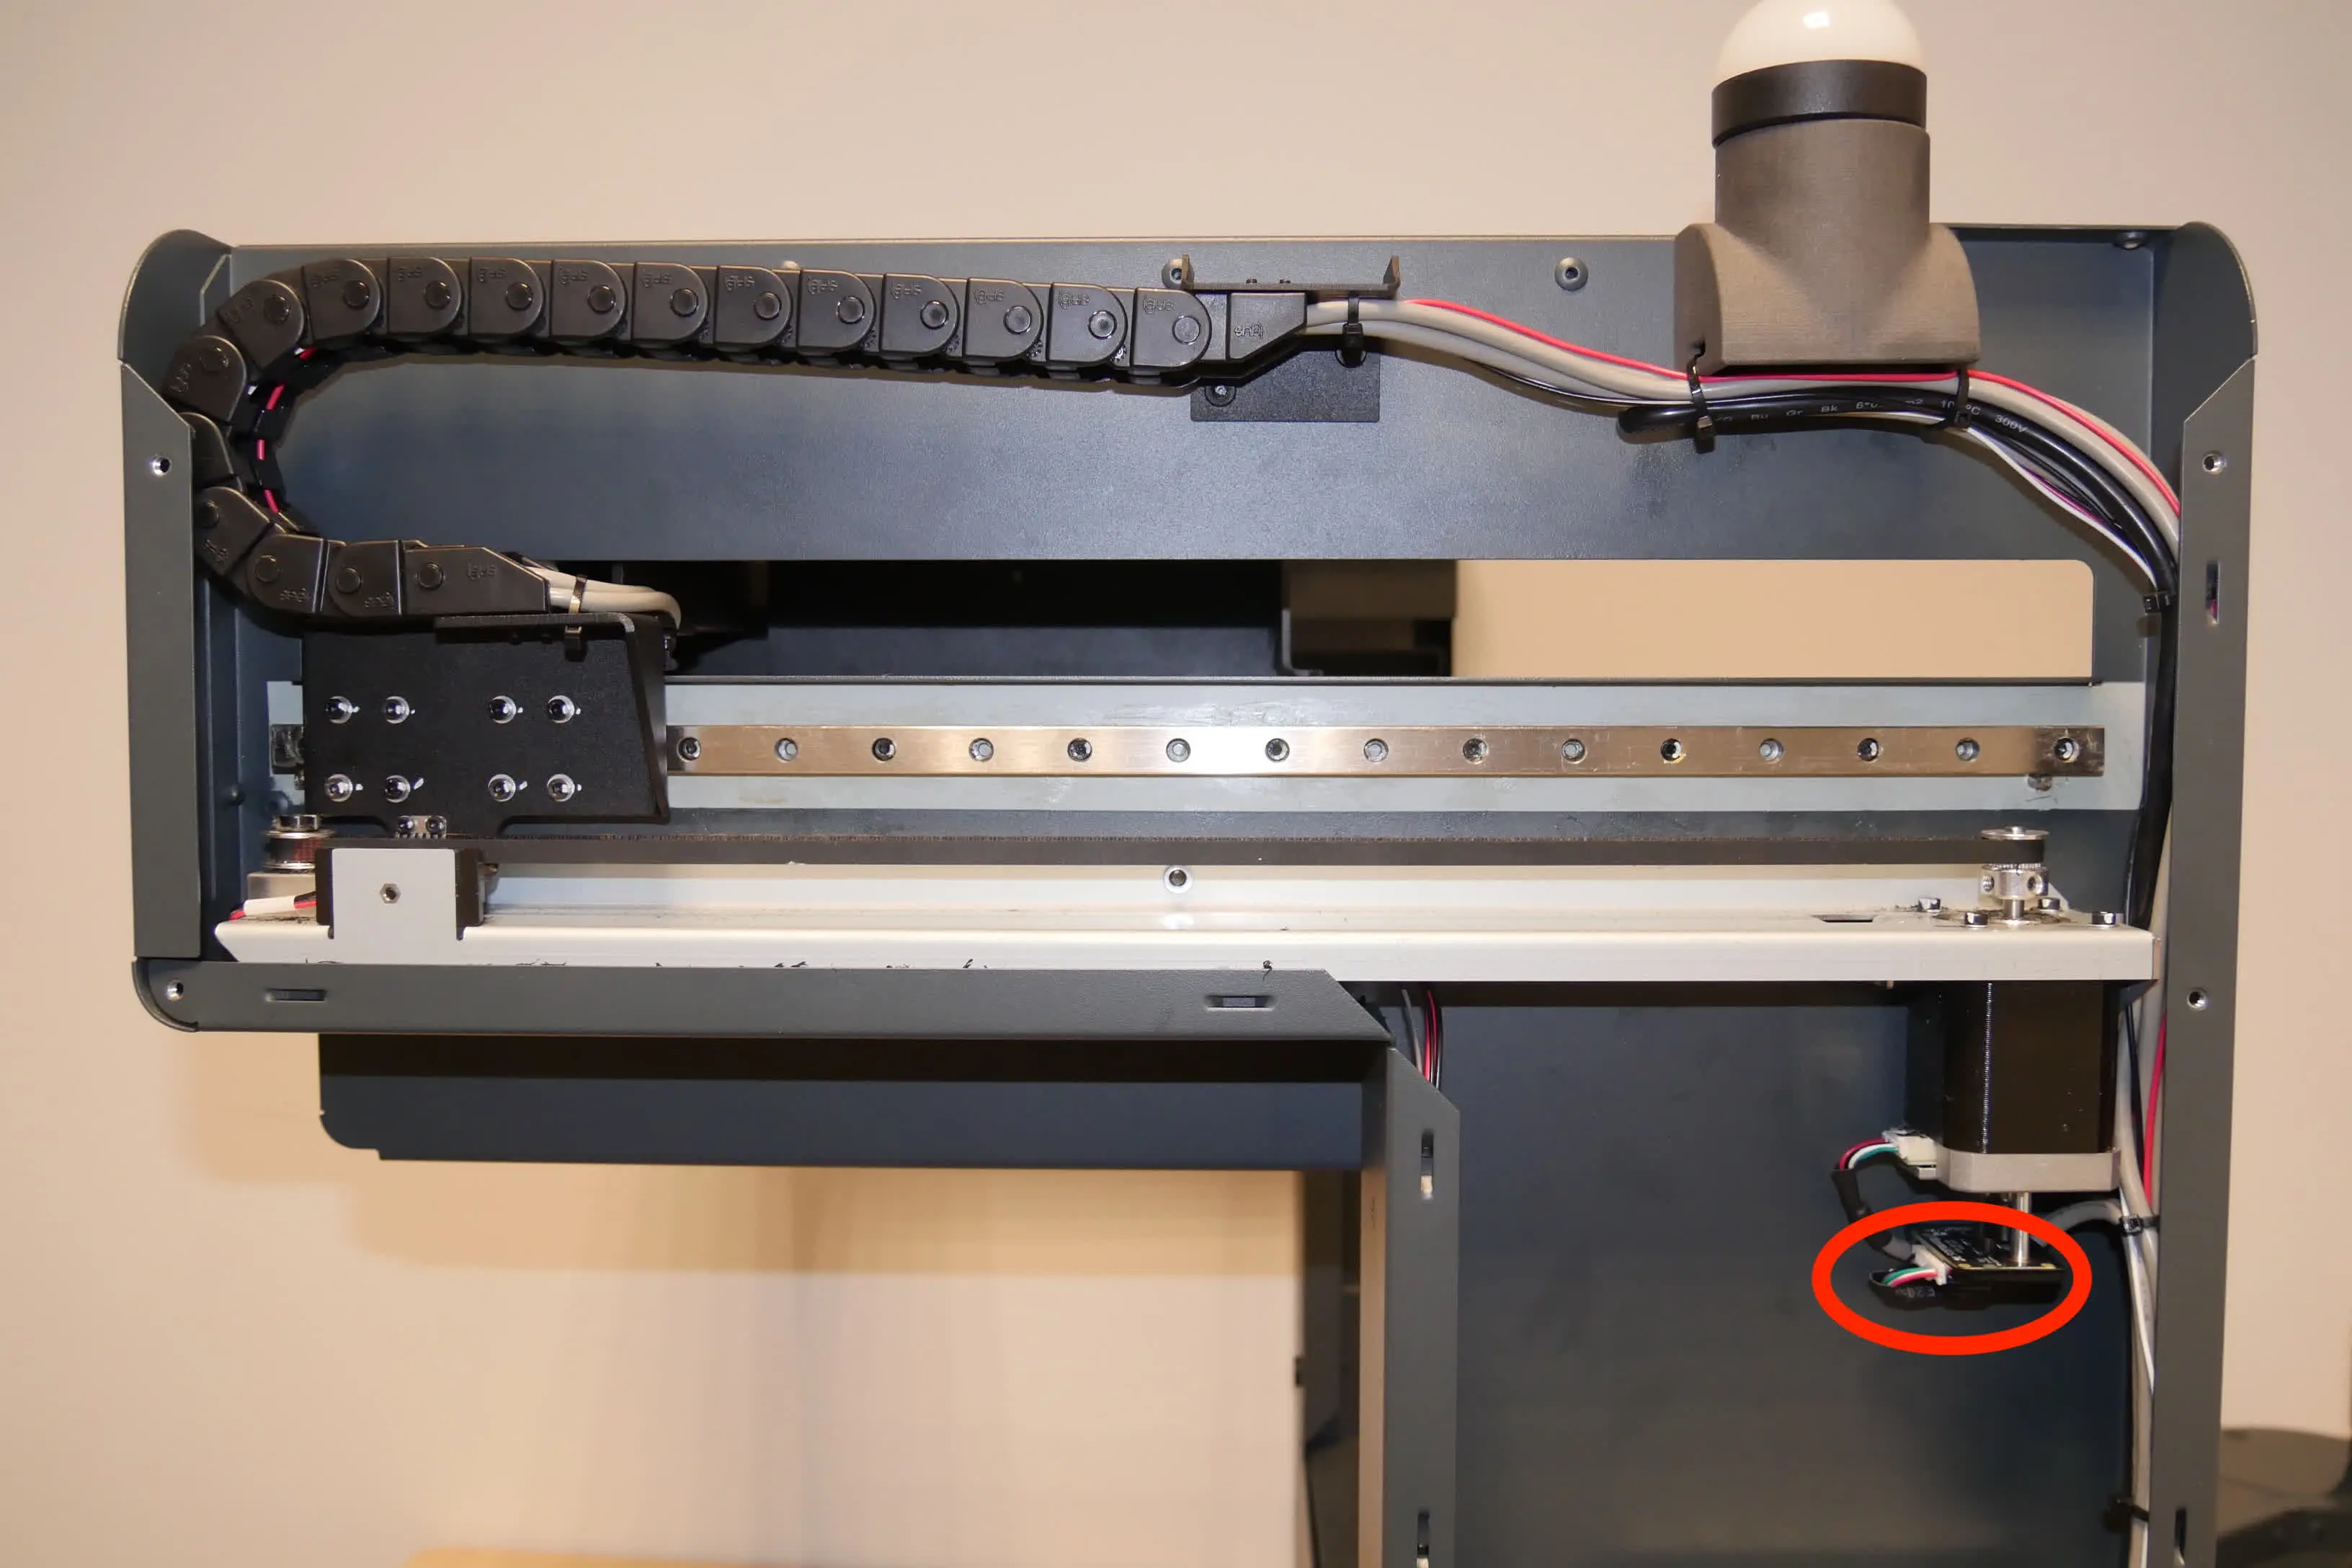
  1. Run a test harvest. On the printer’s touchscreen, tap Settings > Form Auto > Run Print Removal Cycle. Check if the gantry moves towards the printer at all during the cycle.
  2. If the gantry moves, the gantry motor encoder may be malfunctioning. Power off and unplug the machine, remove the rear shell (on the same side as the power switch), and reseat both ends of the encoder cable.
Form Auto rear shell screws
Form Auto gantry motor encoder
    1. If the gantry does not move, the motor may be malfunctioning. Power off and unplug the machine, remove the rear shell (on the same side as the power switch), and reseat both ends of the motor cable.
Form Auto rear shell screws
Form Auto gantry motor
  1. If there's any obvious physical issue with the gantry moving (e.g., a grinding noise, motor stalling noise, excessive resistance when moving the gantry by hand while the machine is powered off, etc.), the mechanism may be misaligned or the belt that drives the gantry may be damaged. Replace the gantry drive assembly if necessary.
  2. If the test harvest completes normally but the printer shows this error, contact Formlabs Support or your authorized reseller.

Error 358/1

Error 358/1 indicates that the motor that closes and opens the part removal mechanism failed to reach its home position.

  1. Check for obstructions around the printer and Form Auto.
  2. Re-rack the part removal mechanism by pulling the arms to the closed position, then reopening them.
  3. Inspect the part removal mechanism pulley and service it if it is slipping. Follow the instructions in the guide Proactively servicing the Form Auto part removal mechanism pulley [EN] [DE] [ES] [FR] [IT] [JA] [ZH].
  4. If the pulley axle is damaged, replace the part removal mechanism. Follow the instructions in the guide Replacing the Form Auto part removal mechanism [EN] [DE] [ES] [FR] [IT] [JA] [ZH]. Replacement part removal mechanisms are available on the Formlabs Store.

Error 358/2

Error 358/2 indicates that the motor that moves the part removal mechanism towards and away from the printer failed to reach its home position.

  1. Check for obstructions around the printer and Form Auto.
  2. Re-rack the part release gantry by pulling it fully towards the printer, then pushing it back to its home position.
  3. Inspect the gantry pulley and service it if it is slipping. Follow the instructions in the guide Repairing a slipping gantry pulley [EN] [DE] [ES] [FR] [IT] [JA] [ZH].
  4. If the pulley axle is damaged, replace the part release gantry. Follow the instructions in the guide Replacing the Form Auto gantry drive assembly [EN] [DE] [ES] [FR] [IT] [JA] [ZH]. Replacement part removal mechanisms are available on the Formlabs Store.

If you see any of these error messages repeatedly, contact Formlabs Support or your authorized reseller.

Form Auto 未校准
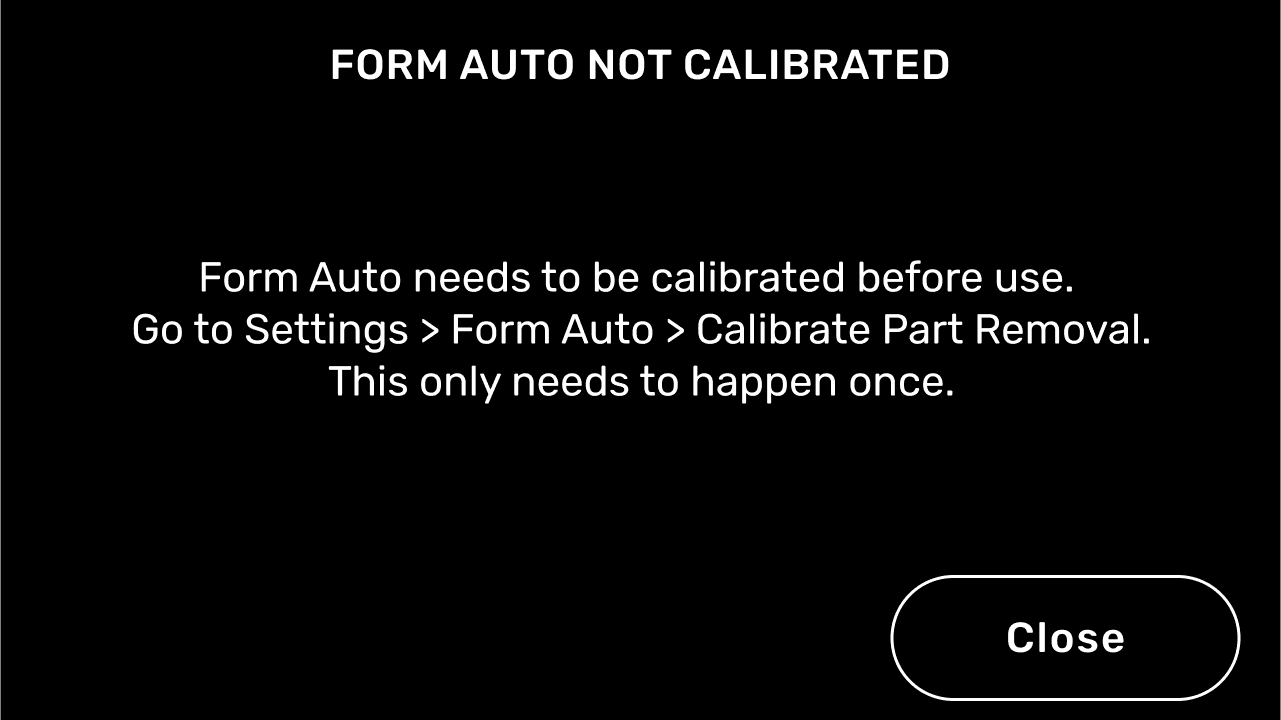
Form Auto 错误信息:Form Auto 未校准

在开始打印之前,必须对 Form Auto 进行调平和校准。校准程序将检测 Build Platform 2 相对于部件移除块的确切位置。

Home(主页)界面上点击扳手图标。
  1. 随即显示 Settings(设置)界面。
  2. 点击 Form Auto。将显示 Form Auto 屏幕。
  3. 点击 Calibrate Part Removal(校准部件移除)Calibration(校准)界面随即显示。若未将 Build Platform 2 插入打印机,切勿开始校准过程。
  4. 将打印机旋转至打印位置。
  5. 点击 Calibrate(校准)开始校准过程。您可能只需要在初始设置过程中校准 Form Auto。